Building Your First Rust Project

Learning a new programming language is fun, exciting, and an absolute privilege in the days of no longer needing to write a custom editor to make it work. There's more to it, though, than just fun.
The ability to build the specific use case that's in your head in the most effective way possible.
In this blog post, you'll learn why you may want to use Rust for your next project and the primary reason behind the language.
Prerequisites
To follow along with this blog post, you'll want to have the following:
- A code editor (e.g - VS Code).
- A basic understanding of programming is required because there will be core concepts (functions, variables, etc.) that won't have an explanation.
Why Rust?
Rust is designed specifically for performance and memory safety. The primary projects you'll see built in Rust are system-level, backend web development, game development (still primarily C++, but seeing more and more Rust), and networking apps (servers, proxies, etc.).
A few key reasons why people are leaning toward Rust are:
- Memory management out of the box and no garbage collection is the traditional sense. Within Rust, memory safety through the language's unique ownership and borrowing system is enforced at compile time.
- High performance in comparison to C and C++ due to not having garbage collection.
- A very minimal runtime that's built into the standard library and the C standard library that's used by Rust, which significantly increases performance.
uv, a popular Python package manager, is built in Rust and has signifiant performance increaes compared to pip.These three things make Rust a great language when working with anything low-level and system-related.
Below is a screenshot with some ideas to build with Rust per Anthropic.

Writing The "Hello World"
Now that you know a bit about Rust and how it works, lets dive into the code and get our first Hello World app done.
- Download Rust.
curl --proto '=https' --tlsv1.2 -sSf https://sh.rustup.rs | sh- On the terminal, create a new Rust project.
Cargo is Rust's build and system package manager.
cargo new hello
cdinto the new package that you created.
cd hello- Open
src/main.rsin your editor and you'll see the following:
fn main() {
    println!("Hello, world!");
}- Run your app.
cargo runYou should see a Hello, world! output on the terminal.
Implementing A Useful Project (Performance Indicator)
In the previous section, you dove into Rust first (maybe) the first time and saw how to build out a standard Rust app. Now, let's build something that's geared toward what Rust is used for a lot - something system related.
- Create a new Rust project called
perf-predict.
cargo new perf-predictcdinto the new project via your terminal.
cd perf-predict- Open
src/main.rsin your editor so you can start editing the main config with the code you'll be running. Ensure to take out all of theHello Worldstuff so you just have an emptymainFunction.
fn main() {

}
Now that the project is ready, let's start adding the performance prediction code.
- Import the appropriate package for this project, which in this case is the
sysinfopackage.
use sysinfo::{System, Disks};When you see :: in a package import, it means you're either calling on a Crate (Rusts name for libraries/packages) or a Function. For example, System is a Function within the sysinfo package.
- The first set of functionality returns disk usage.
new_all() initiates a new System instance.
new_with_refreshed_list() initiates a new Disk instance and loads the disk(s) into it.
The HD space is then returned/printed to the terminal
    let sys = System::new_all();
    let disks = Disks::new_with_refreshed_list()

    println!("=== DISK USAGE ===");
    for d in &disks {
        let available = d.available_space();

        print!("\nReturning Available HD Space: {}", available)
- The following print command just creates a space between disk and the next piece of the code, which is printing out CPU usage.
print!("\n")- The For Loop below returns/prints the total CPU usage per thread.
    println!("\n=== CPU Usage ===");
    print!("\n");
    for c in sys.cpus() {
        let total = c.cpu_usage();
        println!("Returning CPU Usage Per Thread: {}", total);
- The last print statements free the total memory and the total available memory.
    println!("\n=== MEM USAGE ===");
    print!("\n");
    println!("Returning Total Memory In System{}", sys.total_memory());
    println!("Returning Available/Free Memory: {}", sys.free_memory())
If you ever see the available_memory() function, here's the difference between that and free_memory().
- free memory == unused memory
- available memory = memory that can be reclaimed
Putting the code together, you get the following.
use sysinfo::{System, Disks};

fn main() {
    let sys = System::new_all();
    let disks = Disks::new_with_refreshed_list();

    println!("=== DISK USAGE ===");
    for d in &disks {
        let available = d.available_space();

        print!("\nReturning Available HD Space: {}", available)
    }

    print!("\n");

    println!("\n=== CPU Usage ===");
    print!("\n");
    for c in sys.cpus() {
        let total = c.cpu_usage();
        println!("Returning CPU Usage Per Thread: {}", total);
    }

    println!("\n=== MEM USAGE ===");
    print!("\n");
    println!("Returning Total Memory In System: {}", sys.total_memory());
    println!("Returning Available/Free Memory: {}", sys.free_memory());
}
- Run
cargo runand you should see an output similar to the below (minus the stats as your CPU/memory/disk will be different).
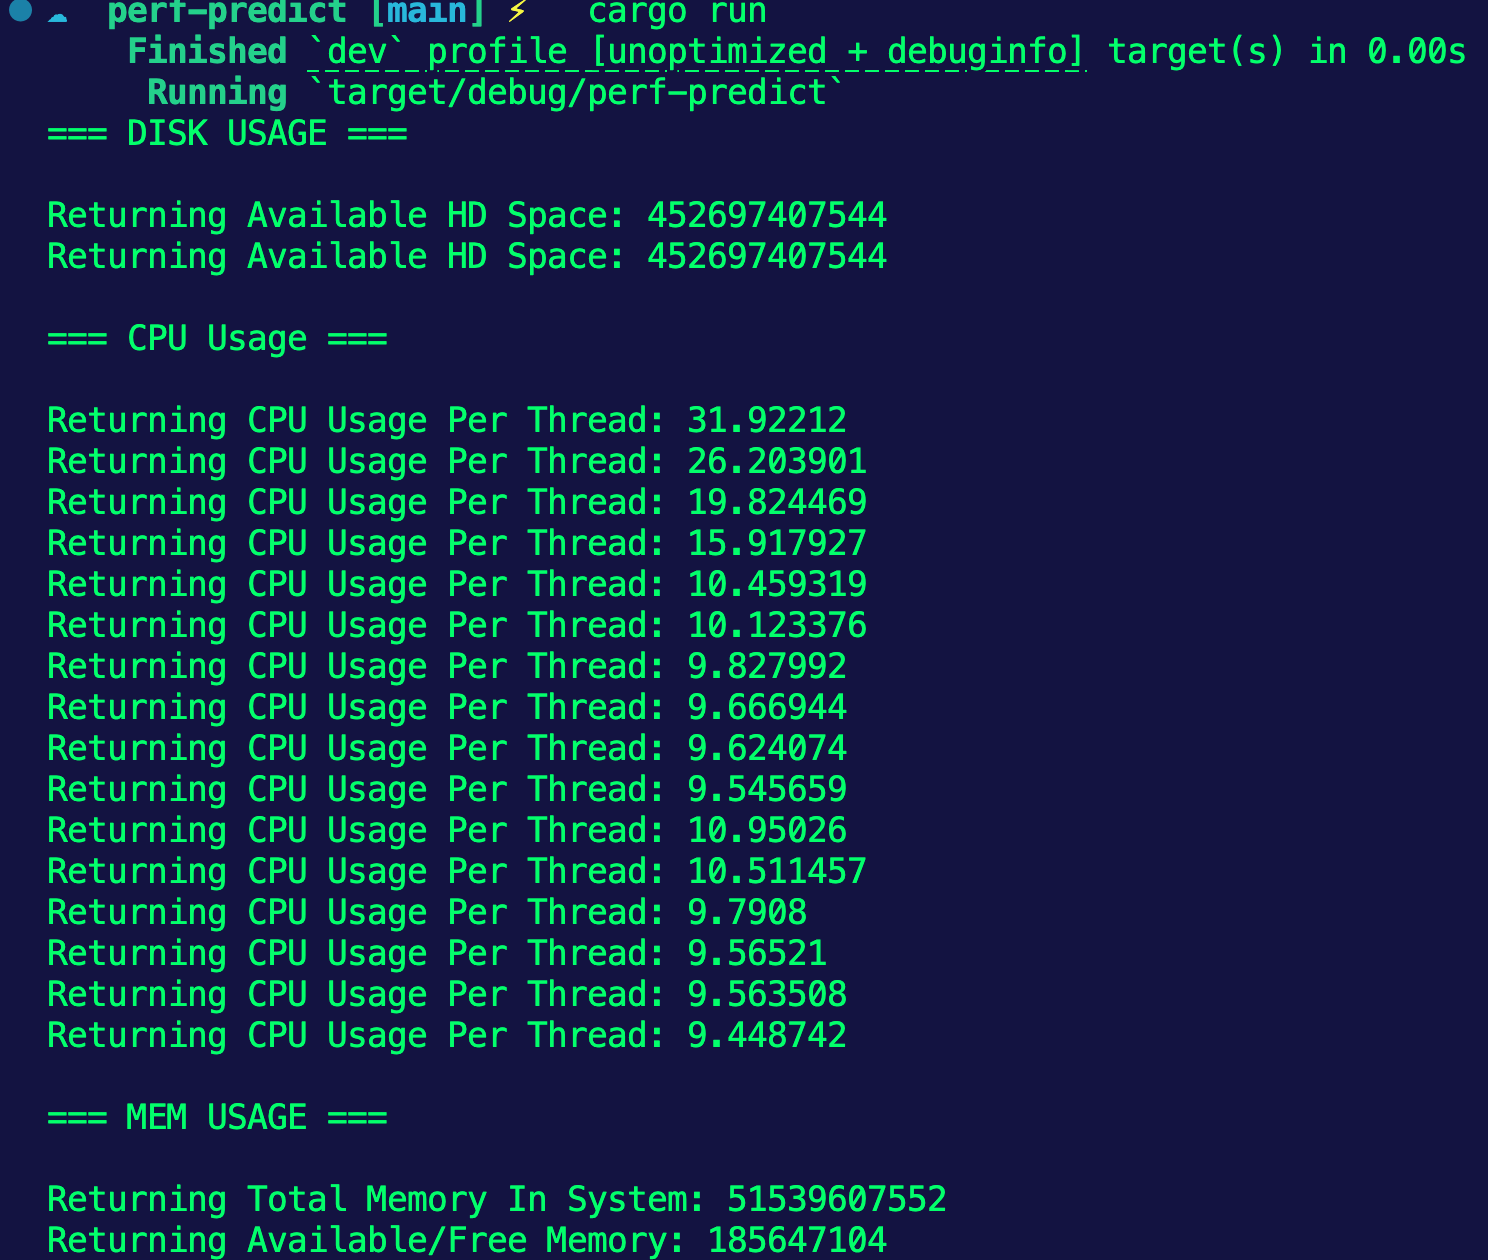
Congrats! You've successfully written a systems performance program in Rust and learned why you may want to use Rust for your next project.

Comments ()