Declarative Meets Mesh: Deploying Istio Ambient With ArgoCD
Workloads are meant to be managed in a declarative way within Kubernetes. When it comes to thinking about what declarative means in this case, it's "tell me what to do, not how to do it". For example, you tell Kubernetes what container image you want to use, but you don't tell it how to go and get it.
With a production-grade Istio configuration, the same rules should apply.
In this blog post, you'll learn how to deploy Istio Ambient Mesh via ArgoCD.
Istio Ambient Mesh Recap
If you're new to Istio Ambient Mesh, as in, have only deployed Istio with sidecars or haven't used a Service Mesh at all, below is a breakdown of the components that make up Ambient Mesh and why they're important
Istiod is, both in Ambient Mesh and standard Istio with sidecars, the Control Plane. It's the brains of the operation. If you're sending destination rules or circuit breaking rules to the mesh, it's going through Istiod. Istiod then sends those configurations to the data plane.
Istio CRDs (you'll see it called istio-base most likely) is how the Kubernetes API is extended so engineers can use Istio objects within a Manifest (much like any other CRD).
Ztunnel, in the case of Ambient Mesh, is the proxy. Instead of using Envoy, you can use a more performant, memory safe (it's written in Rust), and lightweight proxy for apps that are enrolled into the mesh. It still uses xDS as the dynamic configuration protocol, but it's a lighter version in comparison to Envoy. Ztunnel is deployed as a Daemonset, so instead of having sidecar containers for each Pod that's enrolled into the mesh, you have one Pod per Worker Node. Ztunnel hands L4 traffic.
Istio CNI (despite it's name "CNI") directs traffic from what's incoming to Ztunnel. Ztunnel then makes the decision of where the traffic should go based on policies that are configured and the chosen destination of the traffic (e.g - This traffic is intended for backend A).
Waypoints are used to manage all of the L7 traffic, like HTTP routing, circuit breaking, timeouts, retries, and everything else that happens at the Application level.
ArgoCD Installation
Now that you know a bit about Istio Ambient Mesh and how each component is split, let's dive into the installation and configuration of ArgoCD so you can declaratively manage Istio Ambient Mesh.
- Install the ArgoCD CLI, which will be used to authenticate to your instance of ArgoCD locally to deploy application stacks. For example, if you're on a Mac, you can use the following:
brew install argocd- Add the ArgoCD Helm repo.
helm repo add argo https://argoproj.github.io/argo-helm- Install ArgoCD in a High Availability (HA) configuration.
helm install argocd -n argocd argo/argo-cd \
--set redis-ha.enabled=true \
--set controller.replicas=1 \
--set server.autoscaling.enabled=true \
--set server.autoscaling.minReplicas=2 \
--set repoServer.autoscaling.enabled=true \
--set repoServer.autoscaling.minReplicas=2 \
--set applicationSet.replicaCount=2 \
--set server.service.type=LoadBalancer \
--create-namespace- Get the initial admin password for ArgoCD, which is stored in a Kubernetes Manifest.
kubectl get secret -n argocd argocd-initial-admin-secret -o jsonpath="{.data.password}" | base64 -d- Get the load balancer IP of the ArgoCD UI.
kubectl get svc -n argocdYou'll see a service called argocd-server

- Log into ArgoCD with the following command:
argocd login LOAD_BALANCER_IP_ADDRESS
Username: admin
Password:
'admin:login' logged in successfully
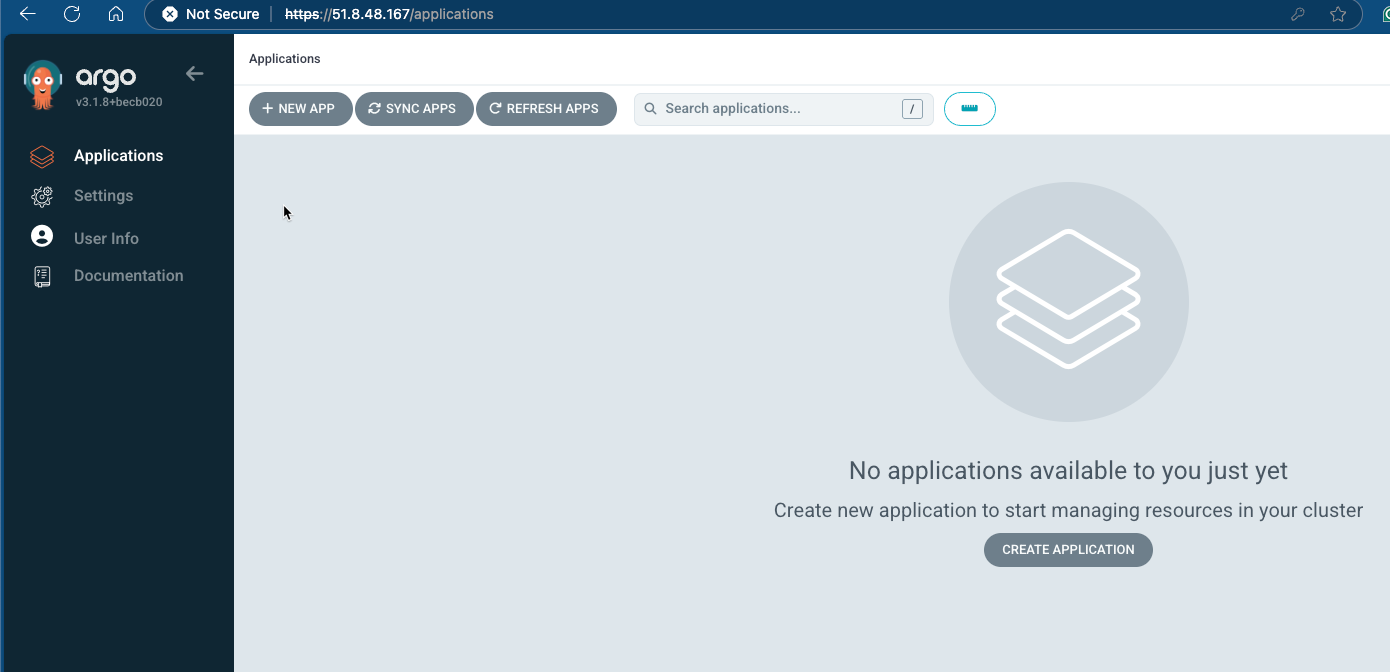
Context '51.8.48.167' updatedYou can also use the same IP address, username, and password to log into the UI.
In the next section, you'll learn how to use the ArgoCD Application object to deploy resources.
Using ArgoCDs Application Object
The Application object/kind that you'll see in the upcoming configurations is the declarative method of deploying application stacks via ArgoCD. You could also use the argocd CLI to deploy applications, but it's far more imperative.
- Set a specific Istio version that you want to use for the Helm Charts that are being deployed via the
Applicationobject.
export ISTIO_VERSION=1.26.4- Install the Istio CRDs.
Notice how it's calling out to the Istio CRD Helm Chart. You can use the Application object to install a Helm Chart, but you can also point it directly to a Kubernetes Manifest.
kubectl apply -f- <<EOF
apiVersion: argoproj.io/v1alpha1
kind: Application
metadata:
  name: istio-base
  namespace: argocd
spec:
  destination:
    server: https://kubernetes.default.svc
    namespace: istio-system
  project: default
  source:
    chart: base
    repoURL: https://istio-release.storage.googleapis.com/charts
    targetRevision: "${ISTIO_VERSION}"
  syncPolicy:
    automated:
      prune: true
      selfHeal: true
    syncOptions:
    - CreateNamespace=true
EOF- Install Istiod.
kubectl apply -f- <<EOF
apiVersion: argoproj.io/v1alpha1
kind: Application
metadata:
  name: istiod
  namespace: argocd
spec:
  destination:
    server: https://kubernetes.default.svc
    namespace: istio-system
  project: default
  source:
    chart: istiod
    repoURL: https://istio-release.storage.googleapis.com/charts
    targetRevision: ${ISTIO_VERSION}
    helm:
      values: |
        profile: ambient
  syncPolicy:
    automated:
      prune: true
      selfHeal: true
  ignoreDifferences:
  - group: admissionregistration.k8s.io
    kind: ValidatingWebhookConfiguration
EOF- Install the Istio CNI.
kubectl apply -f- <<EOF
apiVersion: argoproj.io/v1alpha1
kind: Application
metadata:
  name: istio-cni
  namespace: argocd
spec:
  destination:
    server: https://kubernetes.default.svc
    namespace: istio-system
  project: default
  source:
    chart: cni
    repoURL: https://istio-release.storage.googleapis.com/charts
    targetRevision: ${ISTIO_VERSION}
    helm:
      values: |
        profile: ambient
  syncPolicy:
    automated:
      prune: true
      selfHeal: true
EOF- Install Ztunnel.
kubectl apply -f- <<EOF
apiVersion: argoproj.io/v1alpha1
kind: Application
metadata:
name: istio-ztunnel
namespace: argocd
spec:
destination:
server: https://kubernetes.default.svc
namespace: istio-system
project: default
source:
chart: ztunnel
repoURL: https://istio-release.storage.googleapis.com/charts
targetRevision: ${ISTIO_VERSION}
syncPolicy:
automated:
prune: true
selfHeal: true
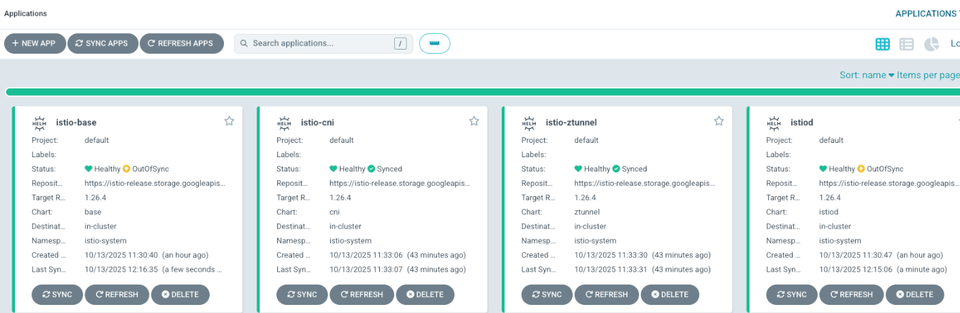
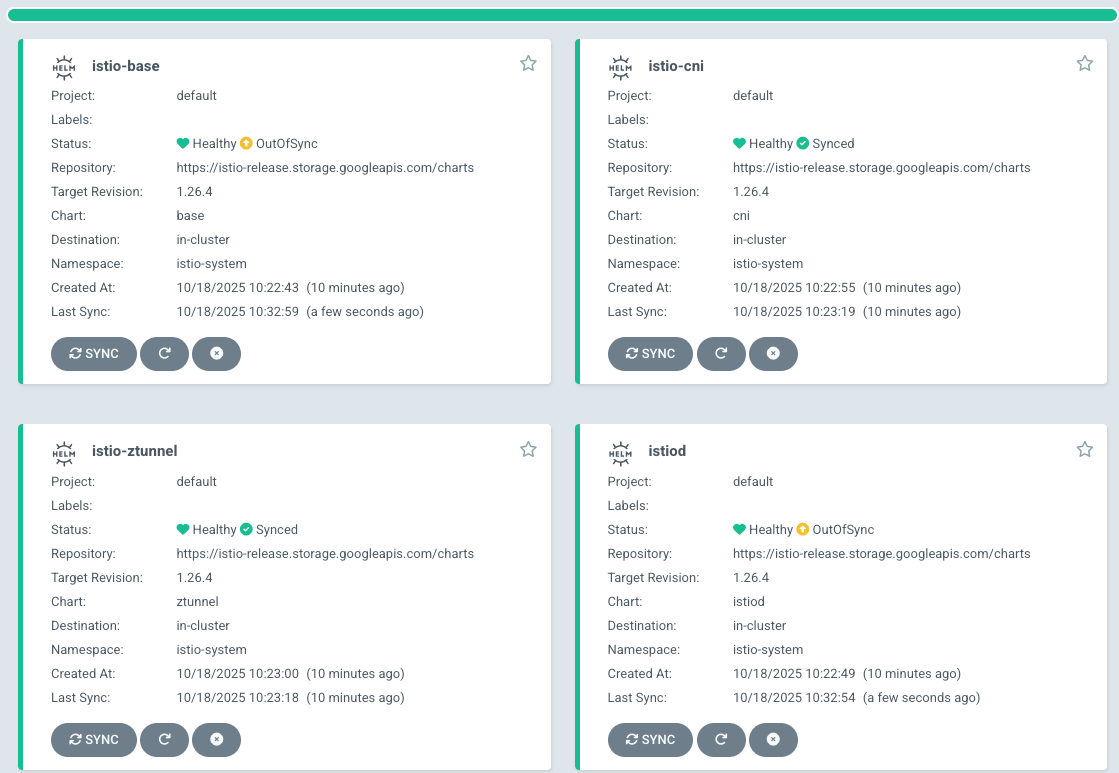
EOFYou should now see that Istio Ambient Mesh is up and running.
Deploying An Application
In the previous section, you learned how to deploy Istio Ambient Mesh with the ArgoCD Application object. You can use the same object to deploy your application stack, which you'll see in this section.
- Use the
Applicationobject to deploy an application.
Notice how the application that's being used is from a public GitHub repo. It's not calling out to a Helm Chart like the Istio Ambient Mesh installation, but instead, calling directly to a Kubernetes Manifest YAML configuration that contains the entire application stack.
kubectl apply -f - <<EOF
apiVersion: argoproj.io/v1alpha1
kind: Application
metadata:
  name: microapp
  namespace: argocd # Or your designated Argo CD namespace
spec:
  project: default
  source:
    repoURL: https://github.com/GoogleCloudPlatform/microservices-demo.git
    targetRevision: main
    path: release/
    directory:
      include: 'kubernetes-manifests.yaml'
  destination:
    server: https://kubernetes.default.svc # Or the API server URL of your target cluster
    namespace: microapp
  syncPolicy:
    automated:
      selfHeal: true # Automatically sync differences between Git and cluster state
    syncOptions:
      - CreateNamespace=true
EOF- Label your application stacks Namespace so it can be enrolled within Ambient Mesh.
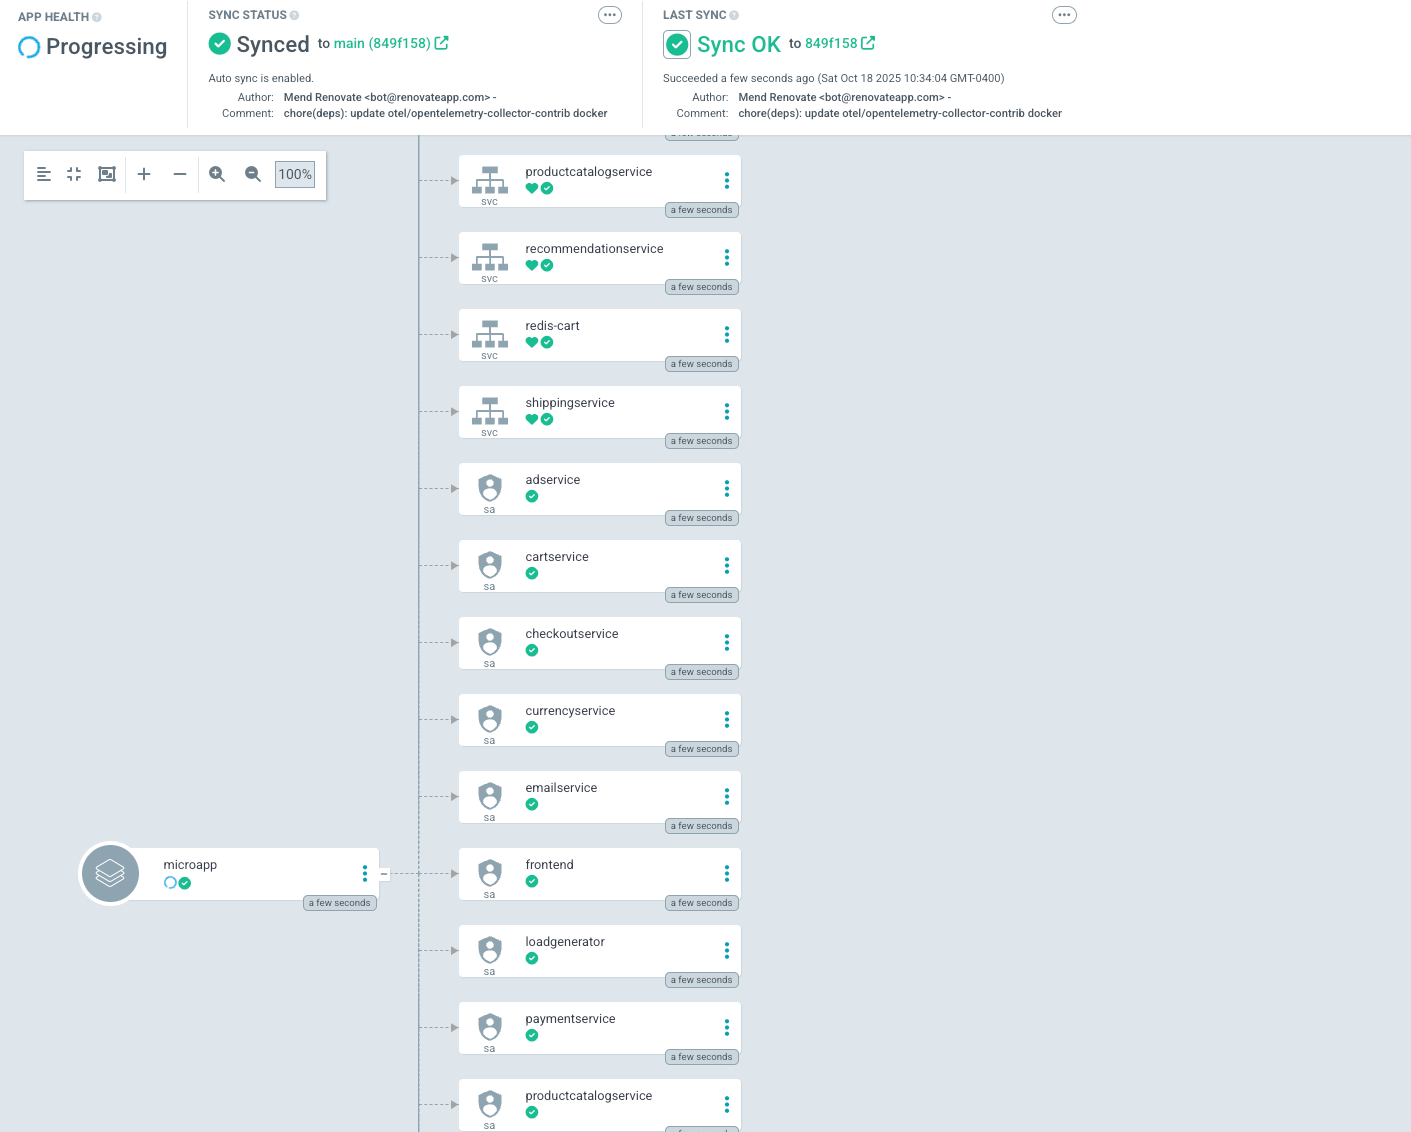
kubectl label namespace microapp istio.io/dataplane-mode=ambientYou can now see your application syncing and readily available within ArgoCD.
Conclusion
Kubernetes, by default, is set up to be declarative. Because of that, it only makes sense to manage your Istio Ambient Mesh in a declarative fashion as well as your application stack itself. That way, you're following all of the "best practices" when it comes to how someone should manage workloads in Kubernetes.

Comments ()