Implementing Your First Kubernetes Gateway API
Just about every Kubernetes environment, in some capacity, will have an application stack that needs to be accessed from the outside world (customers) or by internal engineers (e.g., a Backstage environment). In either case, ensuring proper inbound traffic from a security and routing perspective is how your containerized workloads are reached in an efficient and safe fashion.
In this blog post, you'll learn about one way to manage north/south traffic with the Kubernetes Gateway API.
Prerequisites
If you'd like to follow along from a hands-on perspective, you'll want to have:
- A Kubernetes cluster up and running.
- Emojivoto deployed (a popular demo app), which you can find here: https://github.com/digitalocean/kubernetes-sample-apps/tree/master/emojivoto-example
If you don't have a Kubernetes cluster, that's totally fine! You can still follow along and gain the knowledge you need for when you have a Kubernetes cluster to test this on.
Gateway API vs Ingress Controllers
Any time that you hear "gateway" or "ingress", it's for north/south traffic. That means it's traffic leaving your cluster or coming into your cluster. A good example of this type of traffic is if you go to google.com or amazon.com from your web browser. It's traffic that's going into, or out of your environment.
The important things to remember here are:
- Is the traffic that's coming into your cluster supposed to be? For example, if it's an internal platform built for engineers by the Platform Engineering team, should it have a public domain/IP?
- Is the traffic that's coming into your cluster authorized?
- Is the traffic reaching only the parts of the application that are necessary? For example, is there a Gateway (more on this later) set up for HTTP routing for all Namespaces? Or only the Namespace that it needs access to?
To accomplish all of this north/south traffic, you'd use an Ingress Controller (Nginx, Traefik, etc.) or the Kubernetes Gateway API.
In terms of functionality, the Kubernetes Gateway API and Ingress Controllers do the same thing. The biggest thing is, as mentioned above, the agnostic features. You aren't tied to one method of functionality when managing routing for your public-facing (or internally facing for engineers) application.
You'll read/hear many people say that Kubernetes Gateway API is like "Ingress 2.0".
How It Works
If you've ever used RBAC within Kubernetes, you know that there are ClusterRoles/Roles and ClusterRoleBindings/RoleBindings. The difference between these two are the ClusterRoles/Roles create the permissions that you want for a particular resource, and the ClusterRoleBindings/RoleBindings are what "attach" the resource to a particular permission (or a Service Account).
Another example is with storage. You have a Storage Class, which specifies the type of storage you'll use. You then create the storage with a Persistent Volume and "attach" the Volume to a particular location (e.g - a Pod) with the Persistent Volume Claim.
Kubernetes Gateway APIs work similarly in the sense of how it's all structured.
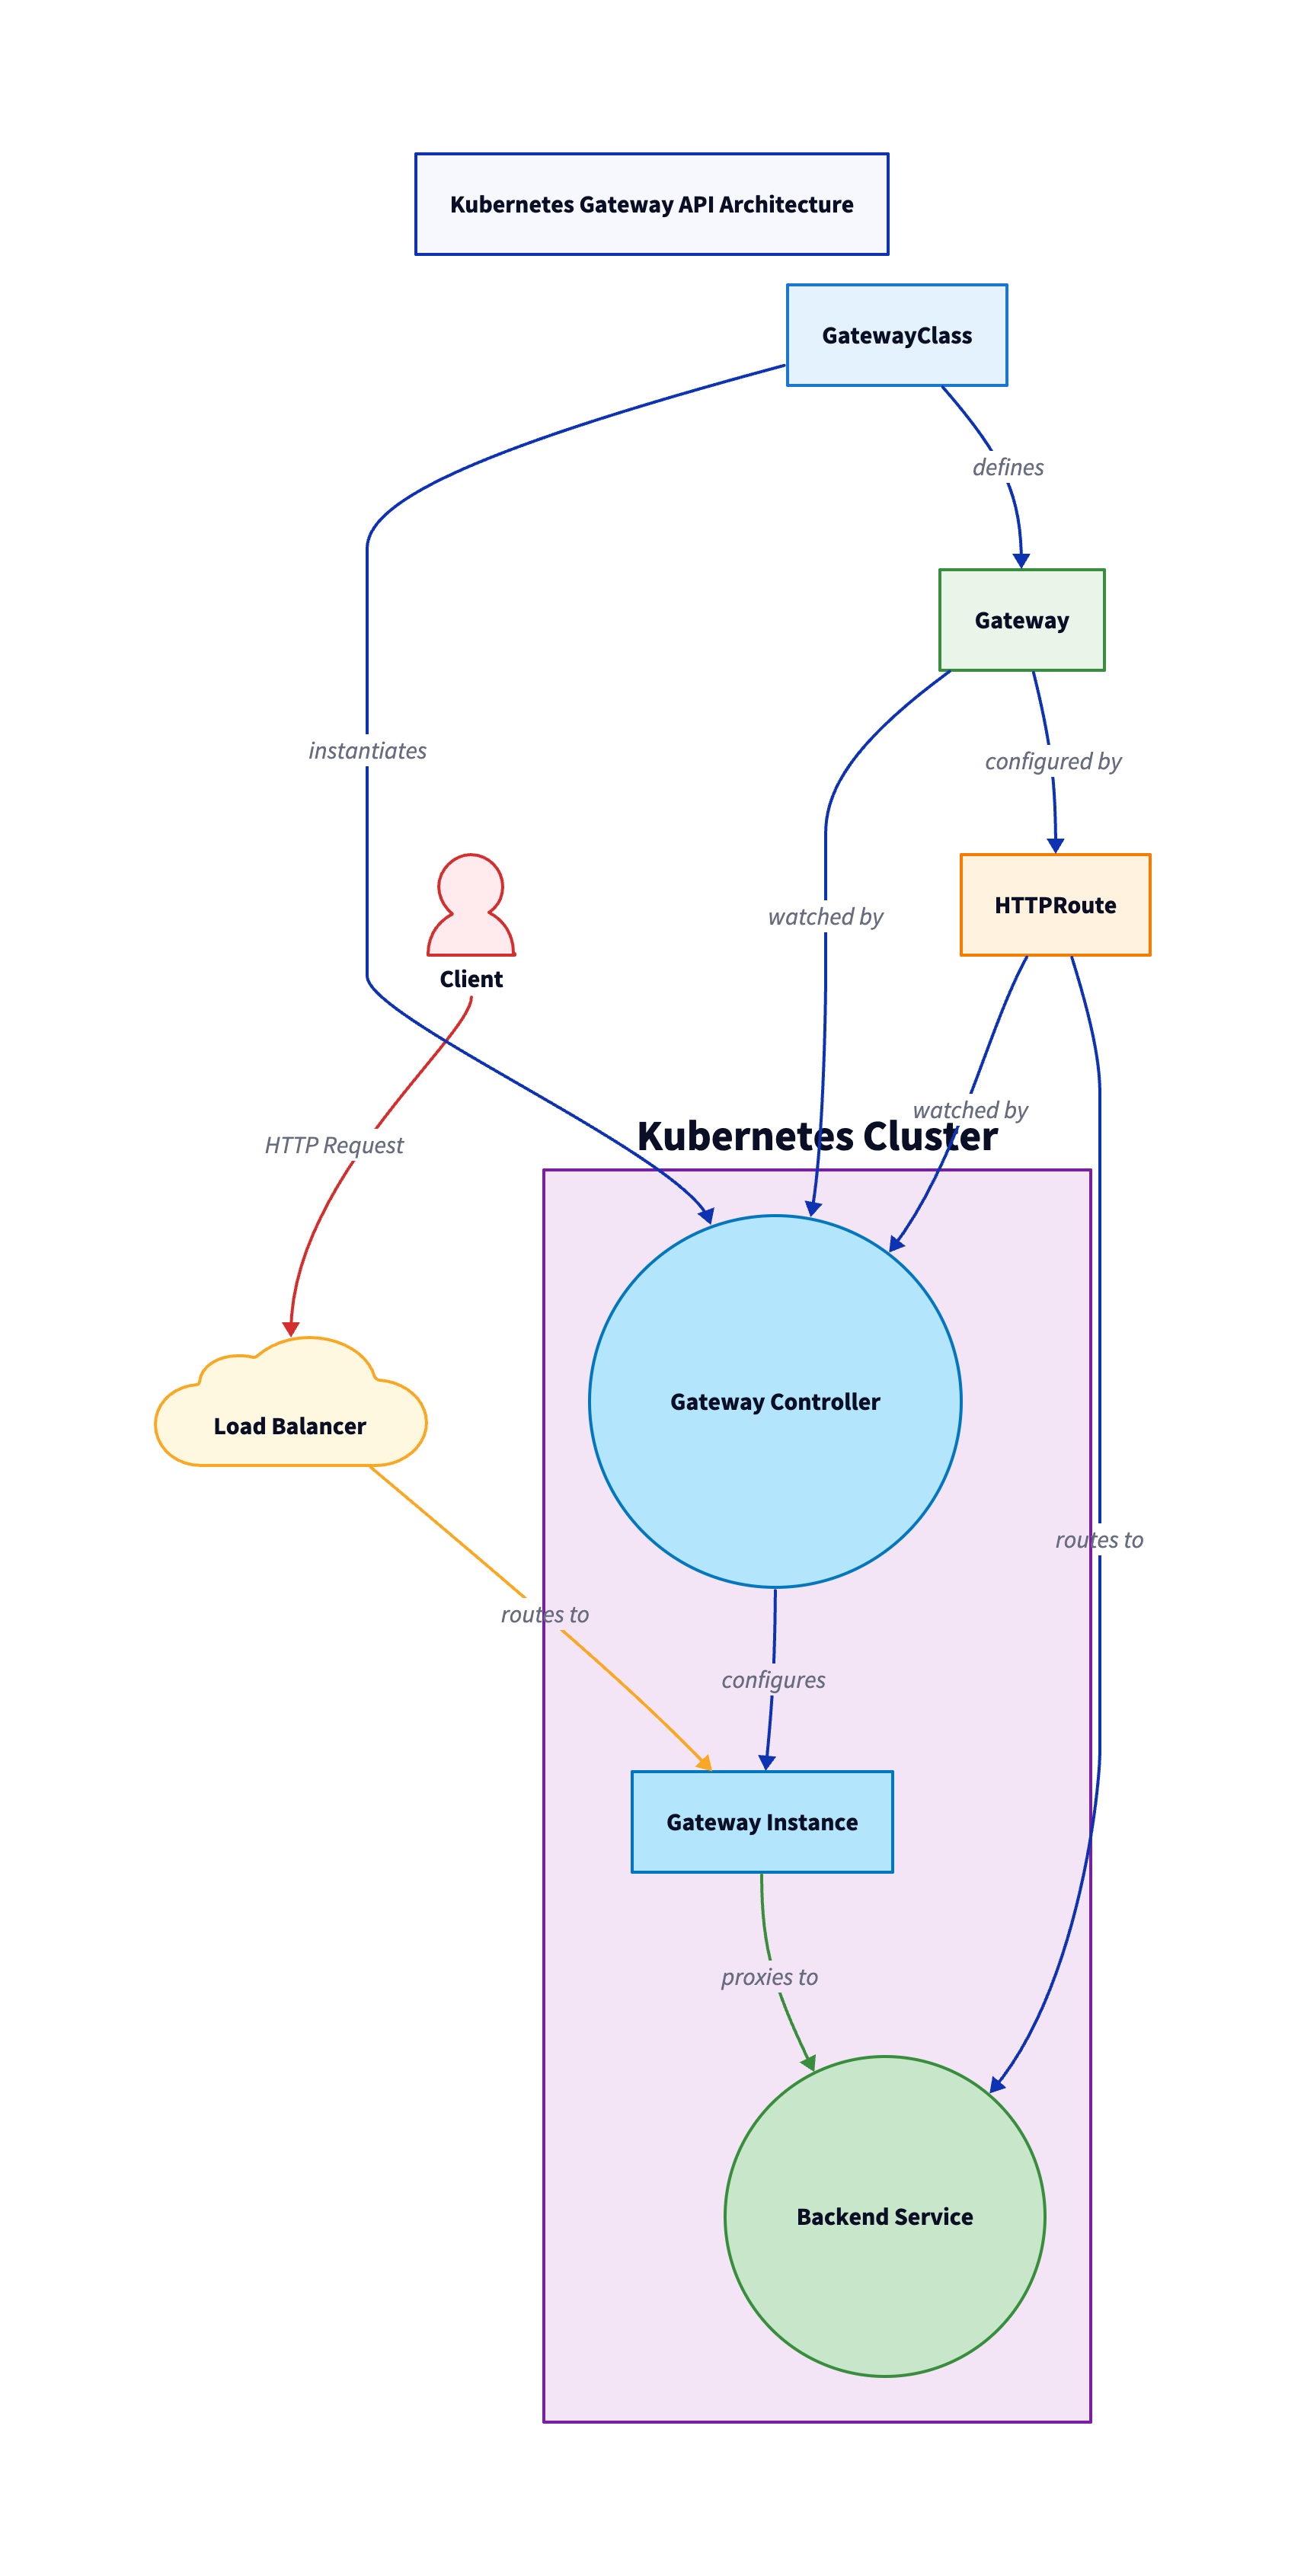
First, you have the GatewayClass that defines a set of gateways and configures the Controller (reconciliation loop/self-healing) for the gateways that will be associated to the class. Next, you have the Gateway object/kind which defines how the gateway will work and what it'll access. For example, it'll listen on port 8080 for a Kubernetes Service that's in a Namespace called namespacea. Lastly, you have the HTTPRoute object/kind that's used to, as the name suggests, specify what backend Kubernetes Service you want the traffic to be routed to.
Now that you know about Gateways and how they work, let's create one.
The Gateway Class
The first thing you will need to do is ensure that the Kubernetes Gateway API CRDs are installed.
kubectl apply -f https://github.com/kubernetes-sigs/gateway-api/releases/download/v1.2.1/standard-install.yamlOnce complete, you can create a new GatewayClass.
apiVersion: gateway.networking.k8s.io/v1
kind: GatewayClass
metadata:
  name: emvoto
spec:
  controllerName: example.com/gateway-controller
To view the GatewayClass, run the following command:
kubectl get gatewayclassThe next step is to add the Gateway.
The Gateway
Using the Gateway object/kind, you can create a new Gateway that specifies:
- What port the backend app should be accessed on
- The selector for where the application resides
from: All as well which would indicate the Gateway can be used by all Namespaces, but I like being able to specify to reduce the footprint.Apply the following Gateway configuration:
kind: Gateway
apiVersion: gateway.networking.k8s.io/v1
metadata:
  name: emojivoto
spec:
  gatewayClassName: emvoto
  listeners:
  - protocol: HTTP
    port: 8080
    name: emojivoto
    allowedRoutes:
      namespaces:
        from: Selector
        selector:
          matchLabels:
            kubernetes.io/metadata.name: emojivoto
You can check that it is deployed by running the following:
kubectl get gatewayFor example, if I want to see all Gateways in all Namespaces, I can run the following and see the results:
kubectl get gateway --all-namespaces

NAMESPACE     NAME        CLASS          ADDRESS         PROGRAMMED   AGE
gloo-system   emojivoto   gloo-gateway   X.X.X.X   True         6h9m
Ensure to remember the public IP address as you'll use that to access the Emojivoto UI later.
Routing
The final step is to configure how the Gateway will flow traffic through to the backend, which is a Kubernetes Service.
In this case, the HTTPRoute is specified with the backend as the web-svc, which is the primary UI service in Emojivoto. The web-svc Kubernetes Service listens on Port 80, not to be confused with the Kubernetes Gateway API that was set up to listen on port 8080.
apiVersion: gateway.networking.k8s.io/v1
kind: HTTPRoute
metadata:
  name: emojivoto
  namespace: emojivoto
spec:
  parentRefs:
    - name: emojivoto
      namespace: default
  rules:
    - backendRefs:
        - name: web-svc
          port: 80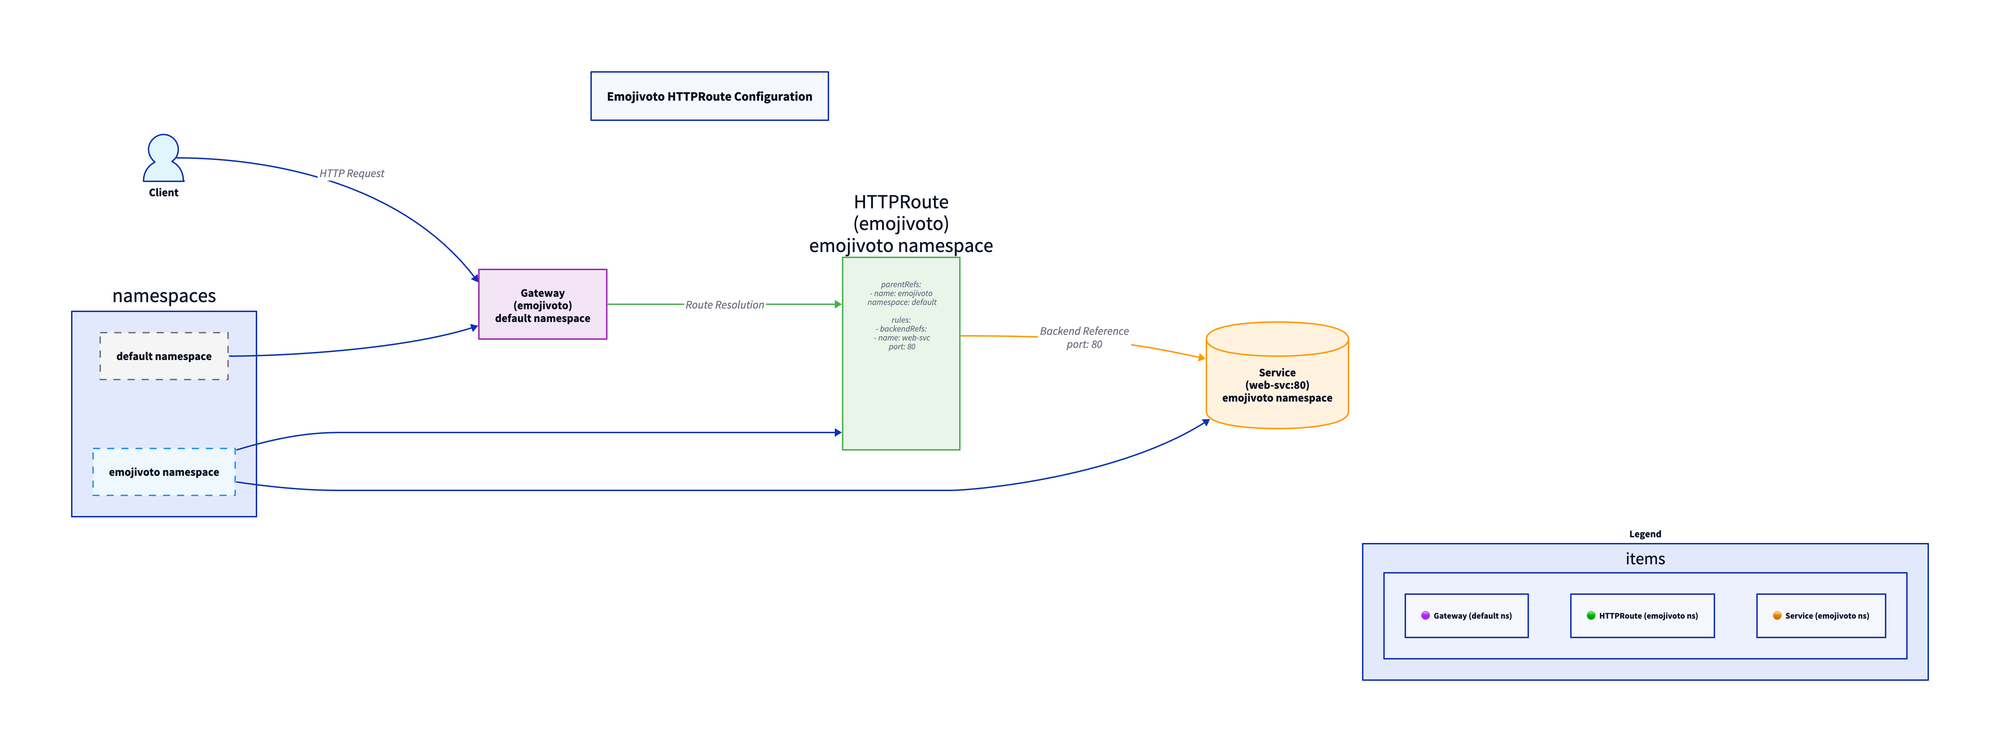
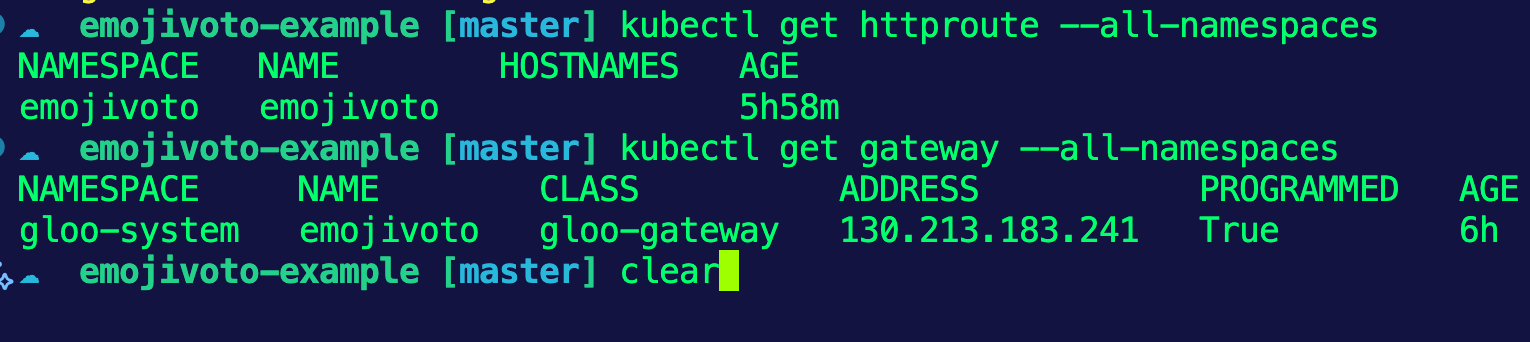
Once the above configuration is applied, you can see it by searching for the httproute resources.
kubectl get httproute n emojivoto

NAMESPACE   NAME        HOSTNAMES   AGE
emojivoto   emojivoto               5h58m
You can now go to the Gateway's IP to see the application running.
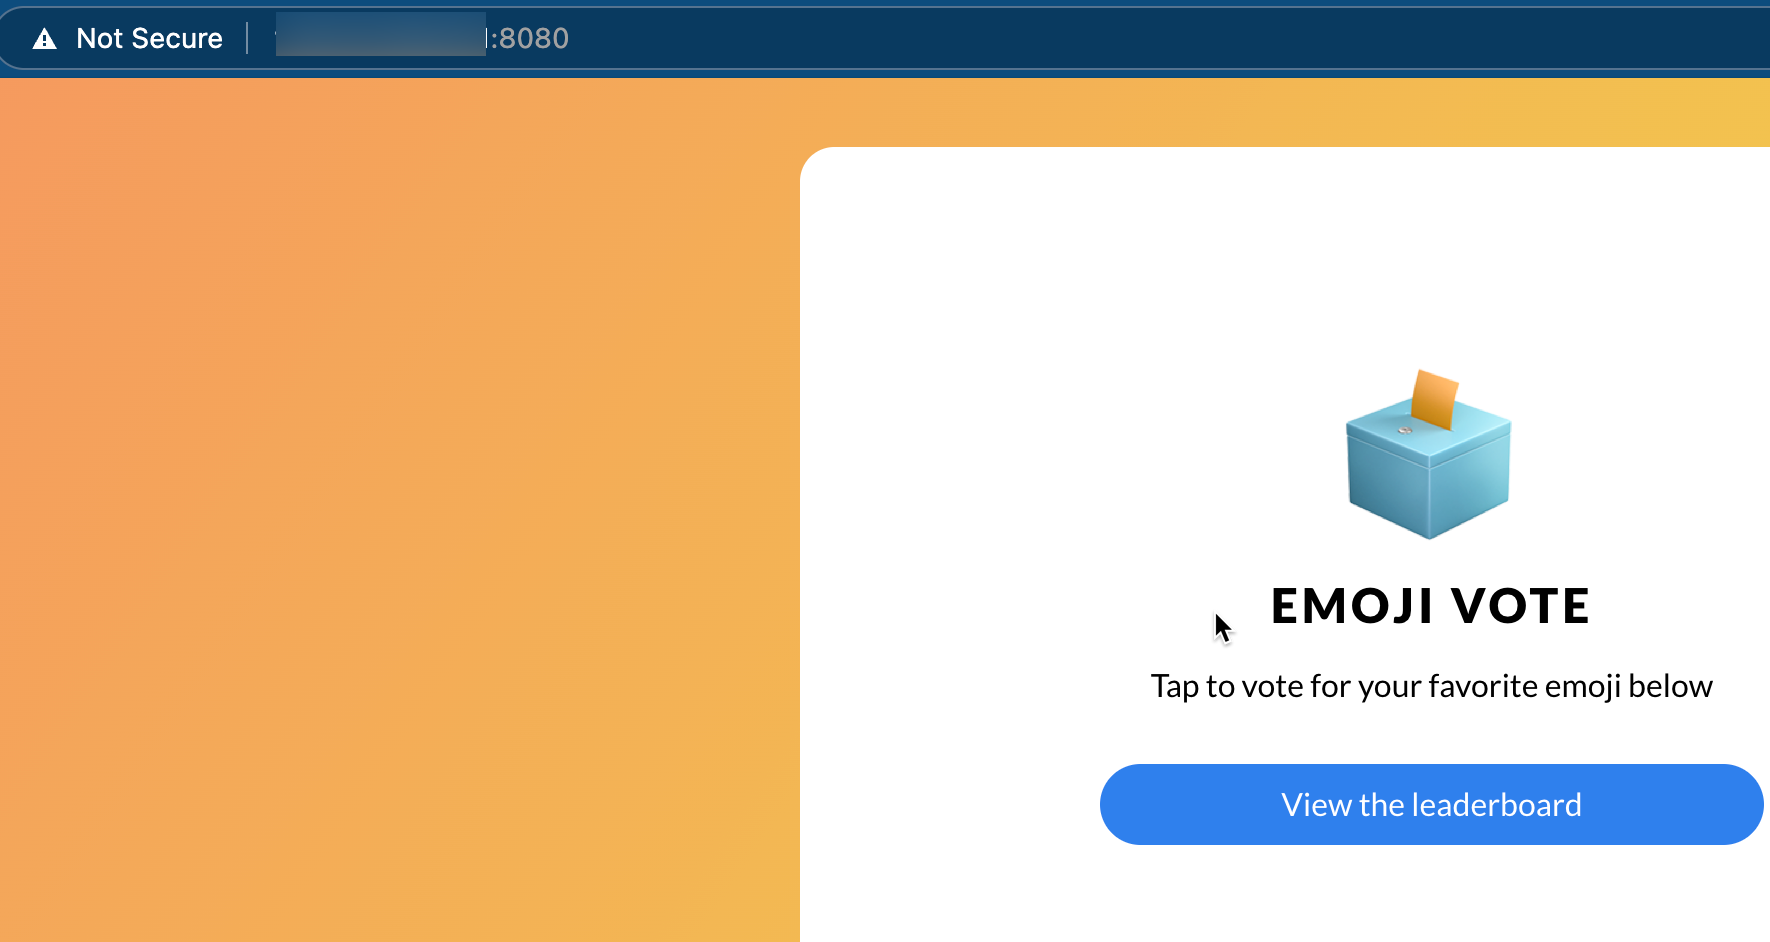
Congrats! You've successfully set up and configured a full Kubernetes Gateway API configuration.

Comments ()