Managing Traffic In Kubernetes For Gateways & Service Mesh
There is always traffic moving throughout your cluster, whether it's north/south (ingress/egress) or east/west (service-to-service). The traffic could be anything from users interacting with a public-facing app to services communicating with each other to a service retrieving information from a database.
In this blog post, you'll learn how to manage that traffic with timeouts, circuit breaking, weights, and load balancing.
Prerequisites
To follow along with this blog post, you should have a Kubernetes cluster up and running that has enough resources (CPU/memory) to run Istiod (Istios control plane).
If you need a cluster configuration, you can use the HCL for creating an EKS cluster here: https://github.com/AdminTurnedDevOps/Kubernetes-Quickstart-Environments/tree/main/aws/eks
Networking Is The Most Important Piece
With new technology, innovation, and tools available to us, there seems to be less of an emphasis on what makes the technology we interact with today possible - the networks. Whether it's public networks or private networks, without packets flowing, none of what we do today in the world of engineering would be possible.
More importantly, without reliable networks, everything done today from an infrastructure, cloud, and software perspective would come to a grinding halt.
If Amazon is down for one minute (60 seconds), that would result in millions of dollars of revenue loss. That 60 seconds could be anything from a service that isn't responsive to a timeout to improper load balancing. Even if your organization isn't as big as Amazon, the potential impact of cost is very high (not just financially, but customers leaving your app to go to a competitor due to feeling a lack of quality).
This isn't just a matter of public applications, remember. If internal services are down, that could mean other teams cannot do their job, which could result in issues with various personnel, management, or higher. Living in a world where everything is "now now now" and 1 second of timeouts is crucial, networks need to be set up as effectively as possible with a quality-first mindset.
Luckily, it's not something that'll take weeks or months to do.
In the next few sections, you'll learn some key methods of managing traffic for services in Kubernetes.
Quick Istio Installation
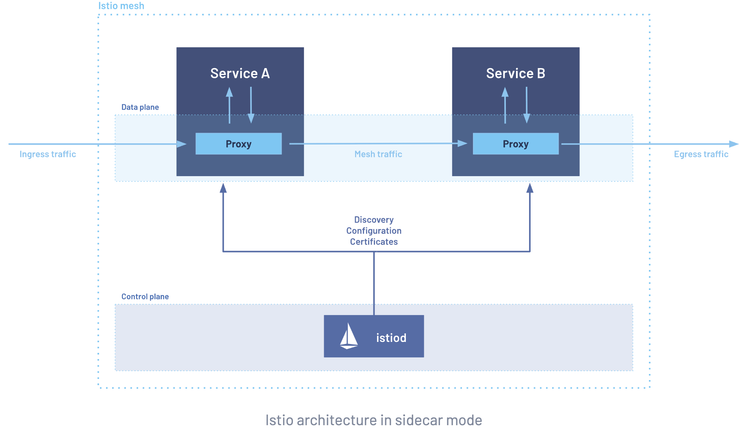
For managing service traffic in Kubernetes, you'll need a Service Mesh. This section won't go through what a Service Mesh is or why it's important, but instead, the commands you need to install Istio.
- Install the Istio CRDs.
helm install istio-base istio/base -n istio-system --create-namespace --wait- Install Gateway API CRDs.
kubectl get crd gateways.gateway.networking.k8s.io &> /dev/null || \
kubectl apply -f https://github.com/kubernetes-sigs/gateway-api/releases/download/v1.3.0/standard-install.yaml- Install Istiod (the Istio Control Plane).
helm install istiod istio/istiod --namespace istio-system --set profile=ambient --wait- Install the Istio CNI (used to redirect app Pod traffic to the Worker Node's local ztunnel as ztunnel is a Daemonset).
helm install istio-cni istio/cni -n istio-system --set profile=ambient --wait- Install Ztunnel (L4 proxy).
helm install ztunnel istio/ztunnel -n istio-system --waitOnce complete, you'll also be able to see that the gateway class is installed, so you don't need to install a seprate Ingress Controller.
kubectl get gatewayclass -n istio-systemQuick Microservice Demo
Now that a Mesh is installed, let's deploy a demo app. For the purposes of this blog post, you'll use GCPs microservice demo.
- Clone the demo app.
git clone --depth 1 --branch v0 https://github.com/GoogleCloudPlatform/microservices-demo.git
cd microservices-demo/- Create a Namespace for the app.
kubectl create ns microapp- Deploy the demo app.
kubectl apply -f ./release/kubernetes-manifests.yaml -n microappYou should see an output similar to the below.
deployment.apps/emailservice created
service/emailservice created
serviceaccount/emailservice created
deployment.apps/checkoutservice created
service/checkoutservice created
serviceaccount/checkoutservice created
deployment.apps/recommendationservice created
service/recommendationservice created
serviceaccount/recommendationservice created
deployment.apps/frontend created
service/frontend created
service/frontend-external created
serviceaccount/frontend created
deployment.apps/paymentservice created
service/paymentservice created
serviceaccount/paymentservice created
deployment.apps/productcatalogservice created
service/productcatalogservice created
serviceaccount/productcatalogservice created
deployment.apps/cartservice created
service/cartservice created
serviceaccount/cartservice created
deployment.apps/redis-cart created
service/redis-cart created
deployment.apps/loadgenerator created
serviceaccount/loadgenerator created
deployment.apps/currencyservice created
service/currencyservice created
serviceaccount/currencyservice created
deployment.apps/shippingservice created
service/shippingservice created
serviceaccount/shippingservice created
deployment.apps/adservice created
service/adservice created
serviceaccount/adservice created
Network Mgmt Step 1: Circuit Breaking
Circuit Breaking temporarily stops requests to a failing or overloaded service, which helps in preventing cascading failures. One major goal of circuit breaking is to assist in reducing infinite loops.
To set up Circuit Breaking, you will:
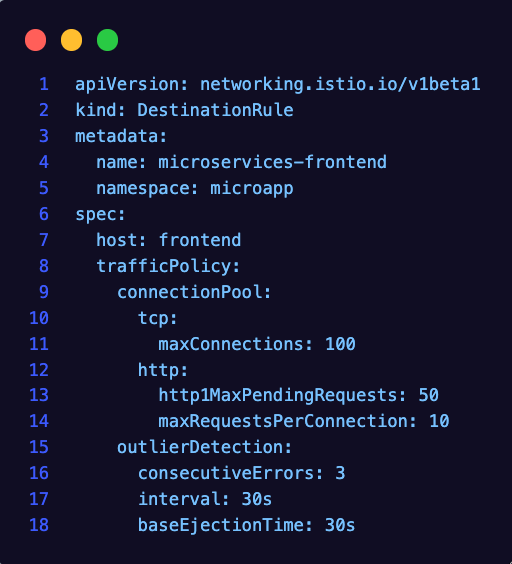
- Use the
DestinationRuleobject in the Istio CRDs. - Specify the Namespace of where your Service exists
- Specify the Kubernetes Service name as the host.
- Set traffic policies.
kubectl apply -f - <<EOF
apiVersion: networking.istio.io/v1beta1
kind: DestinationRule
metadata:
  name: microservices-frontend
  namespace: microapp
spec:
  host: frontend-external
  trafficPolicy:
    connectionPool:
      tcp:
        maxConnections: 100
      http:
        http1MaxPendingRequests: 50
        maxRequestsPerConnection: 10
    outlierDetection:
      consecutiveErrors: 3
      interval: 30s
      baseEjectionTime: 30s
EOF
The traffic policies will vary. In the example above, it's set to 100 max connections and 50 max pending requests, but that could differ based on the application and scale.
Network Mgmt Step 2: Timeouts
Timeouts give you the ability to specify when to stop trying to request a service after X amount of time. It helps in situations where a service may be down and someone is constantly trying to reach it. Timeouts greatly assist in ensuring that requests do not hang forever.
kubectl apply -f - <<EOF
apiVersion: gateway.networking.k8s.io/v1
kind: Gateway
metadata:
  name: frontend-gateway
  namespace: microapp
spec:
  gatewayClassName: istio
  listeners:
  - name: frontend
    port: 80
    protocol: HTTP
---
apiVersion: gateway.networking.k8s.io/v1
kind: HTTPRoute
metadata:
  name: frontend
  namespace: microapp
spec:
  parentRefs:
  - name: frontend-gateway
  rules:
  - timeouts:
      # Increase this number if you want to
      # change the timeout period
      requests: "30s"
  - matches:
    - path:
        type: PathPrefix
        value: /
    backendRefs:
    - name: frontend-external
      port: 80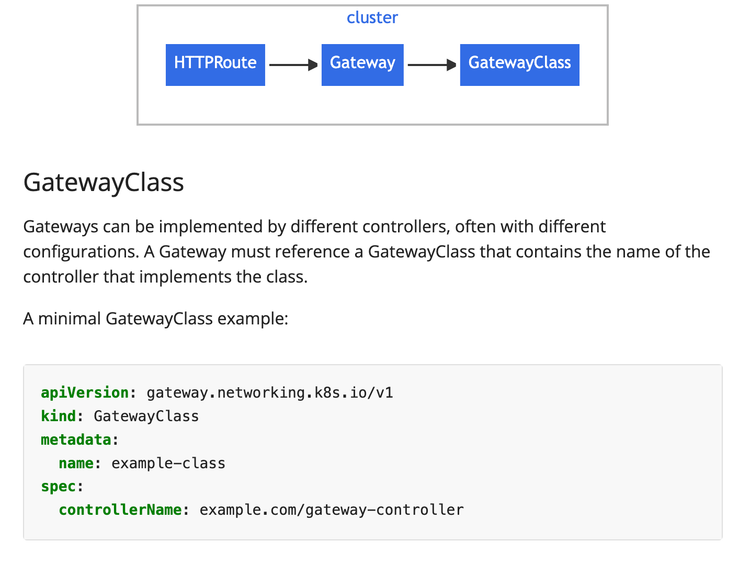
EOFIn this case, the timeout is specified for 30 seconds. Notice how the Gateway is using the Istio Gateway Class.
Network Mgmt Step 3: Load Balancing
Load balancing assists in routing traffic to an appropriate backend.
The four configurations available are:
- ROUND_ROBIN: Requests forwarded to each instance in sequence.
- LEAST_REQUEST: Requests distributed to instances with the fewest requests (default).
- RANDOM: Requests forwarded randomly to instances.
- PASSTHROUGH: No load balancing - let the underlying network handle it.
apiVersion: networking.istio.io/v1
kind: DestinationRule
metadata:
  name: frontend
spec:
  host: frontend-external
  trafficPolicy:
    loadBalancer:
      simple: ROUND_ROBIN
Network Mgmt Step 4: Weights
Last but certainly not least are Weights, or what some engineers call canary deployments. The goal of a weight is to specify how much traffic should go to one service and how much traffic should go to another service.
For example, if you have two frontend applications running in your cluster, one being v1 and the other being v2, you may want some users going to the old version and some going to the new version (nothing like testing in production).
In the example below, you can see that 70% of traffic is going to v1 and 30% is going to v2.
kubectl apply -f - <<EOF
apiVersion: gateway.networking.k8s.io/v1
kind: HTTPRoute
metadata:
  name: frontend-weights
spec:
  parentRefs:
  - name: frontend-gateway
  rules:
  - backendRefs:
    - name: frontend-v1
      port: 80
      weight: 70
    - name: frontend-v2
      port: 80
      weight: 30
EOF
Wrapping Up
Network packets, whether they're internal or external, are crucial to having a proper application stack up and running. The code within the application could be clean, following DRY principles, and the best of the best practices implemented, but without a proper network in place, the application will never see the light of day.


Comments ()