Cloud Custodian: Policy Enforcement For Governance
Understanding what occurs in an environment, or more importantly, what could occur, is a make or break between systems working as expected and systems having a “mind of their own”.
The way that you ensure systems and applications work as expected is by implementing policies.
In this blog post, you’ll learn one way of viewing, implementing, and running policies with Cloud Custodian.
Prerequisites
To work with the Cloud Custodian templates needed, you will need the following:
- An Azure account (Cloud Custodian works in other clouds as well. This blog post follows an Azure structure.
- The
custodianCLI, which you can download for free here.
If you don’t want to follow along from a hands-on perspective, no worries! You can still follow along conceptually.
What Policy Enforcement Does For You
Let’s walk through two examples of policy enforcement.
Example number 1, Best Practices: As a best practice in containerized environments, the majority of organizations never want to deploy the latest container image tag to production. The reason why is because most of the time, it’s an alpha or dev build, which means it’s not fully ready for production. You’d want a policy in place that ensures no one can deploy the latest container image tag for any application stack that’s deployed to production.
Example number 2, Compliance: Within Azure, there are several forms of compliance, but for implementation you’ll typically see Azure Policy (in this case, the Benchmark). Within Azure Policy, there are several policies (controls/frameworks) that can be implemented. For example, Microsoft Cloud Security Benchmark (MCSB) is essentially a set of best practices that are comprised of CIS, PCI, and NIST policies. How is MCSB implemented? With Azure Policy. Using something like Cloud Custodian, you can write policies that map to MCSB to ensure your environment is following particular compliance standards based on the compliance you need. Every organization should have general compliance, but then there are organizations that require more (like healthcare orgs).
Now that you have some examples in your head where policy enforcement comes into play, let’s talk about the architecture of Cloud Custodian.
Cloud Custodian Architecture Hierarchy
If you’re new to Cloud Custodian, chances are you may not be 100% sure where to find the information for creating policies.
Let’s go over the standard hierarchy:
- Name: the name of the policy.
- Resource: the object/service in the cloud you’re targeting.
- Description: metadata about the policy.
- Filters: what specific object/service you want. For example, if you’re looking for all Azure VMs that are in a
runningstate, it would look similar to the screenshot below. - Actions: what policy you want to perform on the object/service.
Please note: this is an example policy and some may not look like this. For example, let’s possible that you have a policy that doesn’t have a filter or an action. It all depends on what you’re doing within the policy.
Cloud Custodian Resources
Now that you have an idea of how a policy is created, here are some helpful tips for finding the filters and actions based on the particular object/resource you’re using.
Cloud Objects
First, it’s very helpful to understand how the objects/services are called from an API perspective in the cloud. For example, Azure Virtual Machines would be azure.vm and AWS SNS would be aws.sns. You can find this information with a Google Search or via the Cloud Custodian docs. For example, on the Cloud Custodian docs, you’ll see the following for Azure:
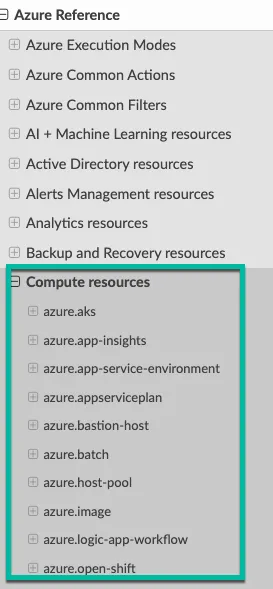
This information is for the resource value within the Policy. Each resource/service that’s supported by Cloud Custodian will be listed here. Please note that not every single resource will be supported by Cloud Custodian, so if you’re wondering why you can’t find said resource/service, that’s why.
Filters and Action
There are particular filters and actions per the policy creation files that you can use for each service. You can find which ones are available in the docs for the particular object/service you’re working with under: Cloud_You_Are_Using Reference > Service Name.
For example, if you chose Azure Reference > azure.aks, you’ll see a Filters and Actions button.
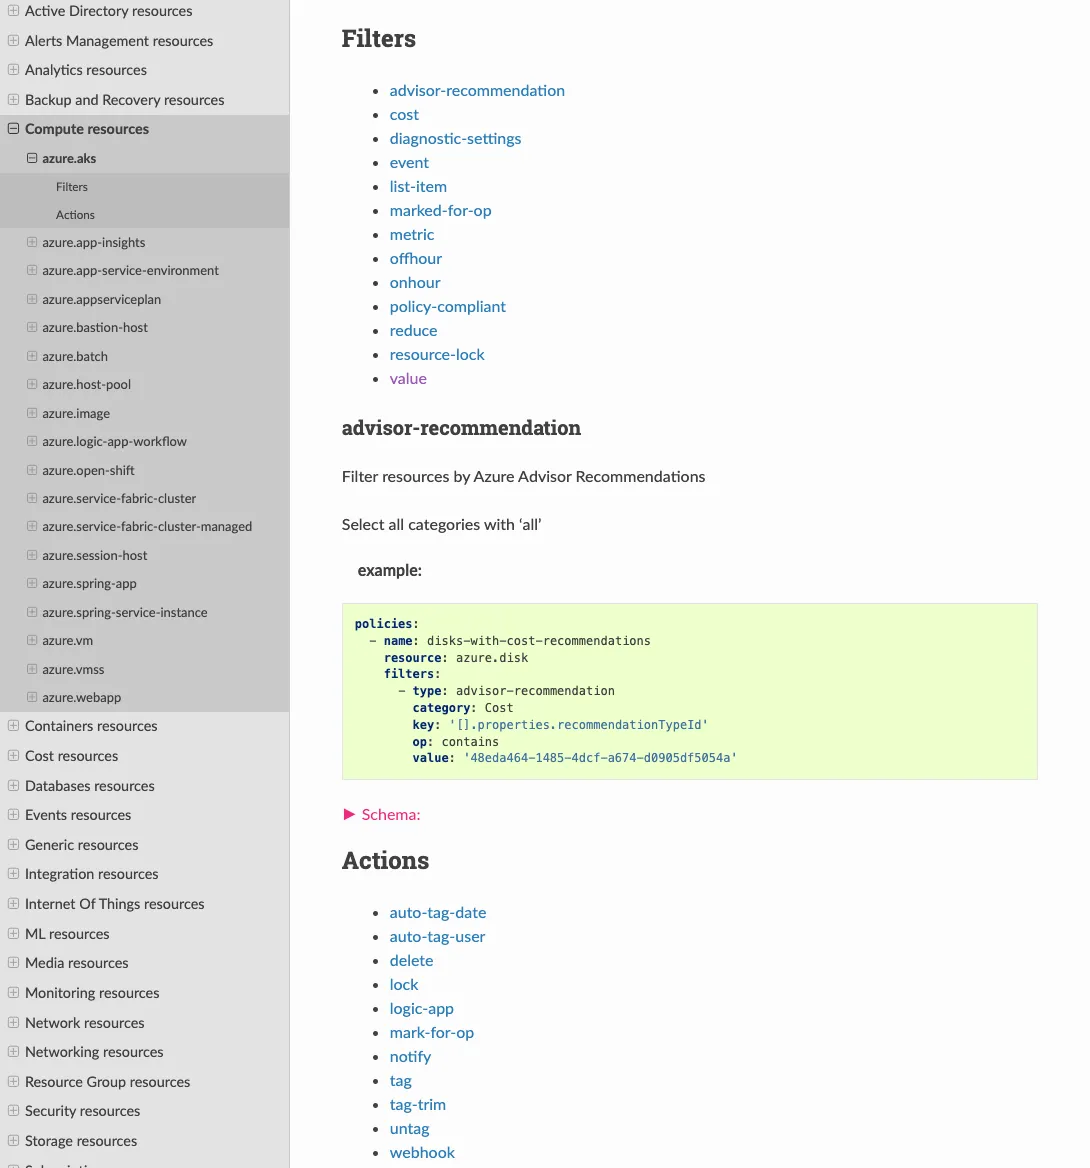
Each of the filters show you what you can search for within the resource/service. Each action shows you what you can do on that resource/service.
Implementing Cloud Custodian On Azure
Throughout this blog post, you’ve learned a few different things:
- Why you should care about policy enforcement.
- How Cloud Custodian works.
- A breakdown of filters and actions.
And now it’s time to put it all into practice.
In this section, you’ll write a policy, validate it, run it, and then see what the output entails.
Writing The Policy
When working with a Cloud Custodian policy, it’s going to be in it’s own YAML DSL. Because of that, you want to ensure that you follow YAML conventions and how Cloud Custodian is expecting indentations and such to work.
First off, you’ll always have a policies block and within that block, you’ll specify everything from the name of the policy to the resource used to the filters and actions.
In the policy block below, you can see that it’s doing the following:
- Naming the policy
- Calling upon Azure Virtual Machines
- Finding all VMs
policies:
  - name: find-virtual-machines
    resource: azure.vm
    description: find vms
As you write policies, you can perform more than one action. You wouldn’t want to, however, perform multiple actions within a policy that have nothing to do with each other. For example, within one policy, you wouldn’t want to manage Virtual Machines and Foundry AI.
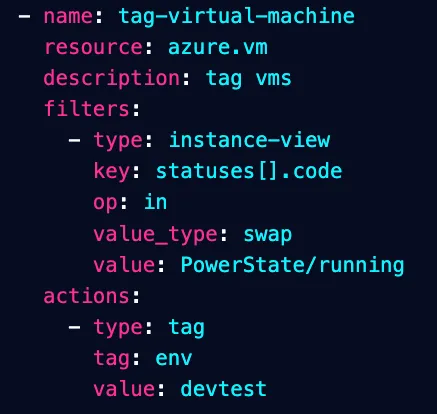
Moving along within the policy, you can see a new workload to tag virtual machines. It’s filtering out all VMs that are running and than adding a tag to the VMs that are running. The key in the tag is env and the value is devtest, specifying all running VMs are dev environments.
  - name: tag-virtual-machine
    resource: azure.vm
    description: tag vms
    filters:
      - type: instance-view
        key: statuses[].code
        op: in
        value_type: swap
        value: PowerState/running
    actions:
      - type: tag
        tag: env
        value: devtest
Putting the policies together, the file should look like the below.
policies:
  - name: find-all-resource-groups
    resource: azure.resourcegroup

  - name: find-virtual-machines
    resource: azure.vm
    description: find vms

  - name: tag-virtual-machine
    resource: azure.vm
    description: tag vms
    filters:
      - type: instance-view
        key: statuses[].code
        op: in
        value_type: swap
        value: PowerState/running
    actions:
      - type: tag
        tag: env
        value: devtest
Save the policies in a file called vm.yaml
Running The Policy
Now that the policy is written, it’s time to validate that it should work as expected and run the policy.
The first command you’ll use is validate.
Think of the validation like a terraform plan - it’s just checking to ensure that the YAML is properly implemented and everything is cohesive by Cloud Custodian standards.
Run the following command against your policy.
custodian validate vm.yaml
You’ll see an output similar to the below that confirms the policy should work as expected from a configuration perspective.
2025-02-01 08:49:58,891: custodian.commands:INFO Configuration valid: vm.yaml
Next, run the policy.
The output directory flag is needed. It’s where you’ll save the log output to. By default, it saves the output into a directory the same as the name of your policy. The . just means that it’s going to create the output directory in your existing location via the local terminal where you’re running these commands.
custodian run vm.yaml --output-dir .
If all went well, you’ll see an output similar to the below. In my case, I have five (5) VMs, two (2) of which are running.
2025-02-01 08:54:05,831: custodian.policy:INFO policy:find-virtual-machines resource:azure.vm region:AzureCloud count:5 time:0.33

2025-02-01 08:54:05,831: custodian.policy:INFO policy:tag-virtual-machine resource:azure.vm region:AzureCloud count:2 time:0.00
--dryrun flag to test how the policy will work within your system.The Output
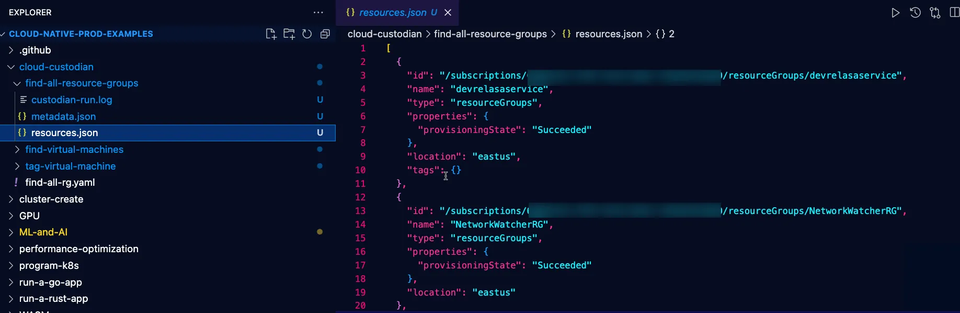
You’ll find the output saved as the same names you used within the policy. In the example you ran above, you had find-virtual-machines and tag-virtual-machines, which means those are the two directories you should see.
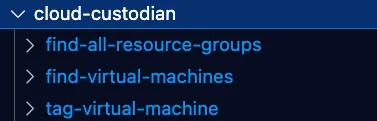
Within the directories, you’ll see three files:
- The log file.
- Metadata file.
- Resources file.

The log is the same thing you saw via the output on the terminal.
The metadata is the structure of the policy as it’s run.
The resources are essentially the same output as you would with something like the standard Azure CLI. It’s a collection of all resources used/viewed/implemented for that particular policy.

The resources file is good for troubleshooting as it’ll help you figure out what went wrong if something does go wrong. For example, it may show you that you accidentally targeted the wrong resource/service.
Wrapping Up
You’ve now successfully went through the process of understanding what policies are, why they’re important, and how to implement them in one way with Cloud Custodian. Luckily, there are some other policy enforcement tools that you can try out as well. One of the other most popular tools is Open Policy Agent (OPA), which can be used for a multitude of environments much like Cloud Custodian.


Comments ()