MCP Server oAuth: Implementation and Configuration
The running joke is "The S in MCP stands for security", and for good question. Out of the box, there's realistically no way to secure traffic from a user to an MCP Server or from an Agent to an MCP Server. The best thing that you can hope for is that when using a Streamable HTTP server, there's security in place (e.g - a PAT token is needed for the GitHub Copilot MCP Server).
In this blog post, you'll learn how to configure oAuth (lets a user grant third-party apps limited access to data on a service) with Auth0 to securely access MCP Servers.
Prerequisites
To follow along with this blog post from a hands-on perspective, you will need the following:
- A Kubernetes cluster
- An Auth0 account, which is free for the configuration that is needed in this blog post. You can sign up here.
Installing An AI Gateway
To ensure the tunnel between users or Agents to an MCP Server can be secured, you'll need to use an AI Gateway that can be used to create and manage traffic policies. That's where agentgateway comes into play. Agentgateway will allow us to have the ability to secure, observe, and monitor AI-related traffic and for the purposes of this blog post, that traffic will be for MCP Servers.
- Install the Kubernetes Gateway API CRDs.
kubectl apply -f https://github.com/kubernetes-sigs/gateway-api/releases/download/v1.4.0/standard-install.yaml- Install the agentgateawy CRDs.
helm upgrade -i --create-namespace \
  --namespace agentgateway-system \
--version v2.2.0-main agentgateway-crds oci://ghcr.io/kgateway-dev/charts/agentgateway-crds - Install agengateway.
helm upgrade -i -n agentgateway-system agentgateway oci://ghcr.io/kgateway-dev/charts/agentgateway \
--version v2.2.0-main- Confirm that the agnetgateway Pod exists.
kubectl get pods -n agentgateway-systemYou will see an output similar to the gateway which specifies the agentgateway Control Plane.
NAME                            READY   STATUS    RESTARTS   AGE
agentgateway-69f977ddf6-r6nbm   1/1     Running   0          18h
MCP and Gateway Configurations
Before having the ability to secure traffic to an MCP Server, you need an MCP Server that is using the Streamable HTTP protocol. The Deployment below uses a demo MCP Server (hosted on my Dockerhub registry) with the Streamable HTTP protocol. It has 5 tools available to test.
- Run the below configuration to deploy the MCP Server as a Pod and put a Service in front of it so the MCP Server is accessible.
kubectl apply -f - <<EOF
apiVersion: apps/v1
kind: Deployment
metadata:
  name: mcp-server
  namespace: default
  labels:
    app: mcp-server
spec:
  replicas: 1
  selector:
    matchLabels:
      app: mcp-server
  template:
    metadata:
      labels:
        app: mcp-server
    spec:
      containers:
      - name: mcp-server
        image: adminturneddevops/mcp-oauth-demo:v0.1
        imagePullPolicy: Always
        ports:
        - containerPort: 8080
          name: http
        env:
        - name: PORT
          value: "8080"
        - name: HOST
          value: "0.0.0.0"
        resources:
          requests:
            memory: "128Mi"
            cpu: "100m"
          limits:
            memory: "256Mi"
            cpu: "200m"
---
apiVersion: v1
kind: Service
metadata:
  name: mcp-server
  namespace: default
  labels:
    app: mcp-server
spec:
  selector:
    app: mcp-server
  ports:
  - name: http
    port: 8080
    targetPort: 8080
  type: ClusterIP
EOF- Create a Gateway, Agentgatewaybackend, and HTTPRoute. The Gateway is so there's an entry point to the MCP Server, the HTTP Route is to route traffic to the MCP Server, and the Agentgatewaybackend is a backend that tells the Gateway where to route to (in this case, it's an MCP Server).
kubectl apply -f - <<EOF
apiVersion: gateway.networking.k8s.io/v1
kind: Gateway
metadata:
  name: mcp-gateway
  namespace: agentgateway-system
  labels:
    app: mcp-gateway
spec:
  gatewayClassName: agentgateway
  listeners:
    - name: mcp
      port: 3000
      protocol: HTTP
      allowedRoutes:
        namespaces:
          from: Same
---
apiVersion: agentgateway.dev/v1alpha1
kind: AgentgatewayBackend
metadata:
  name: demo-mcp-server
  namespace: agentgateway-system
spec:
  mcp:
    targets:
      - name: demo-mcp-server
        static:
          host: mcp-server.default.svc.cluster.local
          port: 8080
          path: /mcp
          protocol: StreamableHTTP
---
apiVersion: gateway.networking.k8s.io/v1
kind: HTTPRoute
metadata:
  name: mcp-route
  namespace: agentgateway-system
  labels:
    app: mcp-gateway
spec:
  parentRefs:
    - name: mcp-gateway
  rules:
    - backendRefs:
      - name: demo-mcp-server
        namespace: agentgateway-system
        group: agentgateway.dev
        kind: AgentgatewayBackend
  EOF
The port that the Gateway is listening on is 3000, the route is /mcp (a common path for MCP), and the backend is targeting the MCP Server service that was deployed in step 1.
Testing MCP Server Connectivity Without oAuth
With the MCP Server deployed and behind a gateway, you can now test it to confirm it works as expected. This testing, however, will not have any security behind it. That's something that oAuth helps with and you'll see that in the upcoming sections.
- Run MCP Inspector, which is an MCP Server client.
npx modelcontextprotocol/inspector#0.16.22. Put in http://YOUR_ALB_PUB_IP:3000/mcp and click Connect. If you aren't running in a Kubernetes cluster that gives you the ability to have an IP address available for the Gateway, you'll need to port-forward the Gateway and switch out YOUR_ALB_PUB_IP with localhost.

You should now be able to see the 5 tools available. However, should the 5 tools be exposed? That's one major security nightmare of MCP Servers. The Server may have several tools available, but that doesn't mean everyone should be able to access those tools.
Setting Up Auth0
Because engineers, teams, and organizations want the ability to secure MCP Servers, but there isn't a real way to do it out of the box, protocols like oAuth can be used. To use oAuth, you need an oAuth provider. That's where a platform like Auth0 comes into play.
To set up Auth0, you will need to:
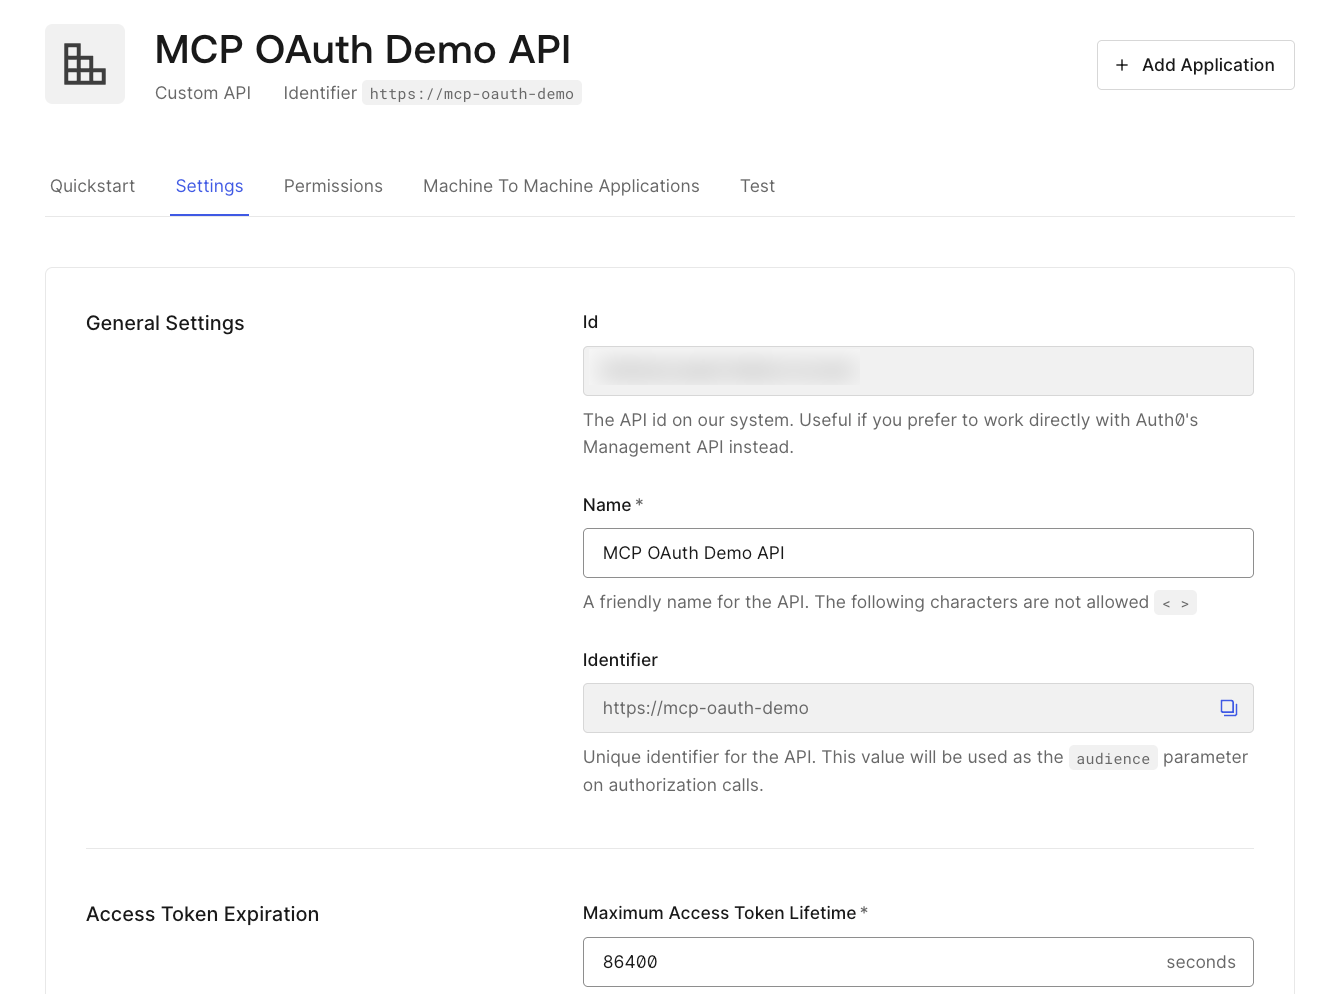
- Create an API
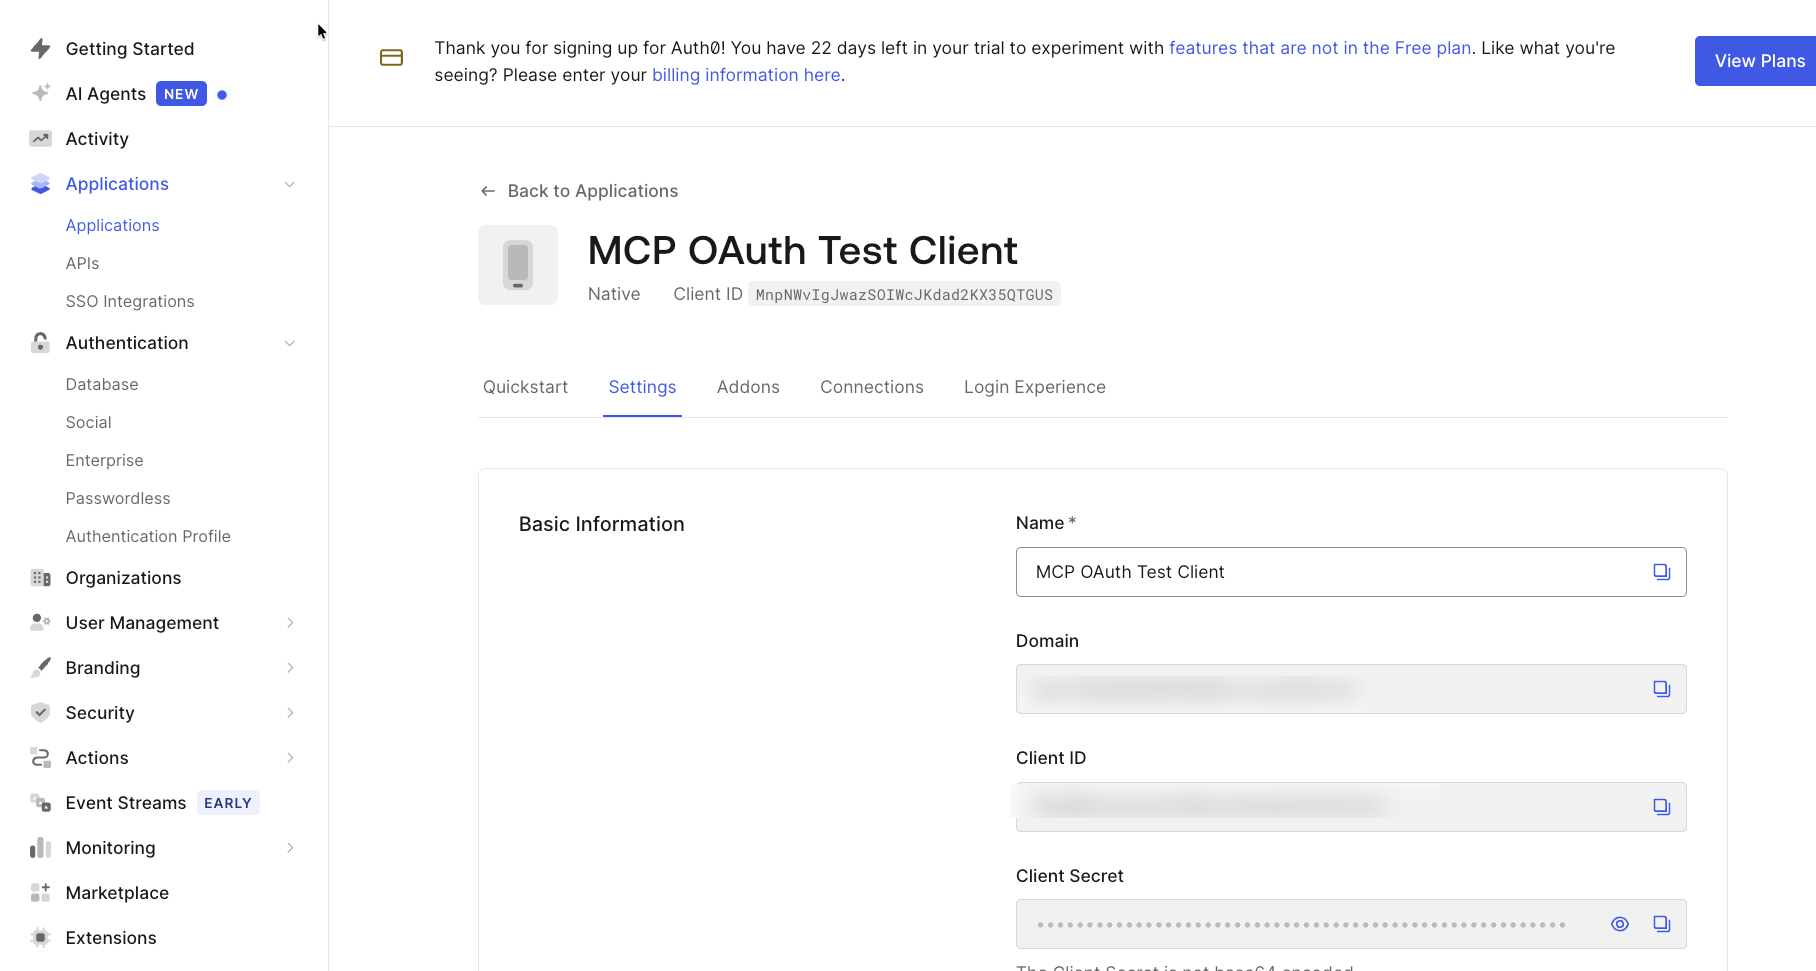
- Create an app
- Configure roles
- Assign roles
There are several steps involved, so to minimize a lengthy process, you can follow this setup guide: https://github.com/AdminTurnedDevOps/agentic-demo-repo/blob/main/mcp/mcp-oauth-demos/auth0/setup.md
After following the setup guide, you should have a full configuration ready to use for authentication to an MCP Server for oAuth (example screenshots below).
Generating A Token
With Auth0 set up and configured, you can now use it to generate a token to be used for authenticating to an MCP Server. You'll need an access policy in place to actually set the security (e.g - only 3/5 tools are available from the MCP Server), but the first step is to ensure that you have a token available to authenticate once the access policy is put into place (you'll configure an access policy in an upcoming section).
- Create environment variables with your Auth0 specifications, the audience that you created in the previous section, and the permission scope. The permissions below will ensure that only 3/5 tools are available (those are configured in the access policy).
export AUTH0_DOMAIN="your-tenant.us.auth0.com"
export CLIENT_ID="your_client_id"
export AUDIENCE="https://mcp-oauth-demo"
export SCOPES="files:read files:delete"- Make a
POSTrequest to your Auth0 environment that will give you a device code and an activiation link.
curl -s -X POST "https://$AUTH0_DOMAIN/oauth/device/code" \
  -H "Content-Type: application/x-www-form-urlencoded" \
  -d "client_id=$CLIENT_ID&scope=$SCOPES&audience=$AUDIENCE" | jq .
The output will look similar to the below:
{
  "device_code": "ABC123...",
  "user_code": "WXYZ-ABCD",
  "verification_uri_complete": "https://your-tenant.us.auth0.com/activate?user_code=WXYZ-ABCD"
}
- Add the device code to an environment variable.
export DEVICE_CODE=vJA-9U-WX70IOJPBGiSWvVrL- Open the
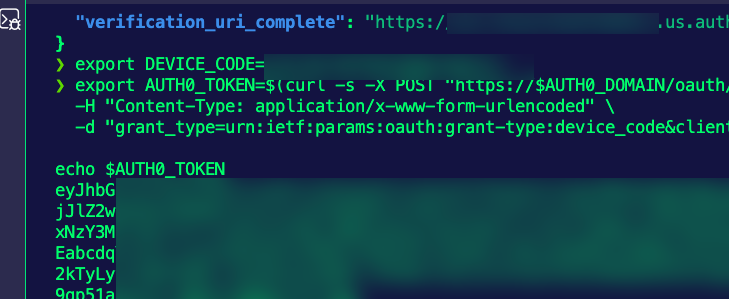
verification_uri_completeURL in your browser and sign in. - Generate an authentication/bearer token to be used in the MCP Inspector to test authentication. Ensure to save the token.
export AUTH0_TOKEN=$(curl -s -X POST "https://$AUTH0_DOMAIN/oauth/token" \
  -H "Content-Type: application/x-www-form-urlencoded" \
  -d "grant_type=urn:ietf:params:oauth:grant-type:device_code&client_id=$CLIENT_ID&device_code=$DEVICE_CODE" | jq -r .access_token)

echo $AUTH0_TOKEN
You'll see an output similar to the one below.

Configuring oAuth
With Auth0 configured and a token generated, you'll now need to set up the connectivity from the Kubernetes cluster to the oAuth environment. That way, secure connectivity can be established.
1. Set the following env variables:
export AUTH0_DOMAIN=YOUR_DOMAIN.us.auth0.com
export API_IDENTIFIER=https://mcp-oauth-demo- Deploy the Auth0 JWKS proxy service (required for agentgateway to fetch JWKS from Auth0). Before applying the config, you'll have to add in your
proxy_passon line 17 andproxy_set_headeron line 19.
apiVersion: v1
kind: ConfigMap
metadata:
  name: auth0-jwks-nginx-config
  namespace: agentgateway-system
data:
  nginx.conf: |
    events {
      worker_connections 1024;
    }

    http {
      server {
        listen 8443;

        location /.well-known/jwks.json {
          proxy_pass https://YOUR_DOMAIN.us.auth0.com/.well-known/jwks.json;
          proxy_ssl_server_name on;
          proxy_set_header Host YOUR_DOMAIN.us.auth0.com;
        }
      }
    }
---
apiVersion: apps/v1
kind: Deployment
metadata:
  name: auth0-jwks
  namespace: agentgateway-system
  labels:
    app: auth0-jwks
spec:
  replicas: 1
  selector:
    matchLabels:
      app: auth0-jwks
  template:
    metadata:
      labels:
        app: auth0-jwks
    spec:
      containers:
      - name: nginx
        image: nginx:alpine
        ports:
        - containerPort: 8443
          name: http
        volumeMounts:
        - name: config
          mountPath: /etc/nginx/nginx.conf
          subPath: nginx.conf
      volumes:
      - name: config
        configMap:
          name: auth0-jwks-nginx-config
---
apiVersion: v1
kind: Service
metadata:
  name: auth0-jwks
  namespace: agentgateway-system
  labels:
    app: auth0-jwks
spec:
  selector:
    app: auth0-jwks
  ports:
  - name: http
    port: 8443
    targetPort: 8443
  type: ClusterIP
3. Apply the Traffic Policy to route traffic for agentgateway to authenticate via your oAuth provider. Notice the MCP Server tools that are available and not available when you apply this policy. This is how you'll only see 3/5 tools available when you perform the testing in the next section.
cat <<EOF | kubectl apply -f -
apiVersion: agentgateway.dev/v1alpha1
kind: AgentgatewayPolicy
metadata:
  name: mcp-oauth-policy
  namespace: agentgateway-system
  labels:
    app: mcp-gateway
spec:
  targetRefs:
    - group: gateway.networking.k8s.io
      kind: Gateway
      name: mcp-gateway
  traffic:
    cors:
      allowOrigins:
        - "*"
      allowMethods:
        - GET
        - POST
        - OPTIONS
      allowHeaders:
        - "*"
      exposeHeaders:
        - "*"
      maxAge: 86400
    jwtAuthentication:
      providers:
        - issuer: "https://${AUTH0_DOMAIN}/"
          audiences:
            - "${API_IDENTIFIER}"
          jwks:
            remote:
              jwksPath: ".well-known/jwks.json"
              backendRef:
                group: ""
                kind: Service
                name: auth0-jwks
                namespace: agentgateway-system
                port: 8443
  backend:
    mcp:
      authorization:
        action: Allow
        policy:
          matchExpressions:
            # Public tool - any authenticated user can call
            - 'mcp.tool.name == "echo"'

            # Any authenticated user can get their own info
            - 'mcp.tool.name == "get_user_info"'

            # Requires files:read scope
            # Auth0 scopes are in the 'scope' claim as a space-separated string
            - 'mcp.tool.name == "list_files" && jwt.scope.contains("files:read")'

            # Requires files:delete scope AND admin role (custom claim)
            # Auth0 custom claims must be namespaced (e.g., https://mcp-demo/roles)
            # Access namespaced claims using bracket notation: jwt["claim-name"]
            - 'mcp.tool.name == "delete_file" && jwt.scope.contains("files:delete") && jwt["https://mcp-demo/roles"].contains("admin")'

            # Requires admin role only (custom claim)
            - 'mcp.tool.name == "system_status" && jwt["https://mcp-demo/roles"].contains("admin")'
EOF
Testing Auth
Throughout this blog post, you've done several steps ranging from installing/configuring all platforms, generating tokens, creating gateways, and implementing access policies. It's time to put it all to the test. In this section, you'll test out authentication to the MCP Server using the token you generated.
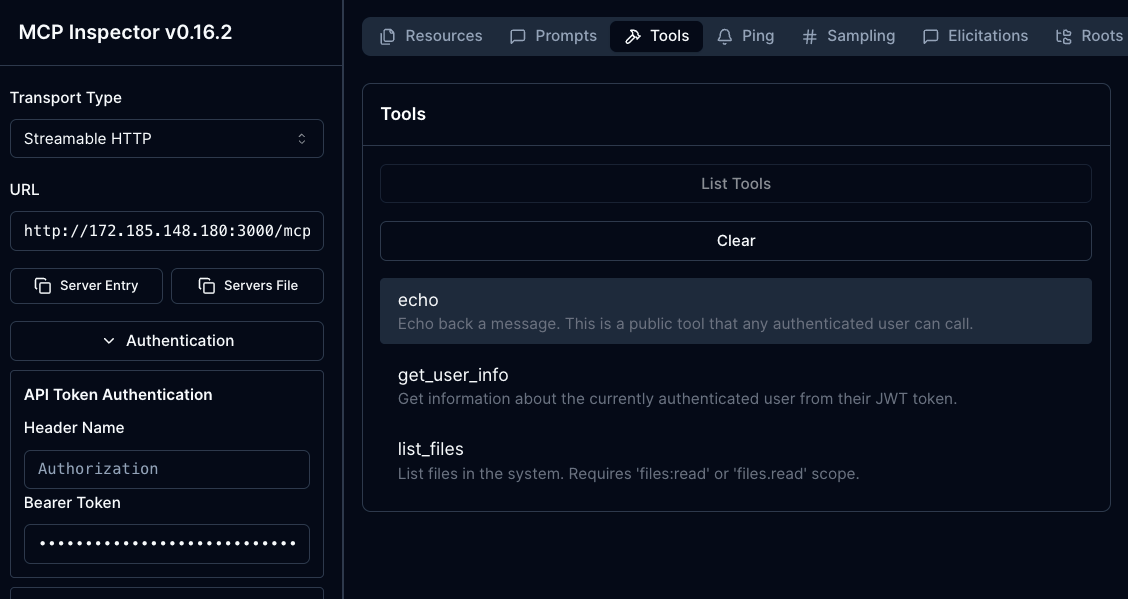
- Open MCP Inspector.
npx modelcontextprotocol/inspector#0.16.2- Connect to your server the same way you did in the Testing MCP Server Connectivity Without oAuth section.
Add in the URL via Streamable HTTP- Click Connect in the MCP Inspector UI and in the terminal, you'll see an error similar to the below:

- Open Authentication and add your token.
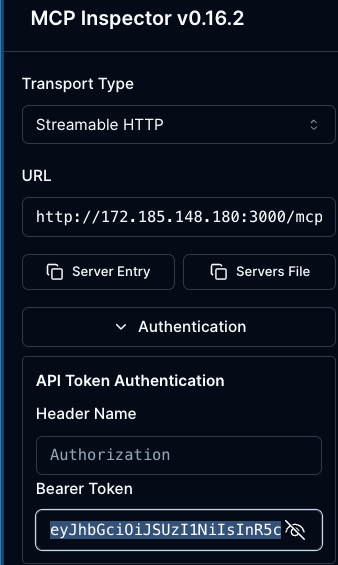
You will now be able to connect and see the tools based on the permissions that were configured in the AgentgatewayPolicy.

Comments ()