Creating and Mounting Azure File Shares

Just about every application, in some capacity, uses storage. Even if it's more of a stateless-style application (like google.com), there's still a backend filled with data somewhere. "Something" is being saved, whether it's application data, user data, or state. The location can vary from a database to an NFS share. With all of the various forms of storage in mind, every engineer should at least understand one implementation type for storing data.
In this blog post, you'll learn about one method with Azure File Shares.
Azure Storage
Azure Storage is a solution for cloud-based storage, which is a great alternative to using SANs on-prem or a combination of a SAN with something like Windows File Share or SMB shares. It allows you to store storage in a few different ways for anything from storage that you rarely access and need to store in a cost effective way to storage that needs to be constantly accessed. Azure Storage also offers Azure File Shares, which come in both SMB and NFS versions.
There are several scalability methods ranging from local redundancy (in the current data base a storage account is deployed to) to zone redundancy (multi-az) to global redundancy (cross-region).
Currently, there are two storage types - HDD (standard) and SSD (premium). The key differences in both are, aside from HDDs having spinning disks, is the performance. You will get far better performance with an SSD vs an HDD, so if you're unsure from a performance perspective how well whatever you're using the storage for will perform, it's best to test it out.
Before jumping into the next section, it's important to make a quick note of the tiers available. Sometimes, the Azure documentation isn't going to line up with what's actually doable. For example, in the docs found here, it states that only Hot and Cool are available in pay-as-you-go, but in the Azure portal, you can choose Cold as well. The best advice is to test it out in Azure to see if the option is truly available or not.
Storage Tiers
There are three storage tiers:
- Hot
- Cool
- Cold
Per the Microsoft Azure documentation:
- Cool tier - An online tier optimized for storing infrequently accessed or modified data. Data in the cool tier should be stored for at least 30 days. The cool tier has lower storage costs and higher access costs compared to the hot tier.
- Cold tier - An online tier optimized for storing rarely accessed or modified data, but still requires fast retrieval. Data in the cold tier should be stored for at least 90 days. The cold tier has lower storage costs and higher access costs compared to the cool tier.
Because the Cold tier is typically accessed way less than Cool, Cold will be cheaper. On the flipside, because Hot storage is accessed frequently, it's more expensive. You can use the Azure Calculator to help out with pricing. Cold tier pricing is around $0.004 per GBb and Cool tier is about $0.01 per GB. The retrieval costs for Cold will be more expensive than Cool.
A good way to think about the tiers is that if you need to access data quickly, use Hot storage. If you need to access data around every 30 days or so, use Cool. If you have data that needs to sit and not be touched (maybe compliance data that an organization needs to legally keep), use Cold.
Azure File Shares
Aside from standard storage ranging from Terraform states to pictures, docs, and anything else that you can think of from a digital storage perspective, there is also the ability to use File Shares in storage accounts. With a File Share, you can choose from:
- SMB (typically for Windows)
- NFS (used for Linux)
And with each option, you can take advantage of the redundancy tiers along with the hot/cool/cold storage tiers and premium or standard storage.
Azure File Shares make a lot of sense in a world where more and more organizations aren't spinning up data centers and even for the organizations that are on-prem, using something like Azure File Shares makes it a lot easier to scale out and create Disaster Recovery (DR) strategies for in comparison to an on-prem SAN.
A great use case for Azure File Shares are database backups. If you aren't using a specific storage solutions for databases but still have data that you need to back up, Azure File Shares is a great location as you can mount via SMB and NFS (in a need where, for example, SQL databases are running on VMs).
Creating An Azure File Share
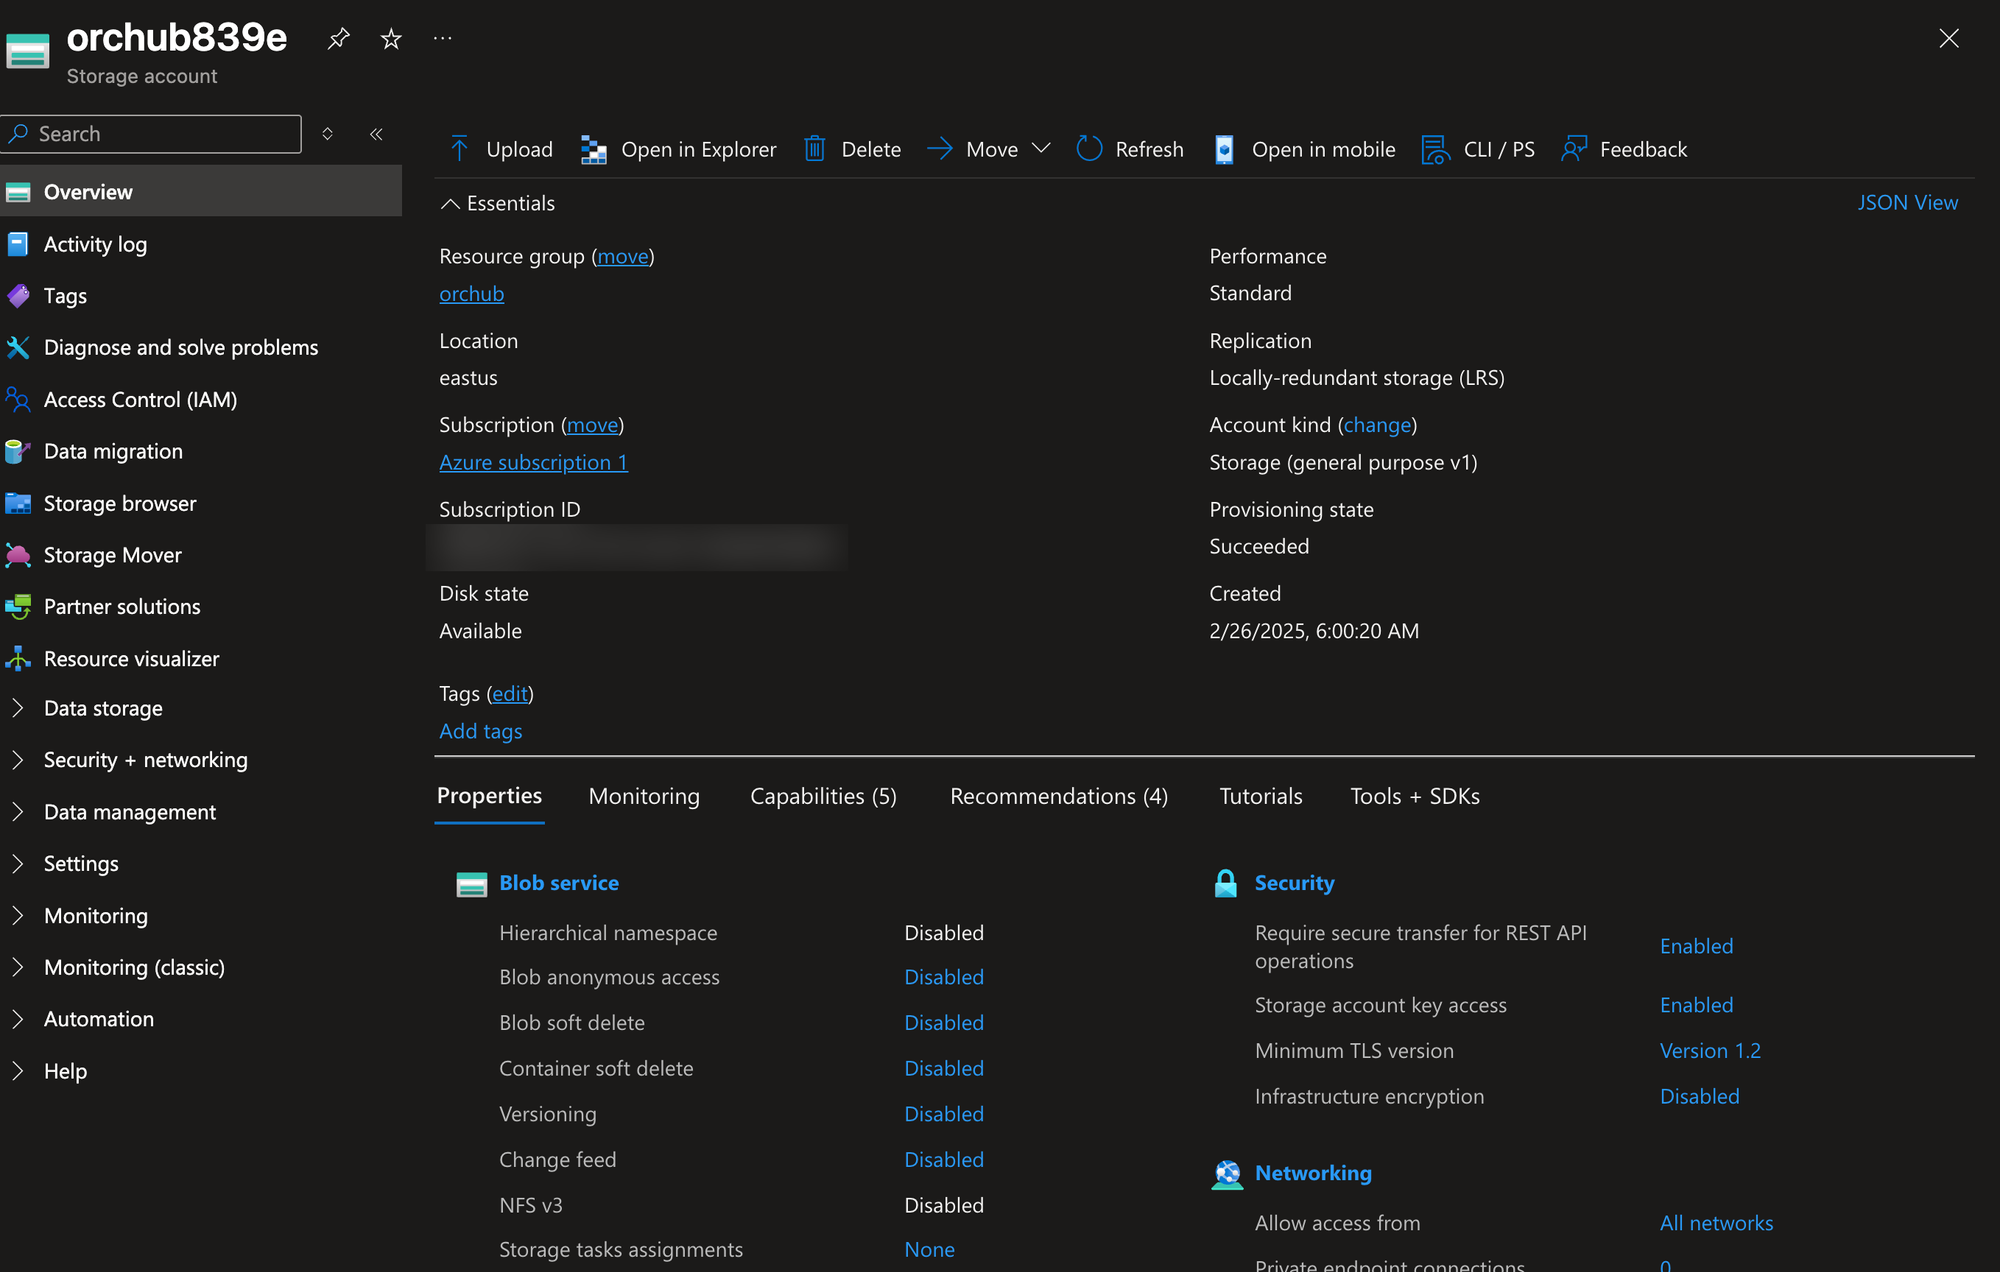
With a bit of theory under your belt around Azure Storage and Azure File Shares, let's learn how to create a Storage Account specifically for Azure File Share.
- Log into the Azure Portal and search for the storage account service.
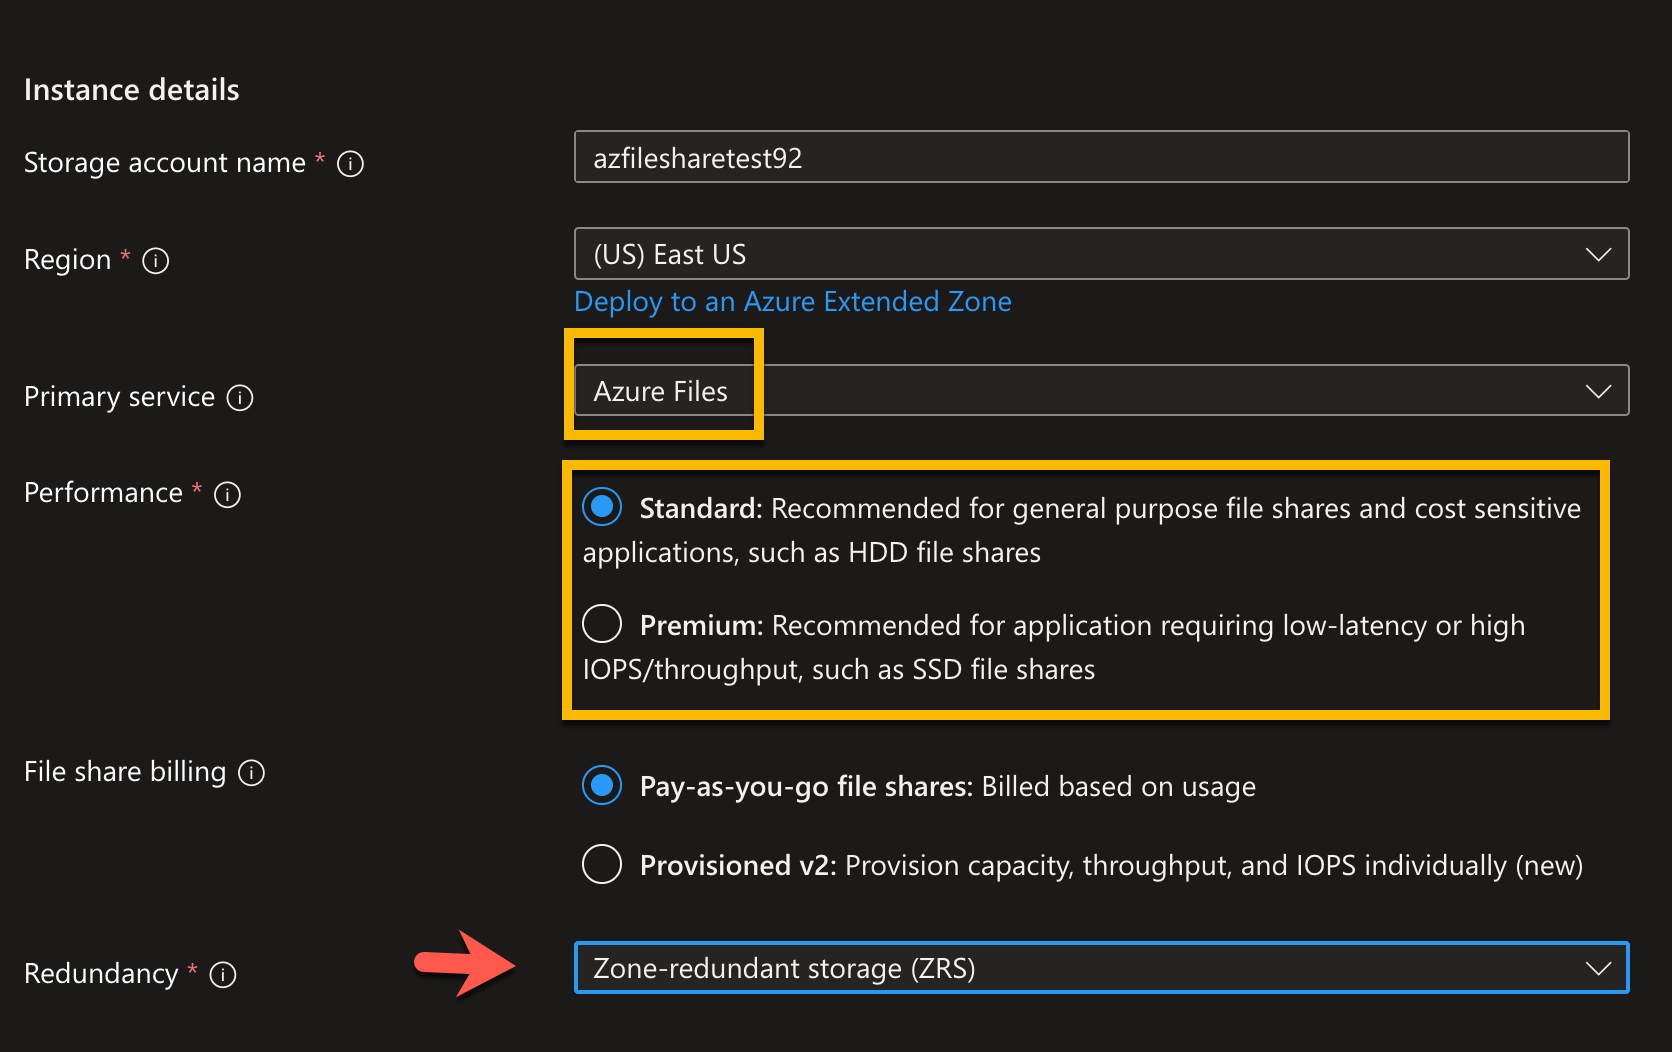
- On the first page, ensure to put a name, subscription, and RG for the storage account.
You'll see that under the Primary service section, you can choose Azure Files. For the performance, you can choose Standard or Premium and a few redundancy options as well.
- On the second screen, click Enable hierarchical namespace and then Enable network file system v3 (this is for NFS, but if you want to use SMB, don't do this step).
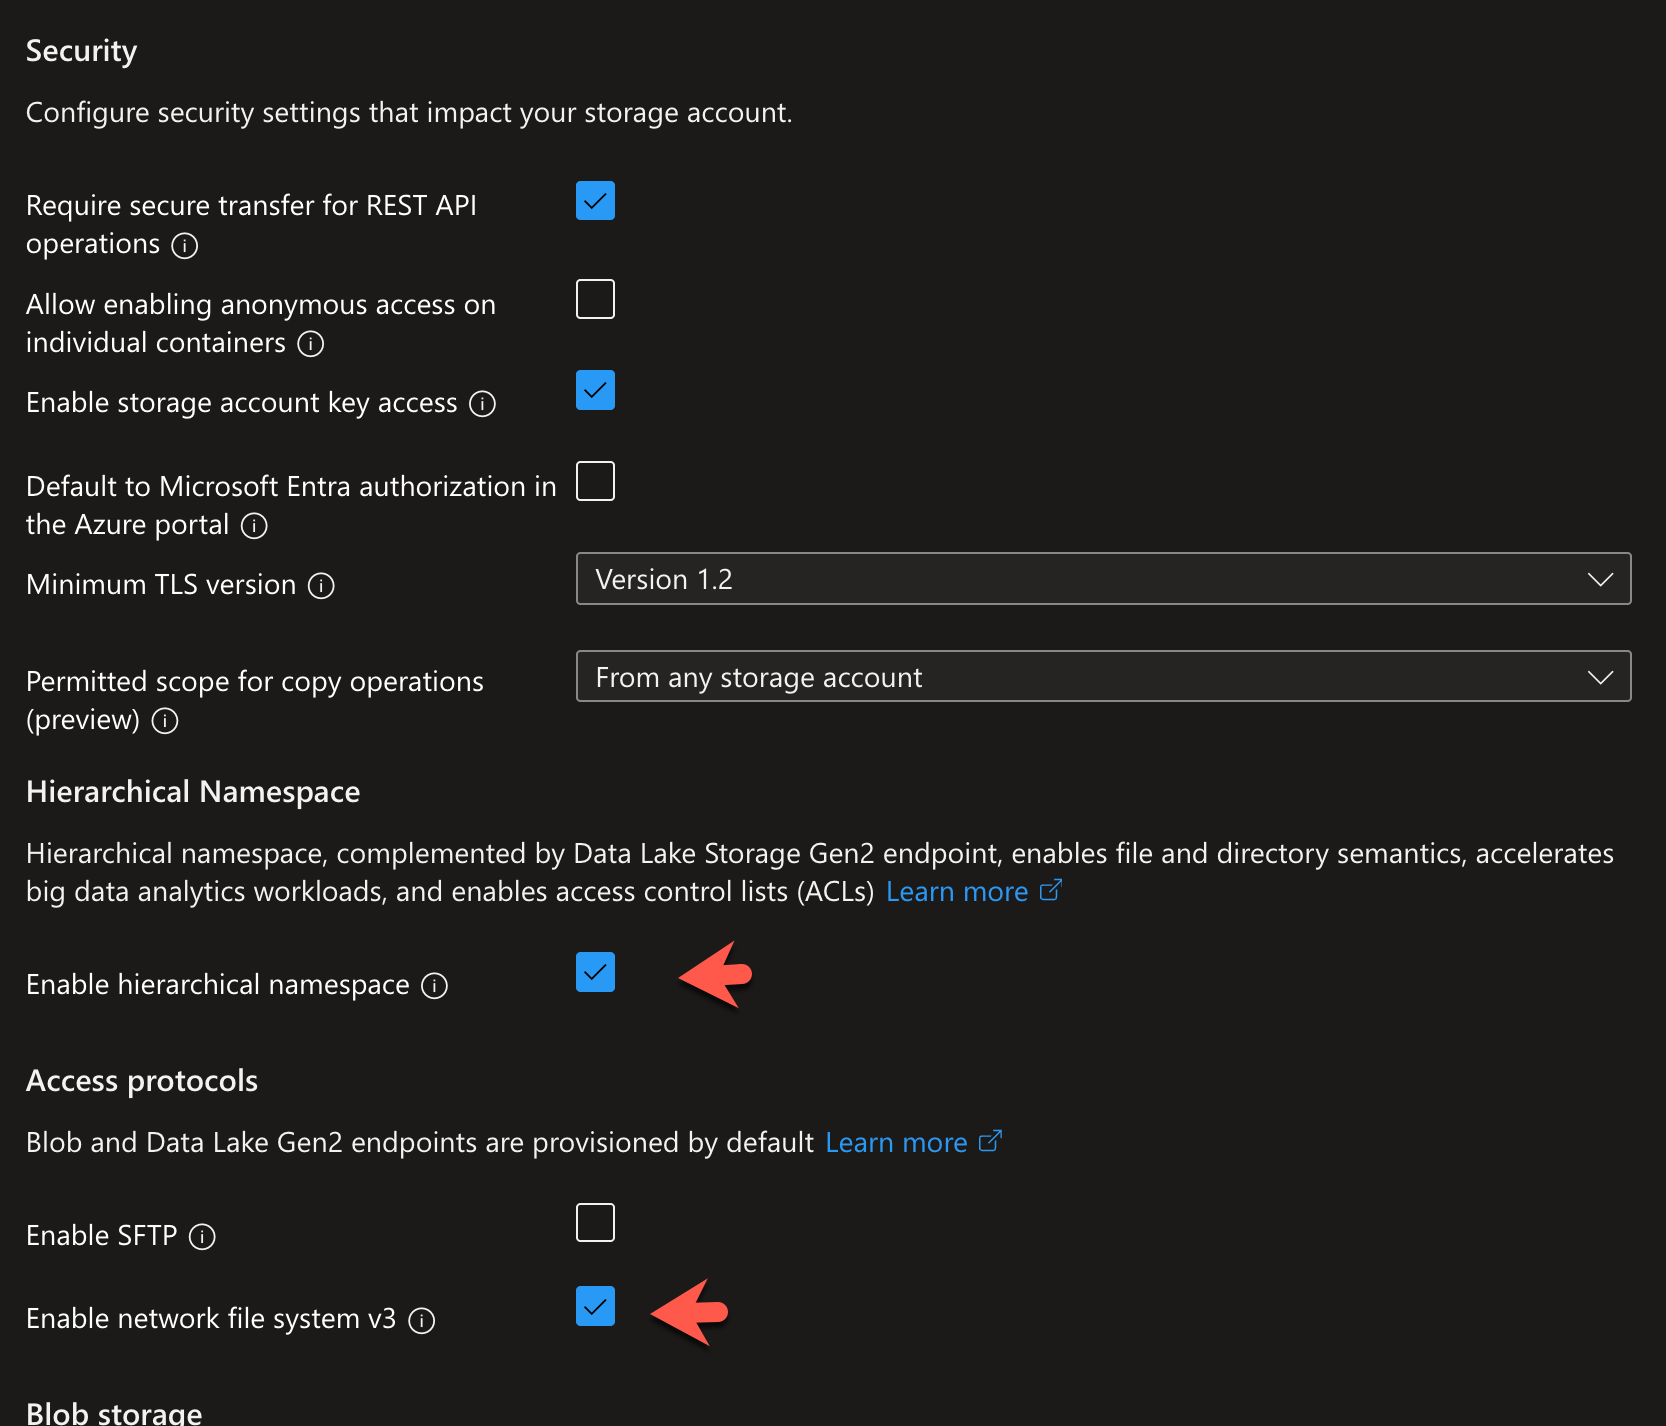
Also, notice the access tiers for Hot, Cool, and Cold.

- Leave the rest as defaults and create the storage account.
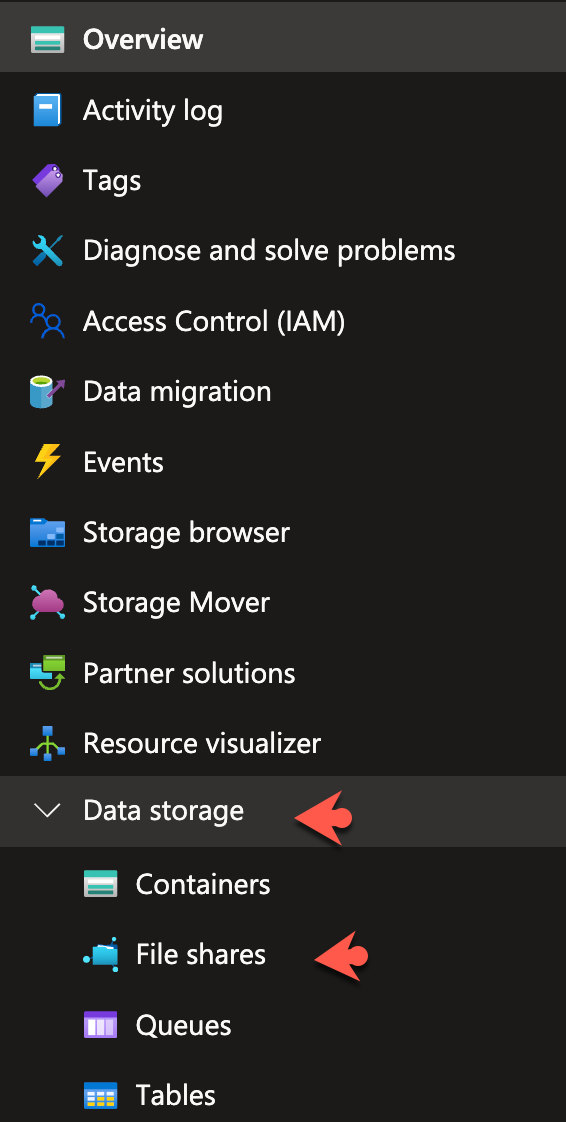
- Within the storage account, choose the File Shares option under Data storage.
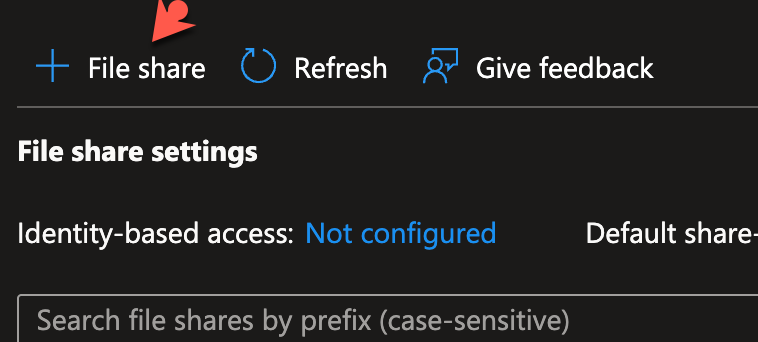
- Click the + File share button.
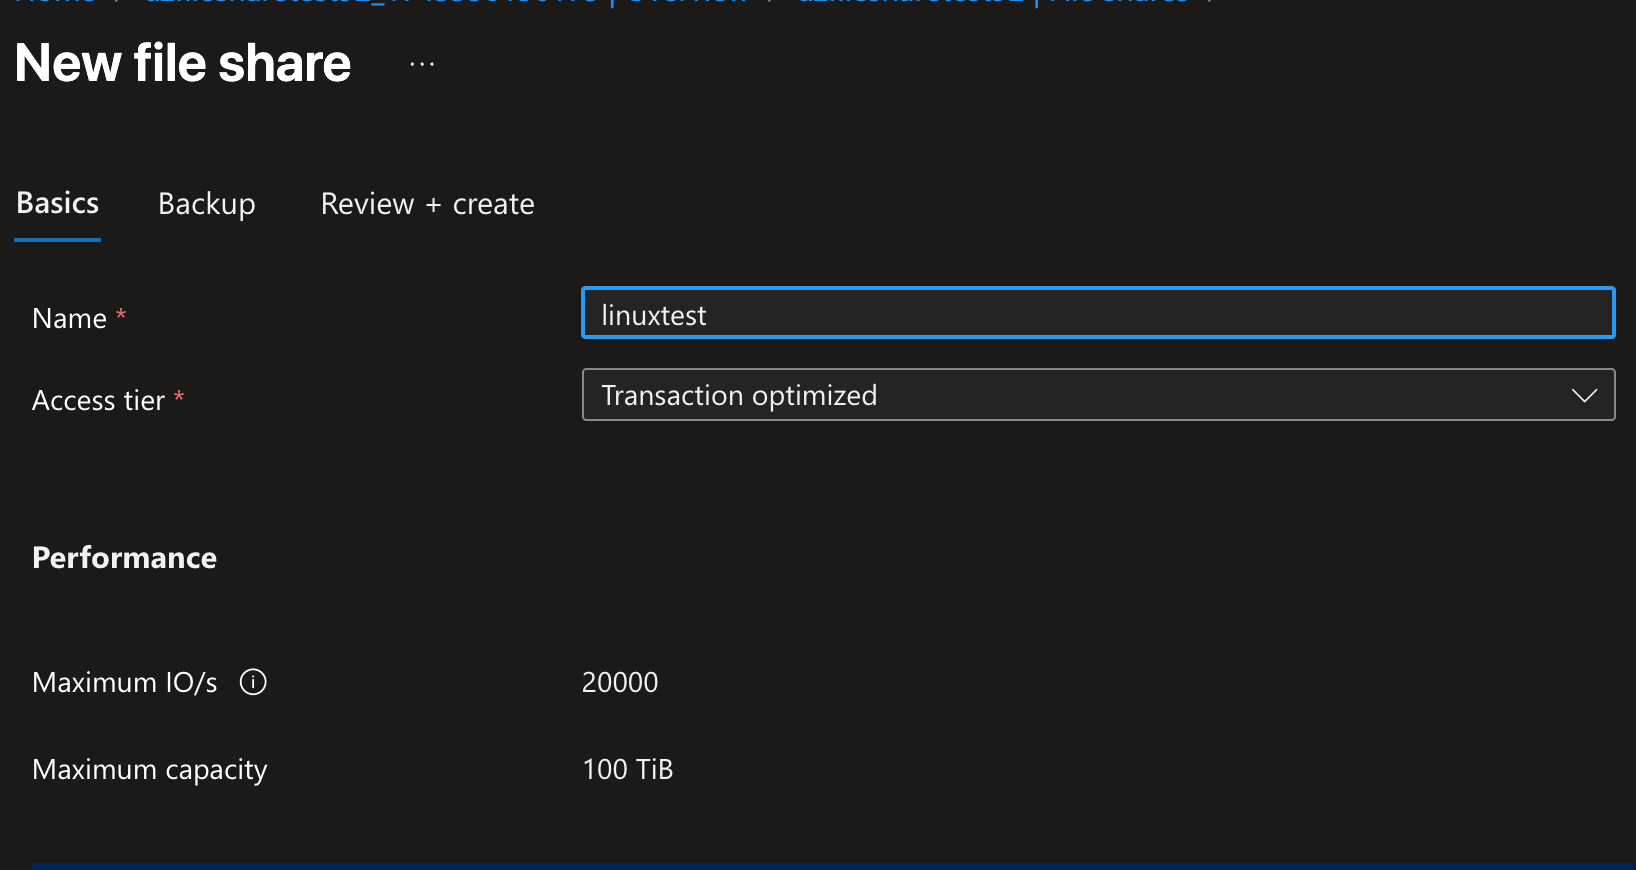
- Give your new File Share a name and create it.
In the next section, you'll learn how to mount the Azure File Shares.
Mounting Azure File Shares To VMs
Now that the Azure File Share is created, let's mount it to a VM.
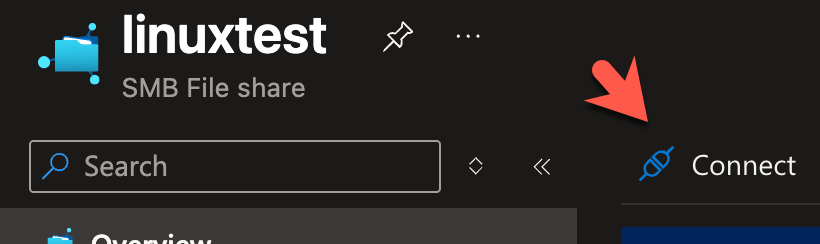
- Within the File Share, click the Connect button.
- You'll see the File Share mount point. Click the blue Show Script button.
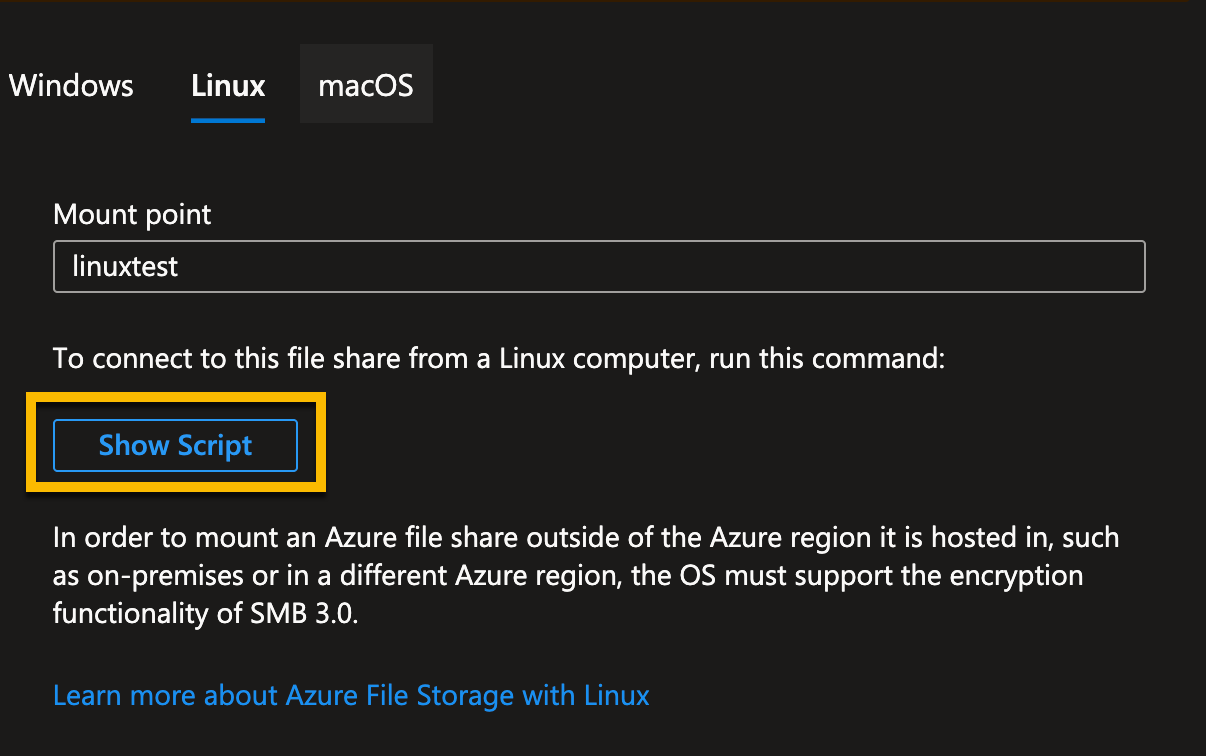
- Copy the script.
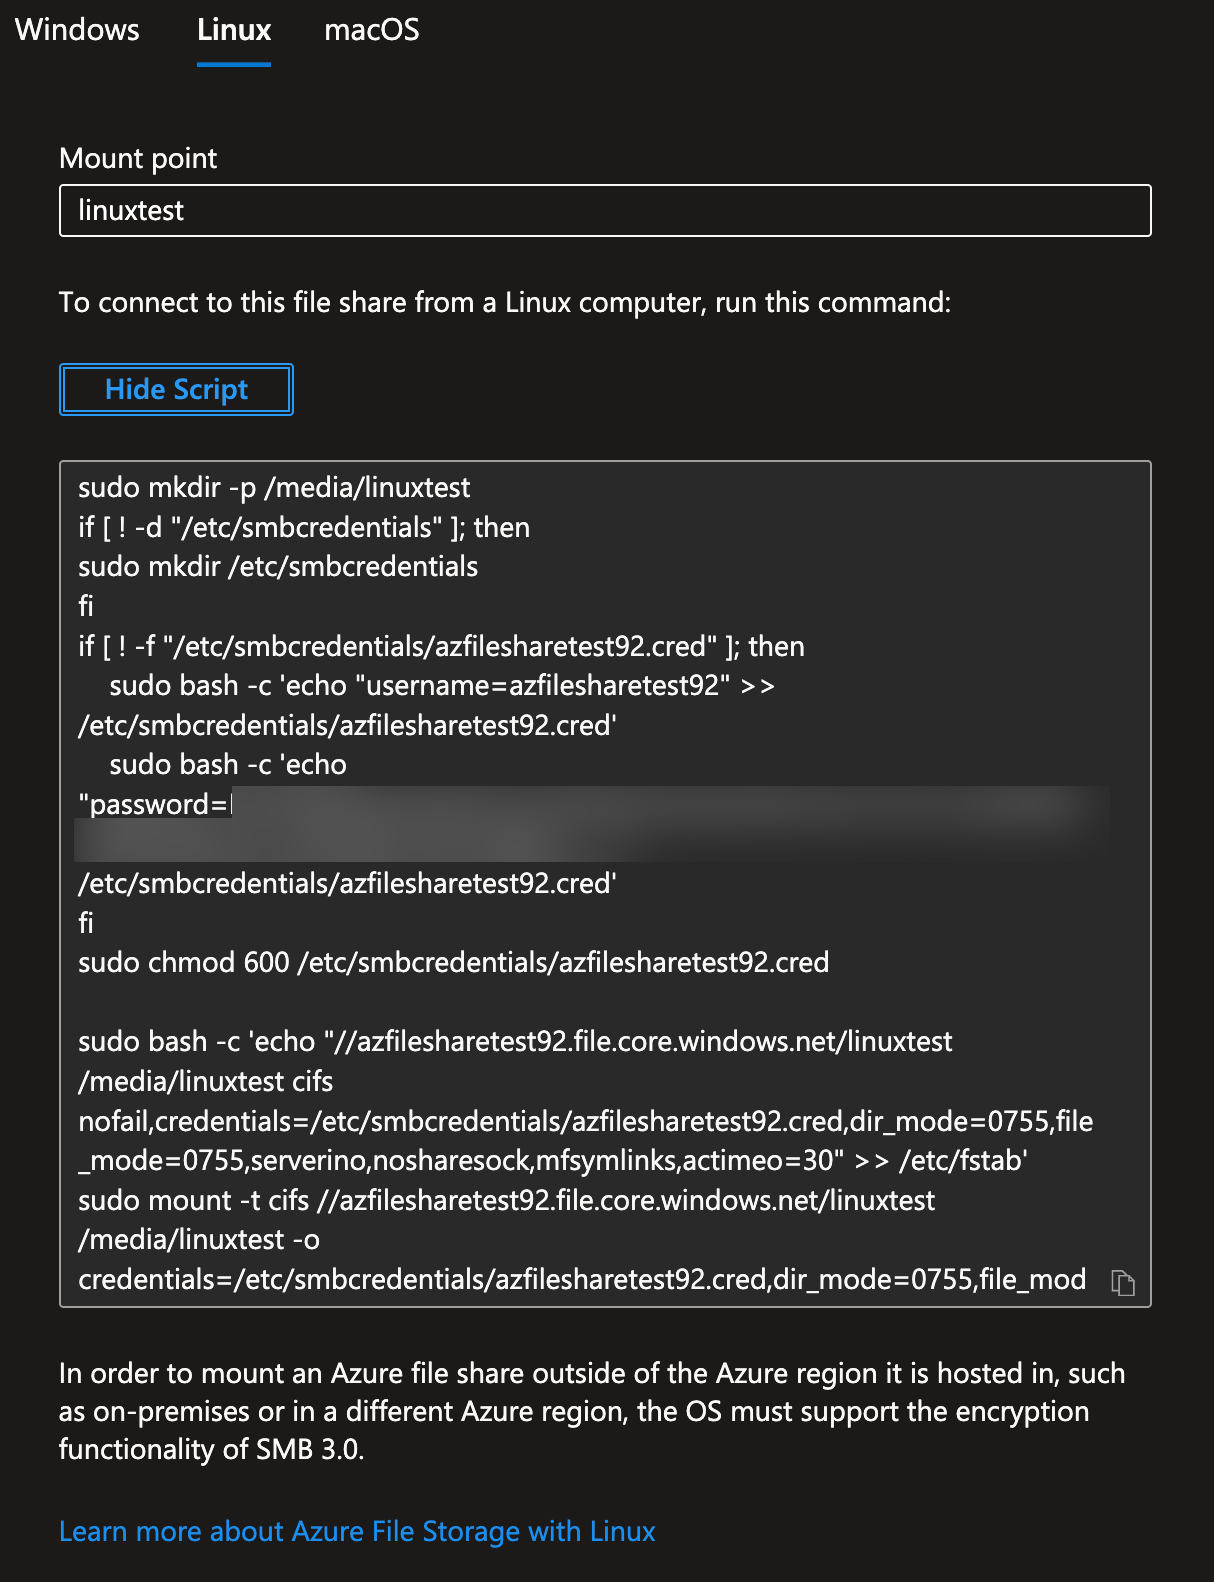
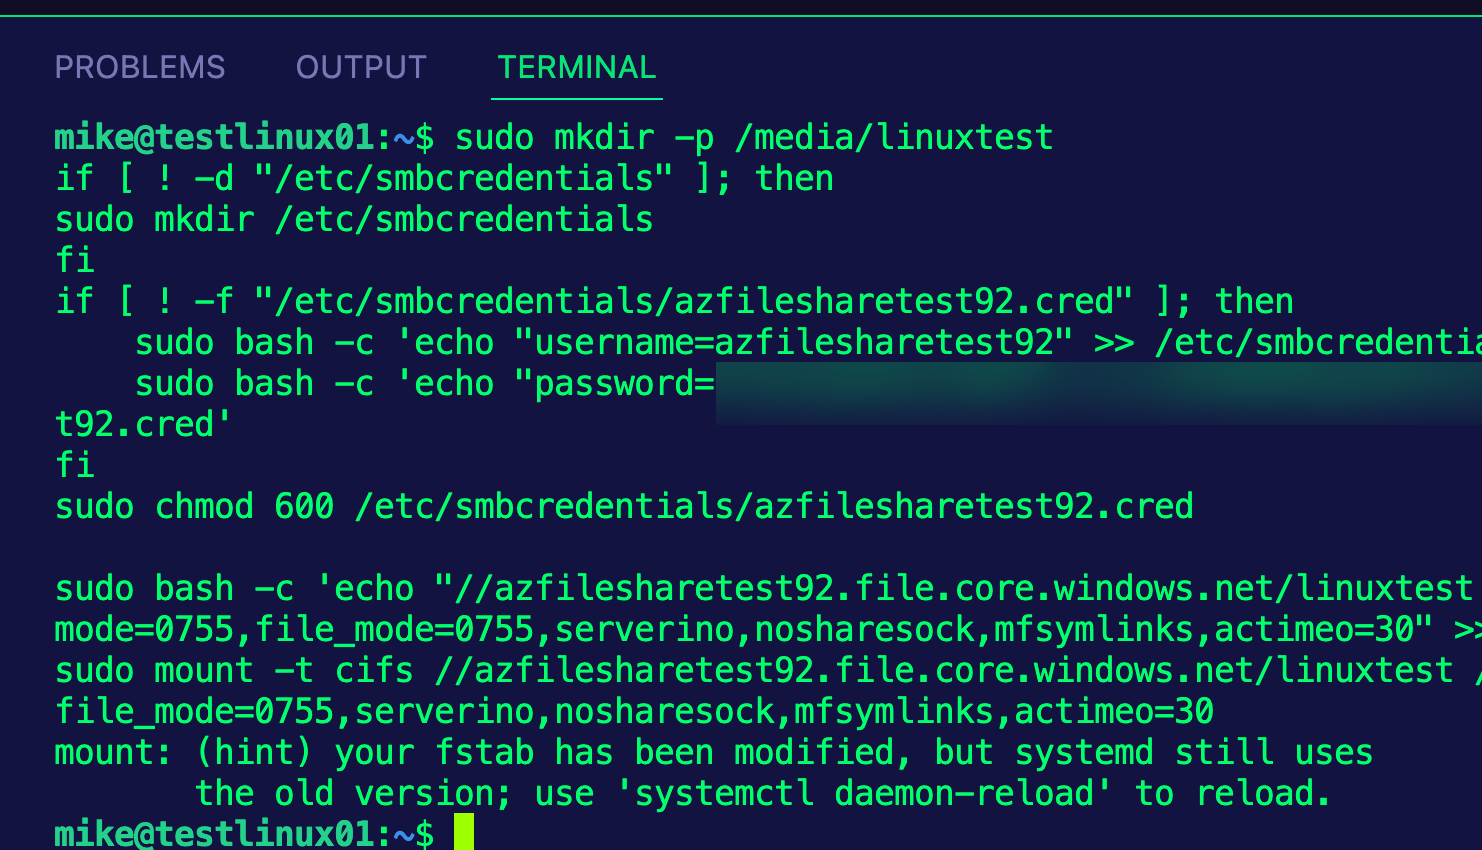
- Run the script that you copied in the terminal and you should see an output similar to the one below.
- You can confirm that the Azure File Share is properly mounted by changing directories to
/media/linuxtest/
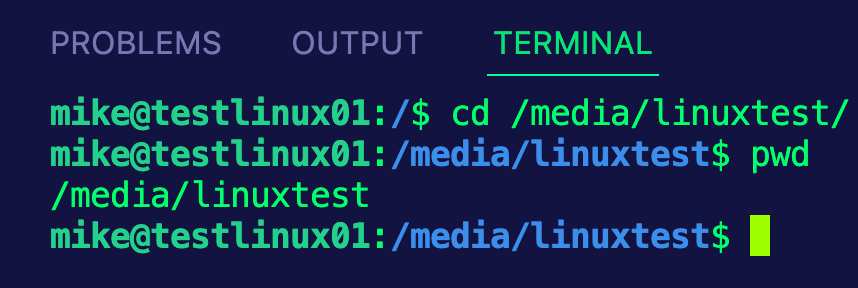
Congrats! You've successfully created an Azure Storage Account, Azure File Share, and mounted the Azure File Share to a Linux VM.
Migrating Data
If you have a current Azure File Share and you want to move the data over to a new one, the best solution is currently AzCopy, which you can find here.


Comments ()