Kubernetes Security and Observability With Datadog
When it comes to certain tools, you can obtain a fair amount of out of the box security coverage ranging from workload protection to vulnerabilities within running workloads.
From a free and/or open-source perspective, chances are you'll have to piece a good amount of tools together to ensure security success. With ceratin enterprise/paid tools, you should have a more "out of the box" experience. That's where a platform like Datadog can come into play.
In this blog post, you'll learn how to configure Datadog on Kubernetes to ensure security coverage across the cluster and workloads.
Prerequisites
To follow along with this blog post from a hands-on perspective, you'll need to have:
- A Kuberentes cluster up and running.
- A datadog account. You can sign up for a free trial account here.
If you don't have a Kubernetes cluster and would still like to follow along from a hands-off perspective, that's totally fine!
Installation
When installing Datadog, the only thing you'll need (aside from the k8s cluster and Datadog account), is a Datadog API key.
To obtain an API key, go to:
Your account > Organization Settings > API Keys
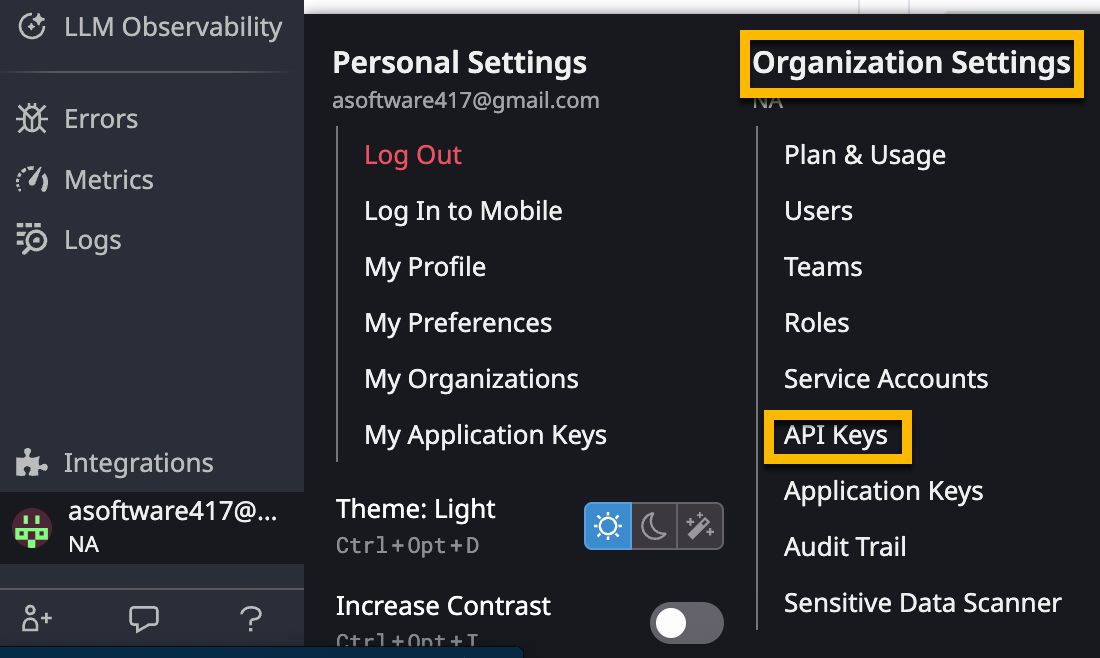
From there, you can generate an API key. You'll need it for the Helm installation, so copy it and hold onto it.
To install Datadog, you can use Helm.
First, add the Helm Chart.
helm repo add datadog https://helm.datadoghq.comNext, install the Helm Chart on your Kubernetes cluster. Notice that there is a value to add in your Kubernetes cluster name and the Datadog API key.
helm install datadog -n datadog \
--set datadog.site='datadoghq.com' \
--set clusterName='YOUR_CLUSTER_NAME' \
--set logs.enabled=true \
--set logs.containerCollectAll=true \
--set datadog.apiKey='YOUR_DATADOG_API_KEY' \
--set processAgent.enabled=true \
--set targetSystem='linux' \
--set datadog.cws.enabled=true \
--set datadog.cspm.enabled=true \
--set datadog.cspm.hostBenchmarks.enabled=true \
--set datadog.securityAgent.runtime.enabled=true \
--set datadog.securityAgent.compliance.enabled=true \
--set datadog.securityAgent.compliance.host_benchmarks.enabled=true \
--set datadog.sbom.enabled=true \
--set datadog.sbom.containerImage.enabled=true \
--set datadog.sbom.host.enabled=true \
--set datadog.remoteConfiguration.enabled=true \
datadog/datadog --create-namespace
The key pieces of the Helm chart configuration that add the security features are the following values:
--set datadog.cws.enabled=true \
--set datadog.cspm.enabled=true \
--set datadog.cspm.hostBenchmarks.enabled=true \
--set datadog.securityAgent.runtime.enabled=true \
--set datadog.securityAgent.compliance.enabled=true \
--set datadog.securityAgent.compliance.host_benchmarks.enabled=true \
--set datadog.sbom.enabled=true \
--set datadog.sbom.containerImage.enabled=true \
--set datadog.sbom.host.enabled=true \
--set datadog.remoteConfiguration.enabled=true \
After you run the Helm chart, head over to the Datadog portal.
Accessing The Security Features
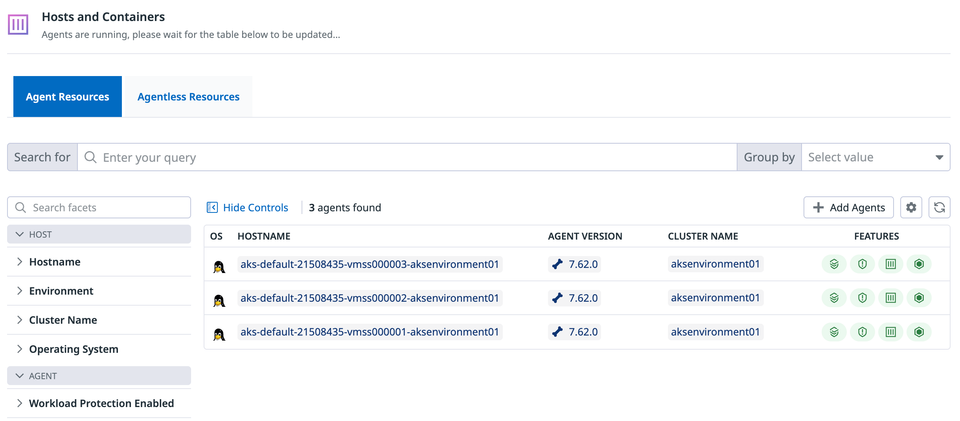
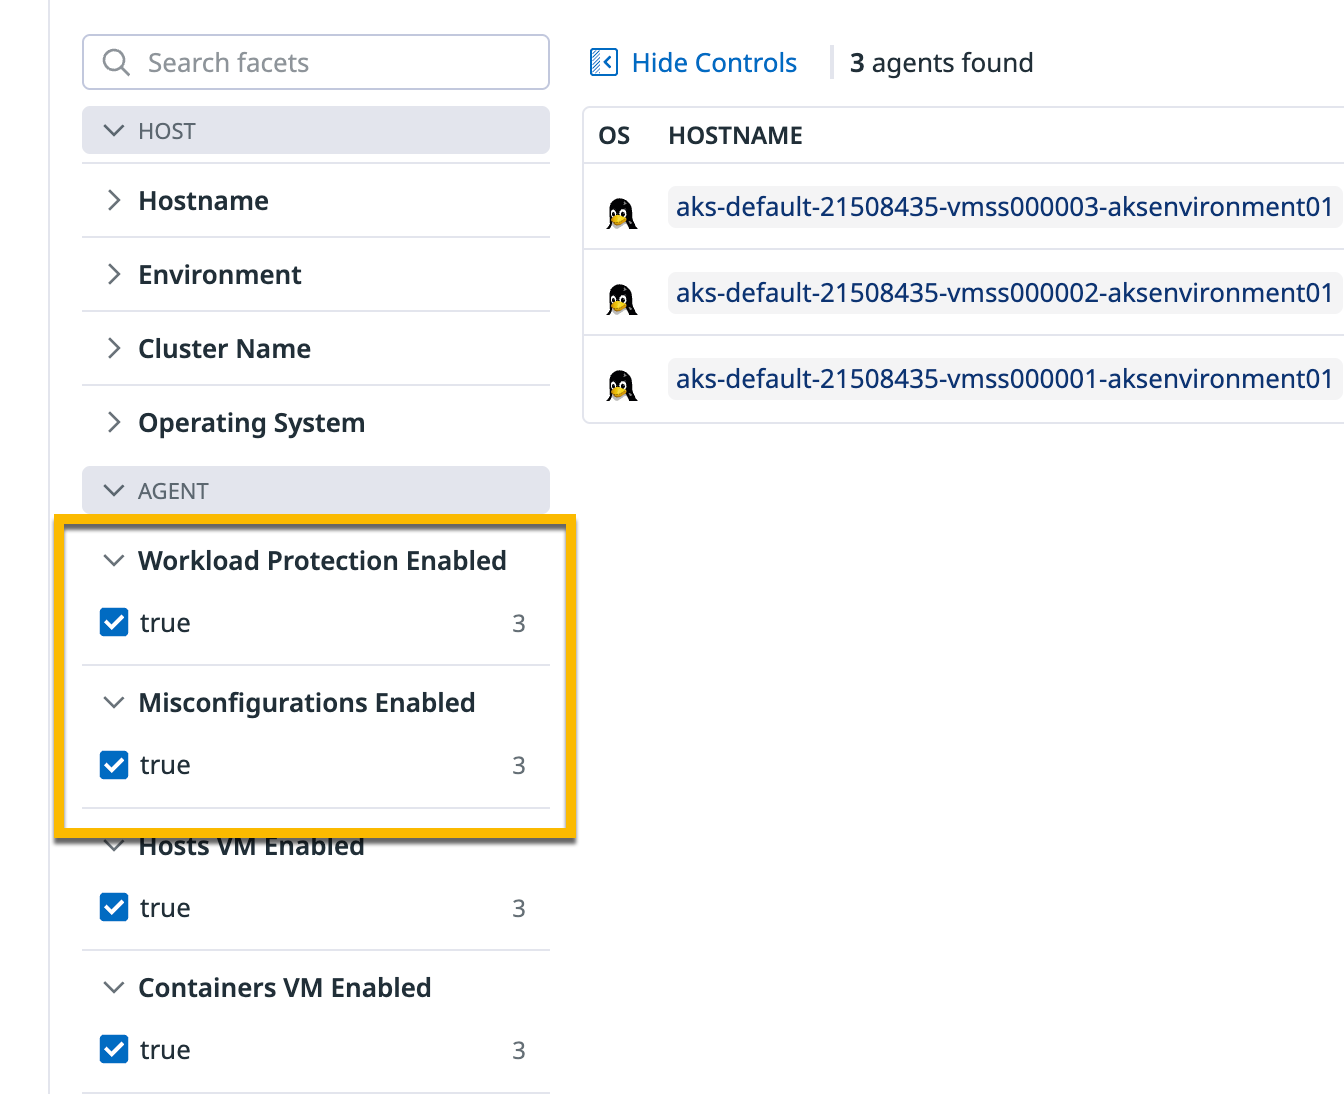
Within the Datadog portal, go to Security > Host and containers.
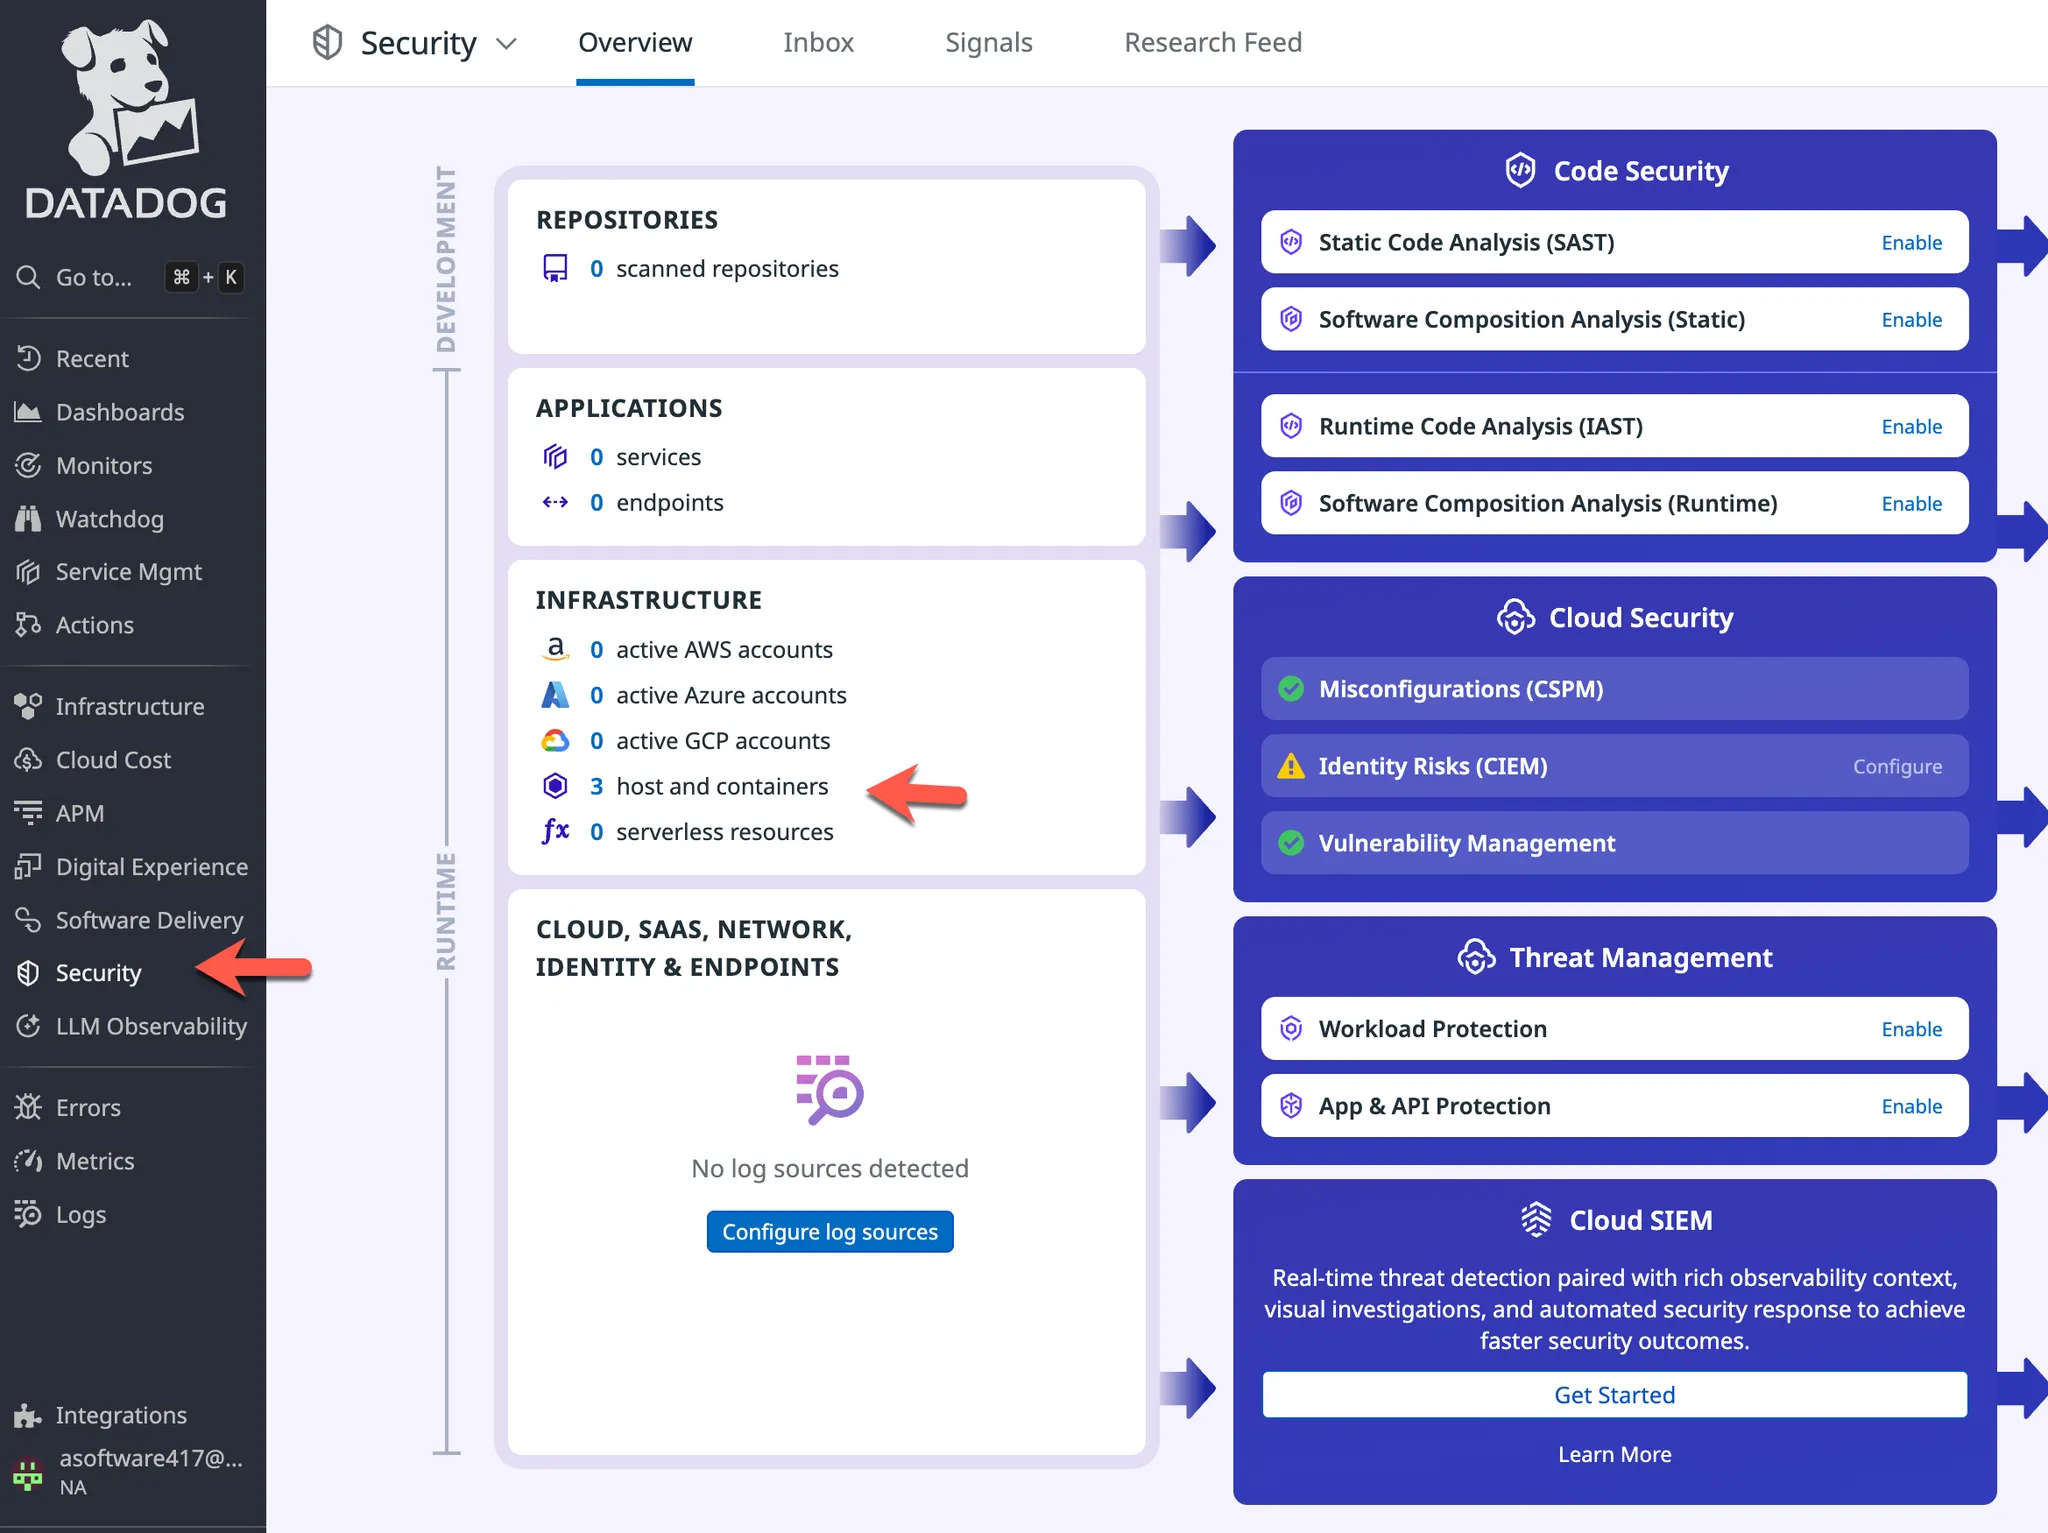
From here, you should see the Kubernetes Nodes within your cluster.
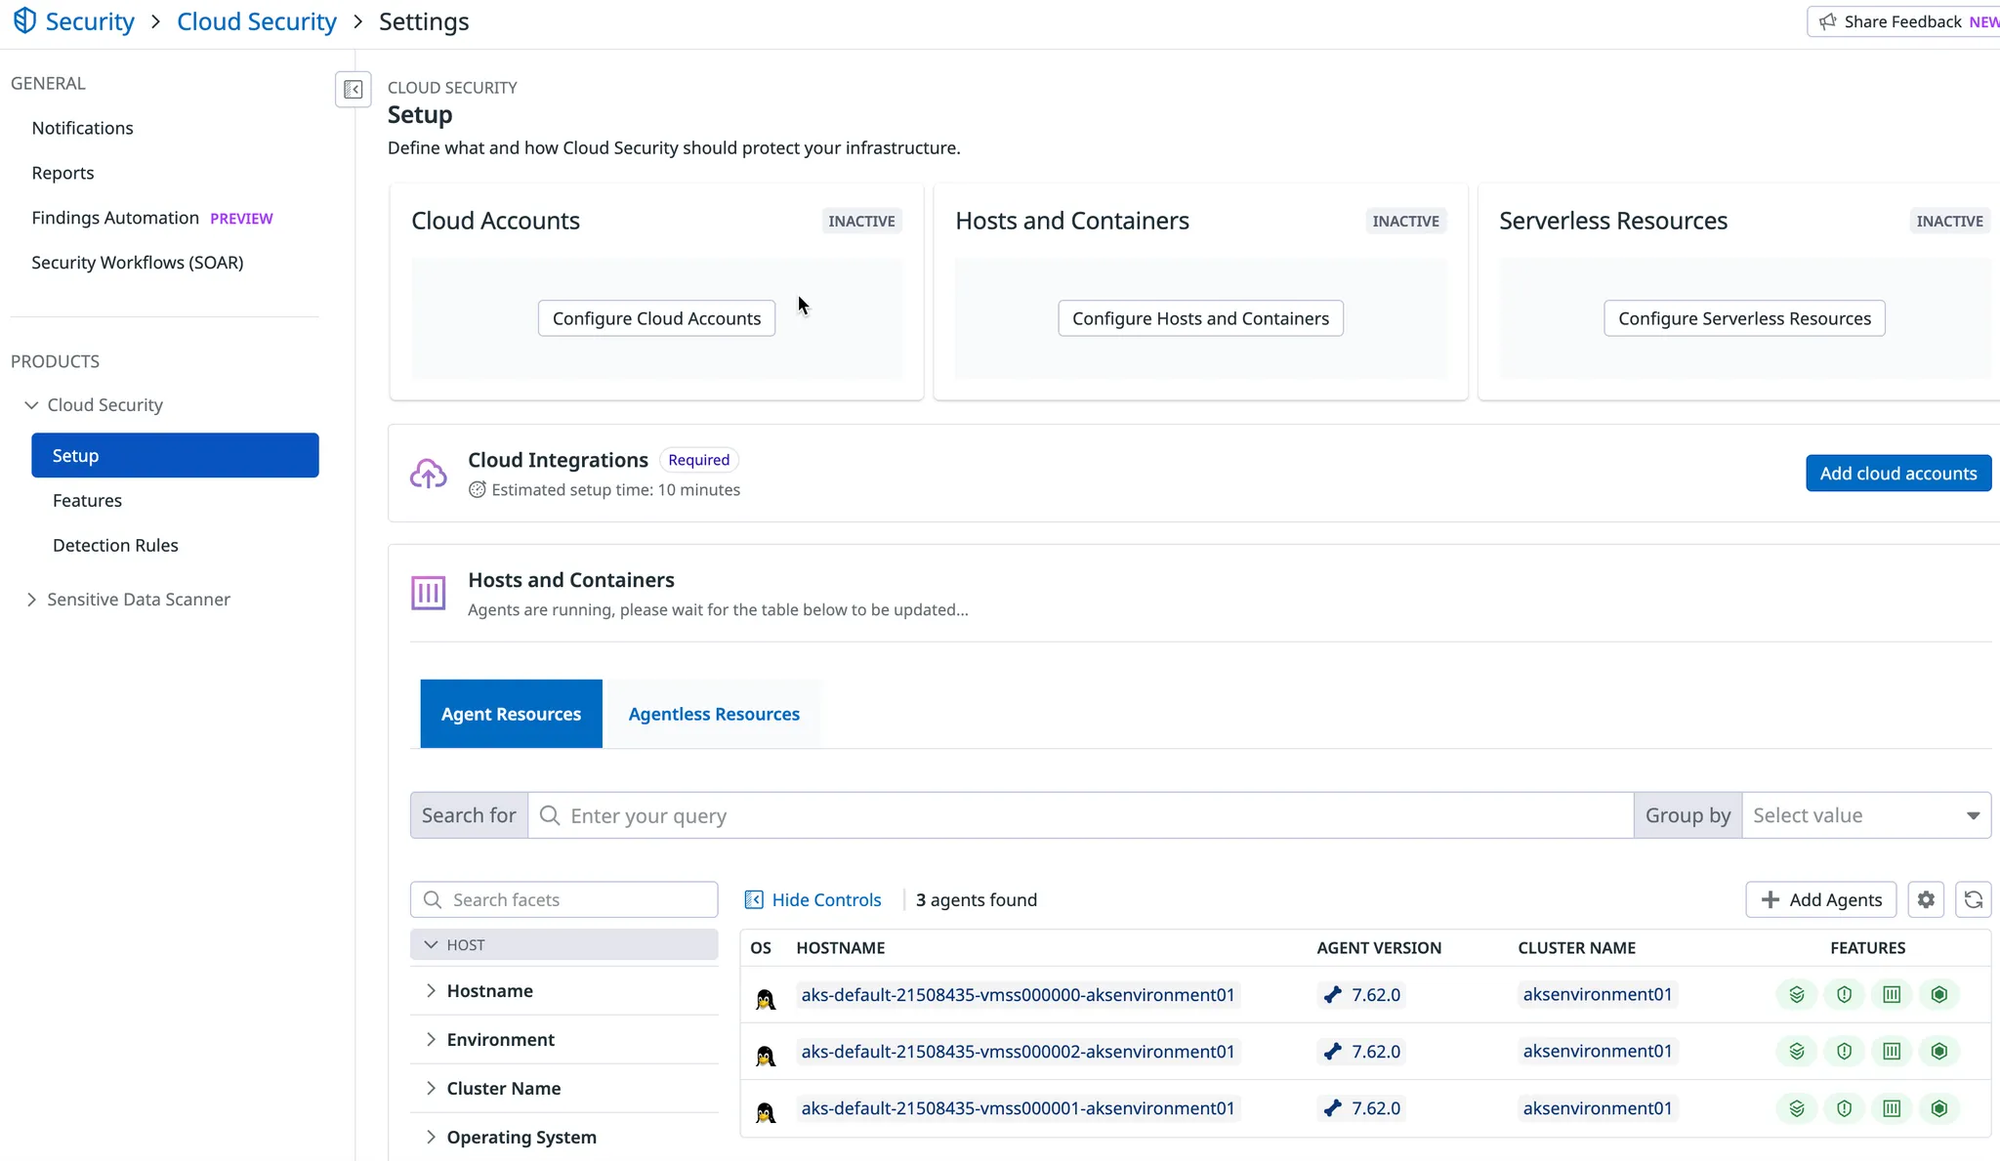
Underneath the FEATURES section, you'll see four icons, which should be showing as green. If you highlight over each feature, you'll see exactly what it does from a security perspective.
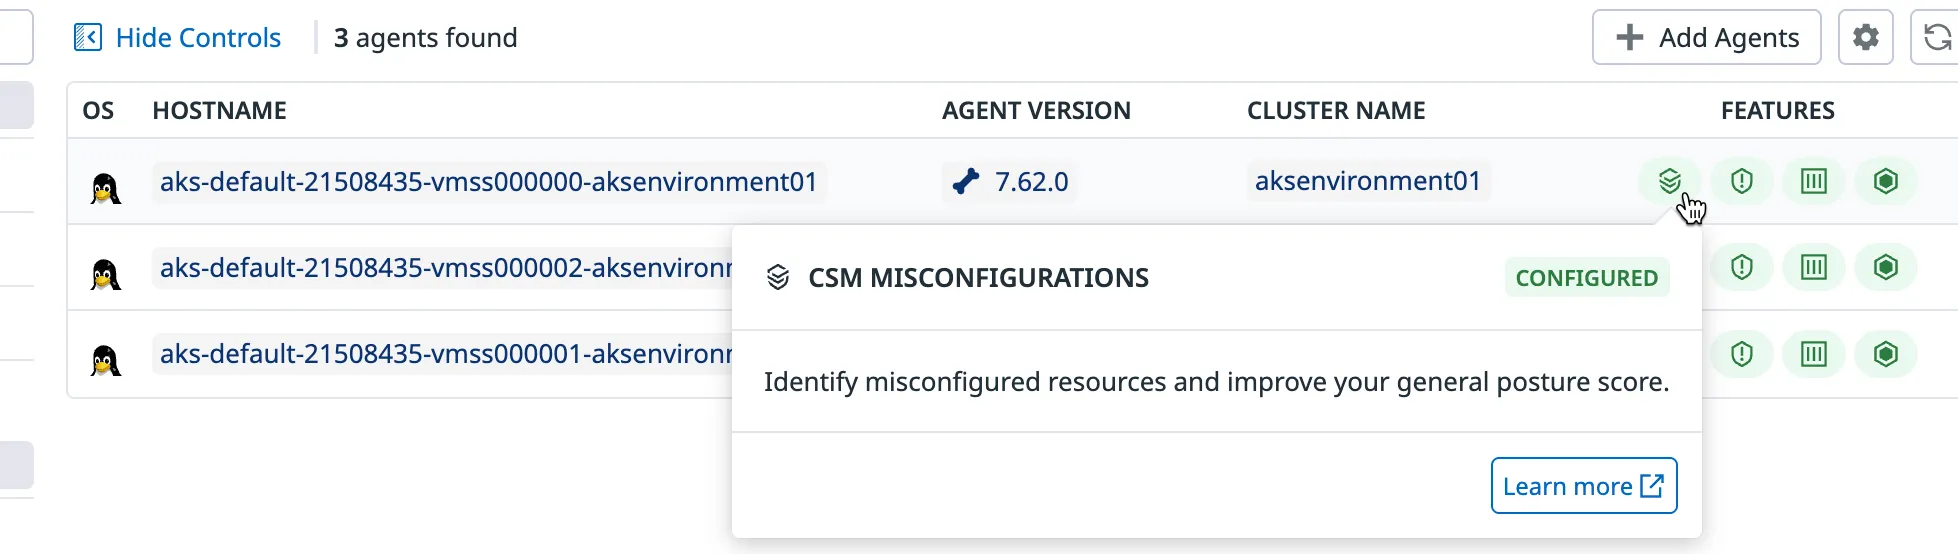
You can confirm that the security protection is enabled within the host configurations.
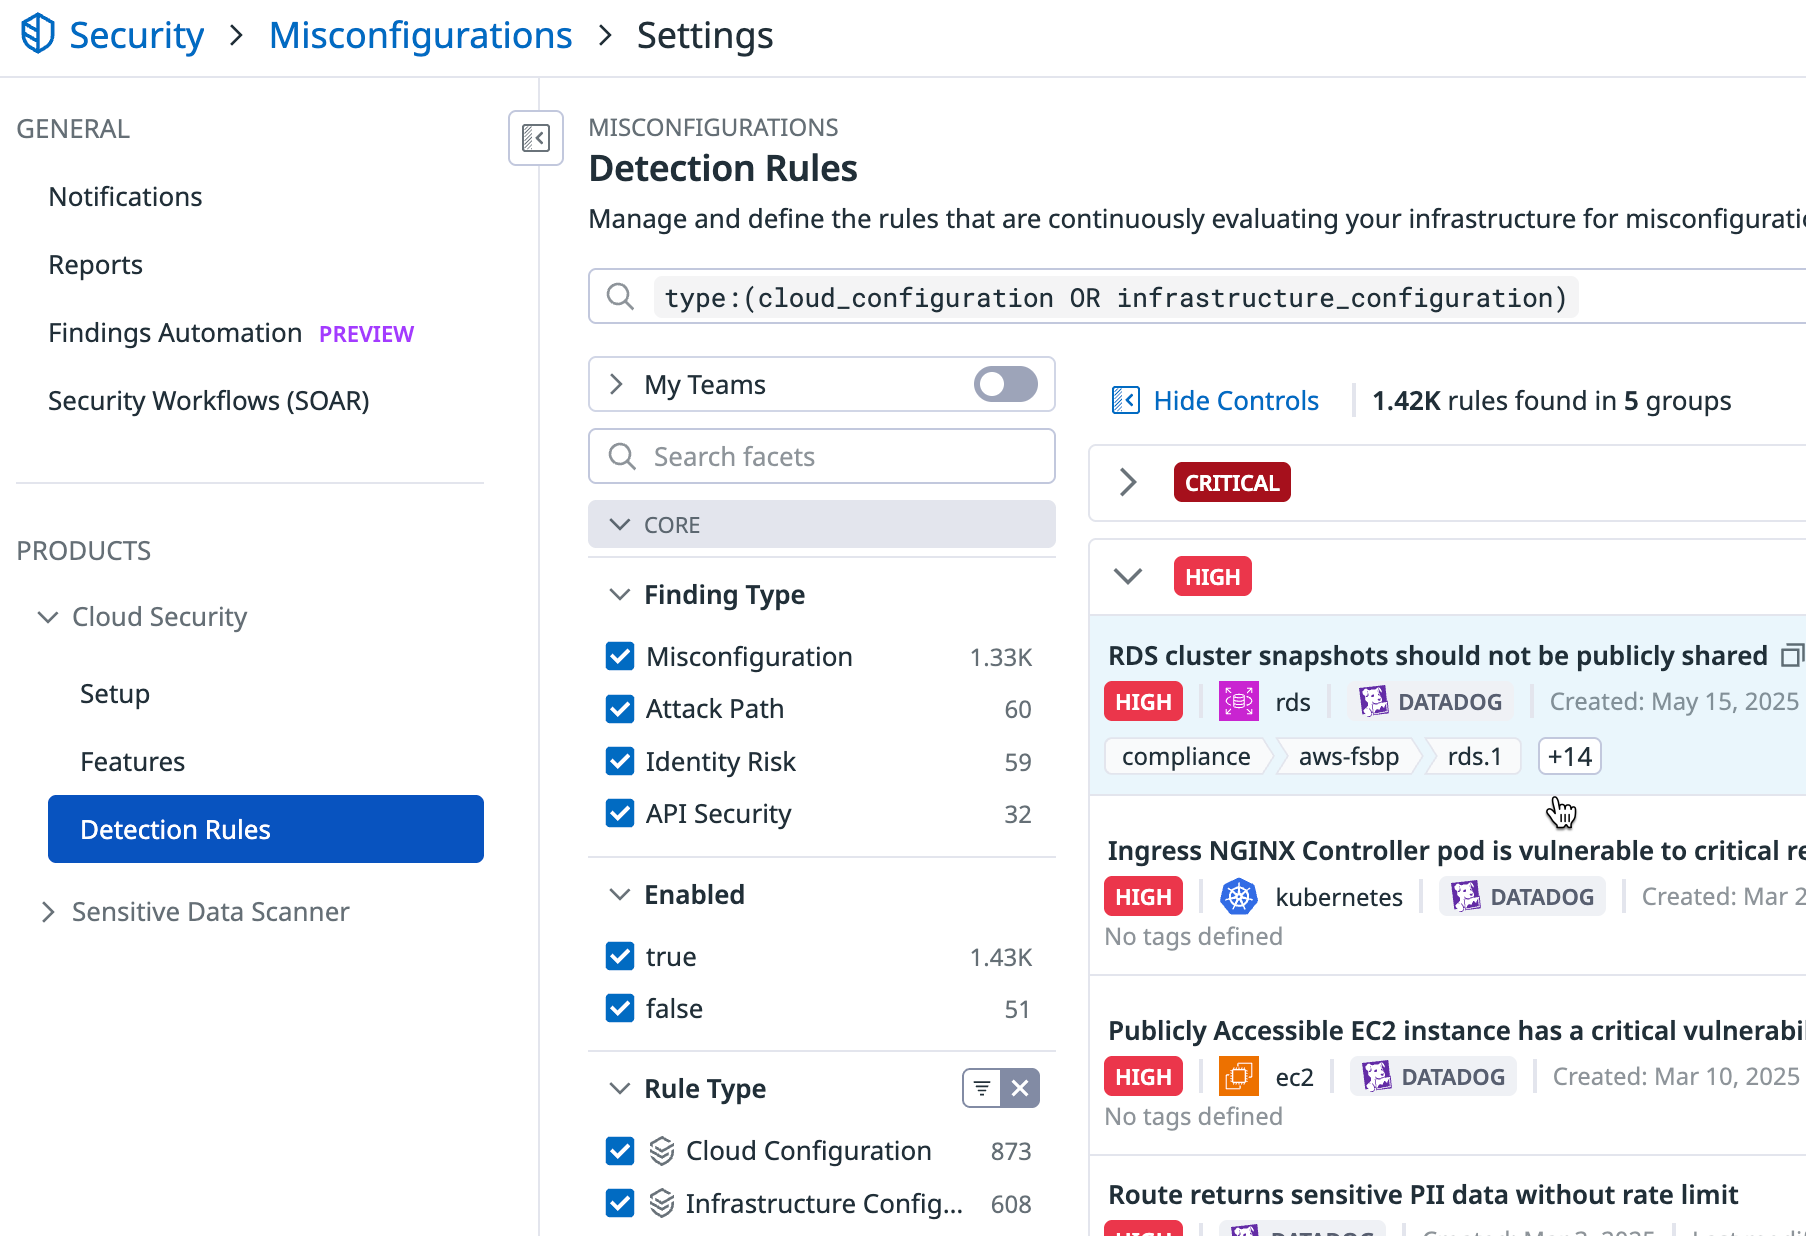
Implementing Detection Rules
Now that Datadog is securing Kubernetes, you can look at the current detection rules based on critical, high, medium, and low threats that are enabled out of the box.
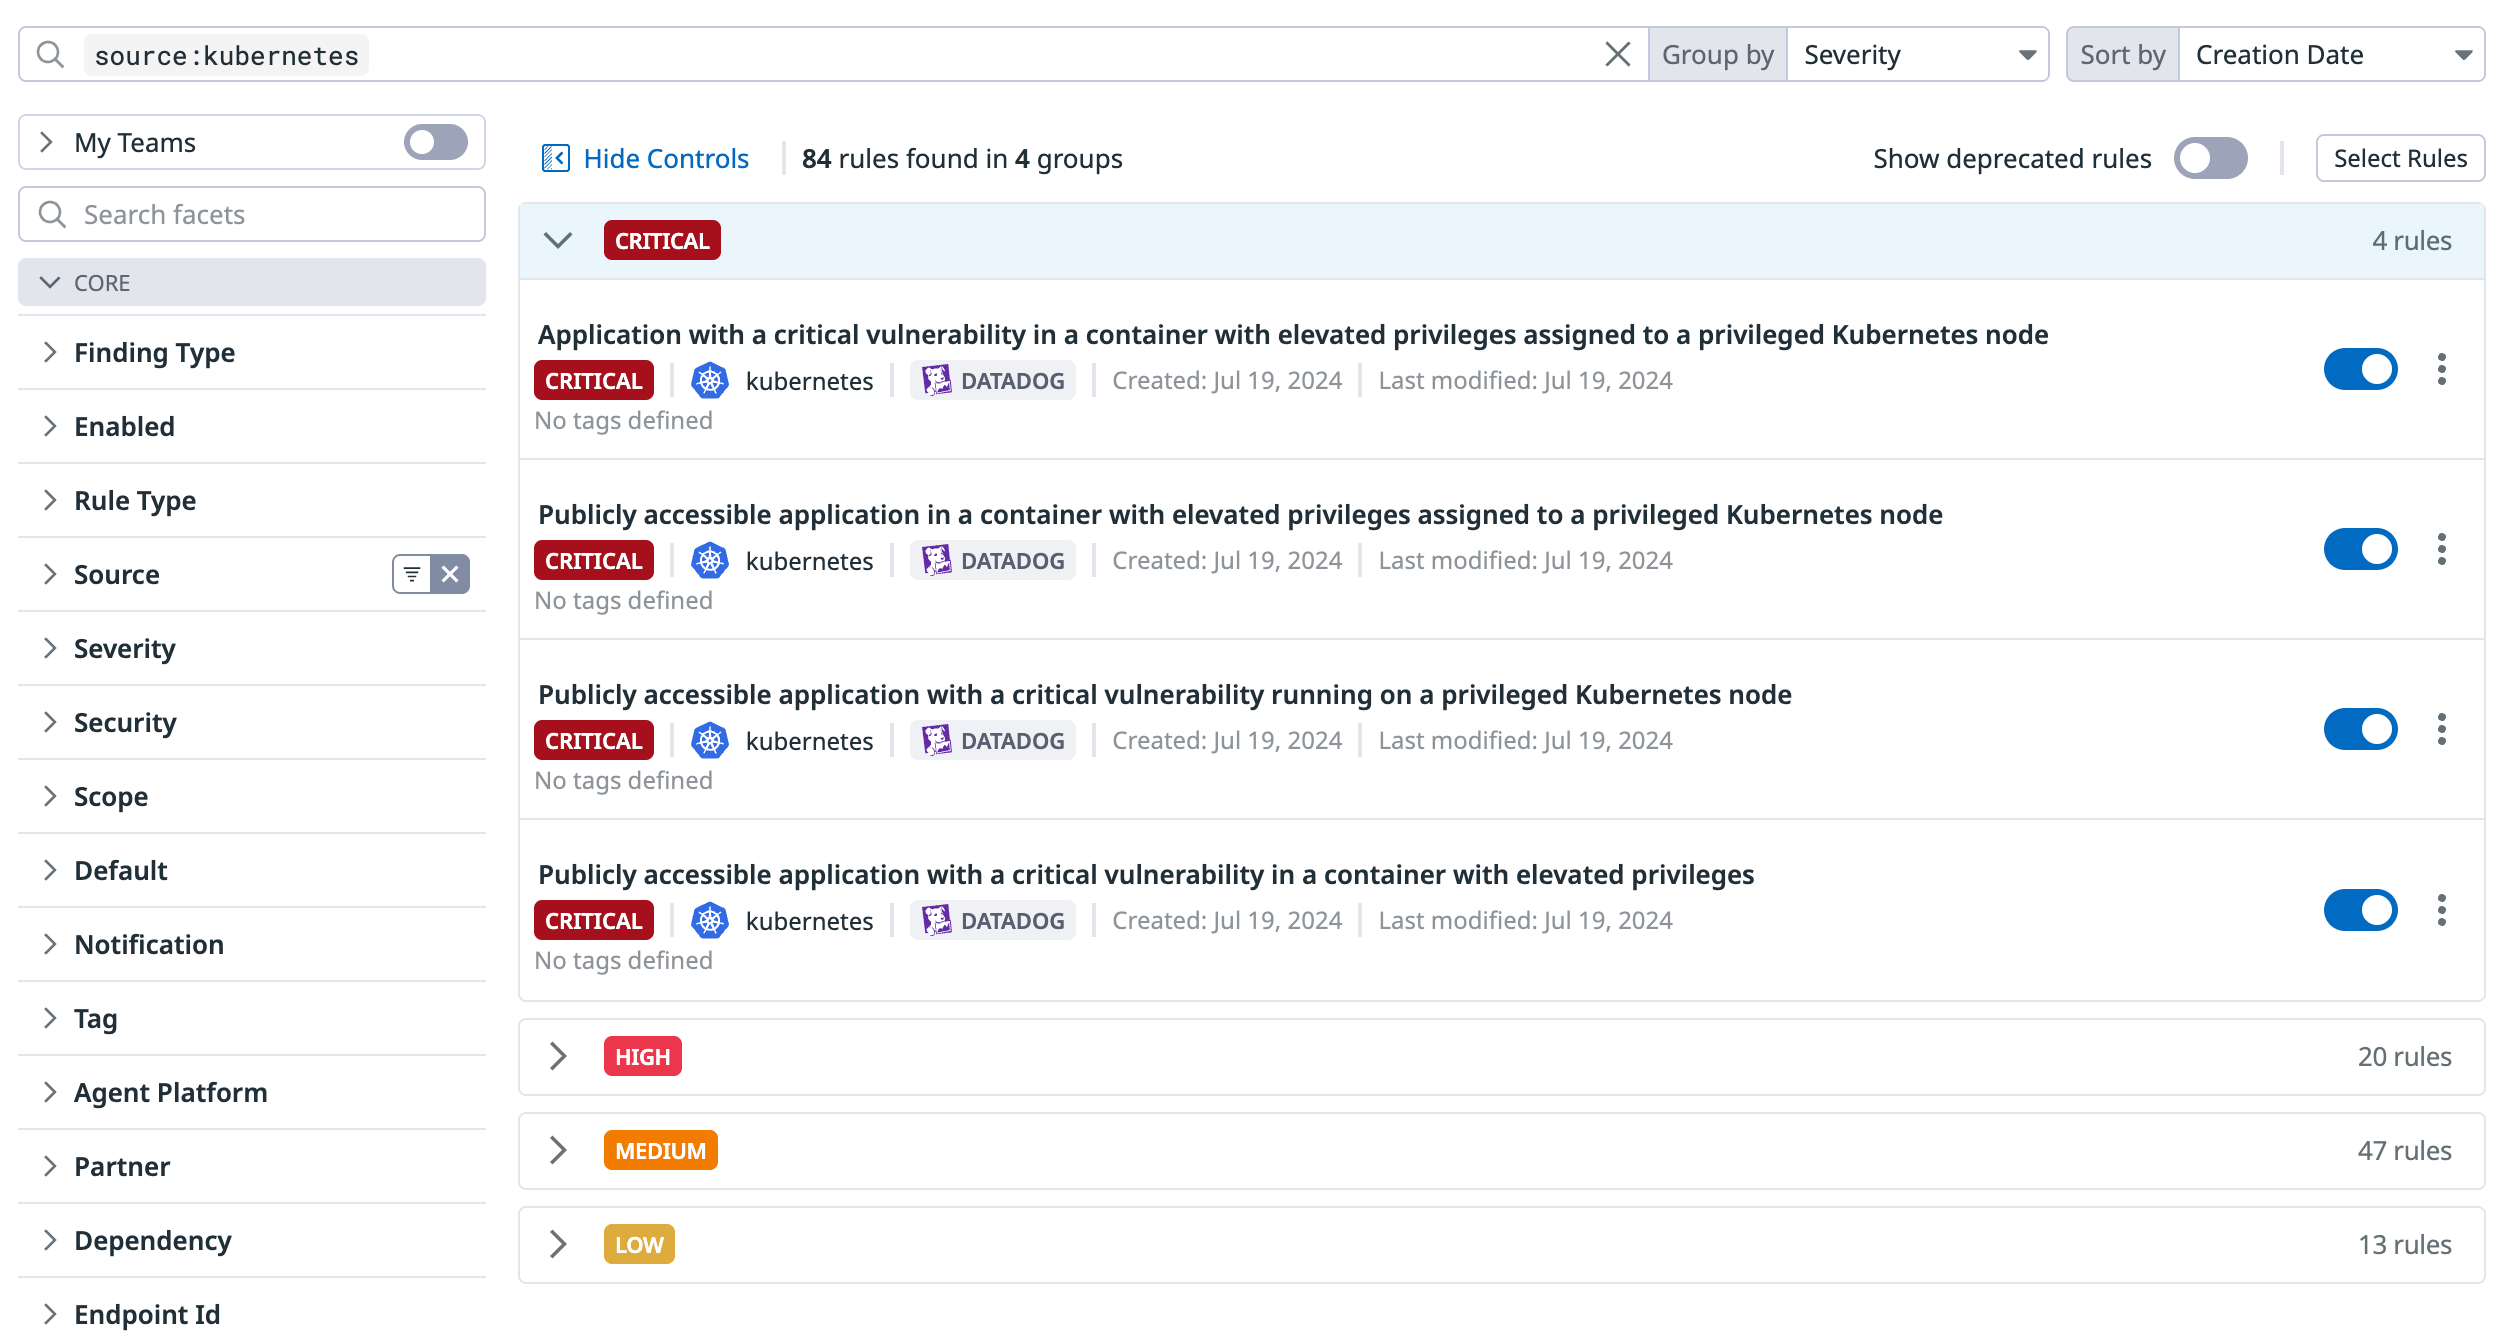
Go to Security > Misconfigurations > Settings and click on Detection Rules.
Within the Detection Rules search bar, type in source:kubernetes.
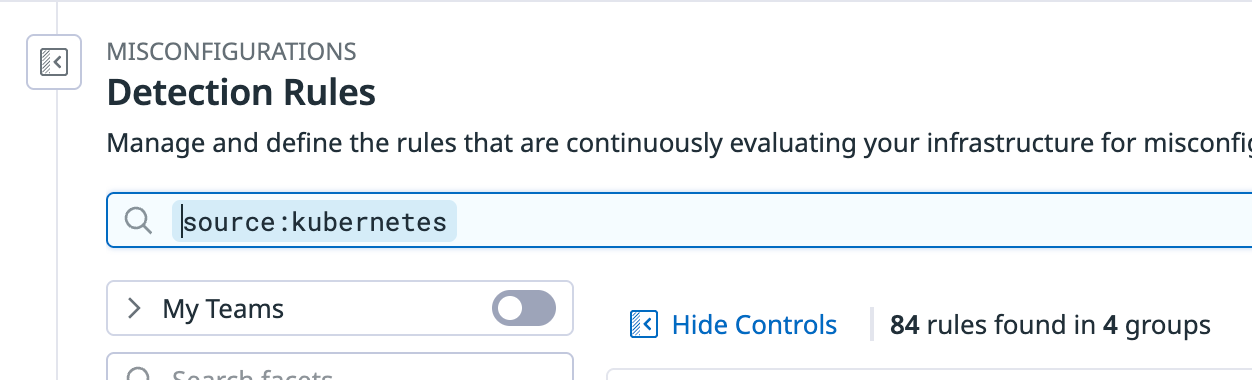
You'll now see just the filtered detection rules that have to do with Kubernetes. You can go through all of the detection rules in critical, high, medium, and low to see what you'd like to turn on and turn off.
And that's it! Luckily, the workflow is pretty straightforward in Datadog. This very-much comes down to the "you get what you pay for" analogy. There are a ton of rules implemented by default along with workload protection for running Pods without you having to do any type of configuration.

Comments ()