Kagent + Agent Substrate: Configuration & Setup
Putting kagent and Agent Substrate together, you have a fully isolated Agentic platform with a declarative runtime to interact with Agents running in a sandboxed environment, and the best part is you can interact with them like any other Agent.
In this blog post, you'll learn how to do the full setup and configuration of kagent, Agent Substrate, and an Agent running with Substrate underneath the hood.
Prerequisites
To follow along from a hands-on perspective, you will need the following:
- A Kubernetes cluster. Typically works best with GKE or Kind, but if you aren't using GKE, you will have to set the JWT issuer to your cluster so you can hit the
/substratepage. For example, if you're running an Azure Kubernetes Service (AKS) cluster, your installation of Agent Substrate will look like the below (no need to run the below; this is just to show if you're not on a GKE or Kind cluster)
   helm upgrade --install substrate \
     oci://ghcr.io/kagent-dev/substrate/helm/substrate \
     --namespace ate-system --create-namespace \
     --set auth.jwt.issuer=https://aksenvironment01-dns01-xujbmtcz.hcp.westus.azmk8s.io \
     --set auth.jwt.audience=api.ate-system.svc 2>&1 | tail -20
Installation and Configuration
The first step is to implement the full kagent and Agent Substrate environment. Luckily, you can do it all right from kagent Helm Charts!
- Set your LLM provider. In this case, Anthropic is used, but you can use any provider on this list.
export ANTHROPIC_API_KEY="your-api-key-here"- Install the kagent CRDs
helm upgrade --install kagent-crds oci://ghcr.io/kagent-dev/kagent/helm/kagent-crds --version 0.9.7 -n kagent- Install kagent with Substrate support.
helm upgrade --install kagent oci://ghcr.io/kagent-dev/kagent/helm/kagent --version 0.9.7 -n kagent \
  --set providers.default=anthropic \
  --set providers.anthropic.apiKey=$ANTHROPIC_API_KEY \
  --set controller.agentImage.tag="" \
  --set controller.skillsInitImage.tag="" \
  --set controller.image.registry="" \
  --set controller.image.repository=kagent-dev/kagent/controller \
  --set controller.image.tag="" \
  --set controller.image.pullPolicy="" \
  --set ui.image.registry="" \
  --set ui.image.repository=kagent-dev/kagent/ui \
  --set ui.image.tag="" \
  --set ui.image.pullPolicy="" \
  --set controller.substrate.enabled=true \
  --set controller.substrate.defaultWorkerPool.namespace=kagent \
  --set controller.substrate.defaultWorkerPool.name=kagent-default \
  --set substrateWorkerPool.create=true \
  --set substrateWorkerPool.name=kagent-default \
  --set substrateWorkerPool.replicas=1 \
  --set controller.substrate.ateApiEndpoint="dns:///api.ate-system.svc:443" \
  --set controller.substrate.ateApiInsecure=true \
  --set controller.substrate.atenetRouterURL="http://atenet-router.ate-system.svc:80" \
  --set controller.substrate.ateApiTokenFile="/var/run/secrets/tokens/ate-api/token" \
--set substrateWorkerPool.ateomImage=ghcr.io/kagent-dev/substrate/ateom-gvisor:v0.0.6- Install the Substrate CRDs via the kagent fork.
helm upgrade --install substrate-crds \
oci://ghcr.io/kagent-dev/substrate/helm/substrate-crds- Install Substrate, also from the kagent form.
helm upgrade --install substrate \
oci://ghcr.io/kagent-dev/substrate/helm/substrate \
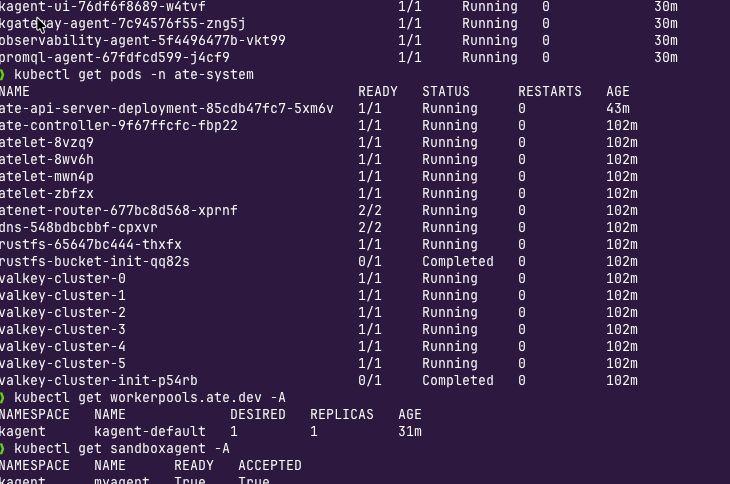
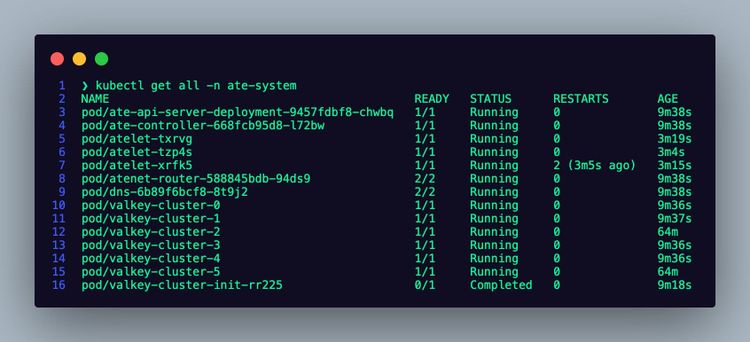
--namespace ate-system --create-namespace- Confirm that the Pods are up and operational for both kagent and Agent Substrate.
kubectl get pods -n kagent
kubectl get pods -n ate-system
To access the dashboard, you can port forward the kagent k8s service.
kubectl port-forward svc/kagent-ui -n kagent 8080:8080You should now be able to see the kagent and Substrate dashboards.

WorkerPool Creation
If you're wondering why you needed to create a Worker Pool in the helm installation above with kagent, it's because Agent Substrate needs the Worker Pool to schedule Actors. Actors are your Agents, and Worker Pools are the Pods where your Actors run. if you don't have a Worker Pool, you will see the error below when trying to create an Agent.

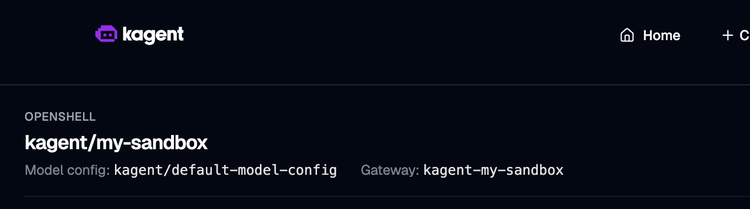
Configuring An Agent To Use Substrate
With kagent and Substrate installed along with a WorkerPool up and running, you can now create an Agent with Substrate as the Sandbox.
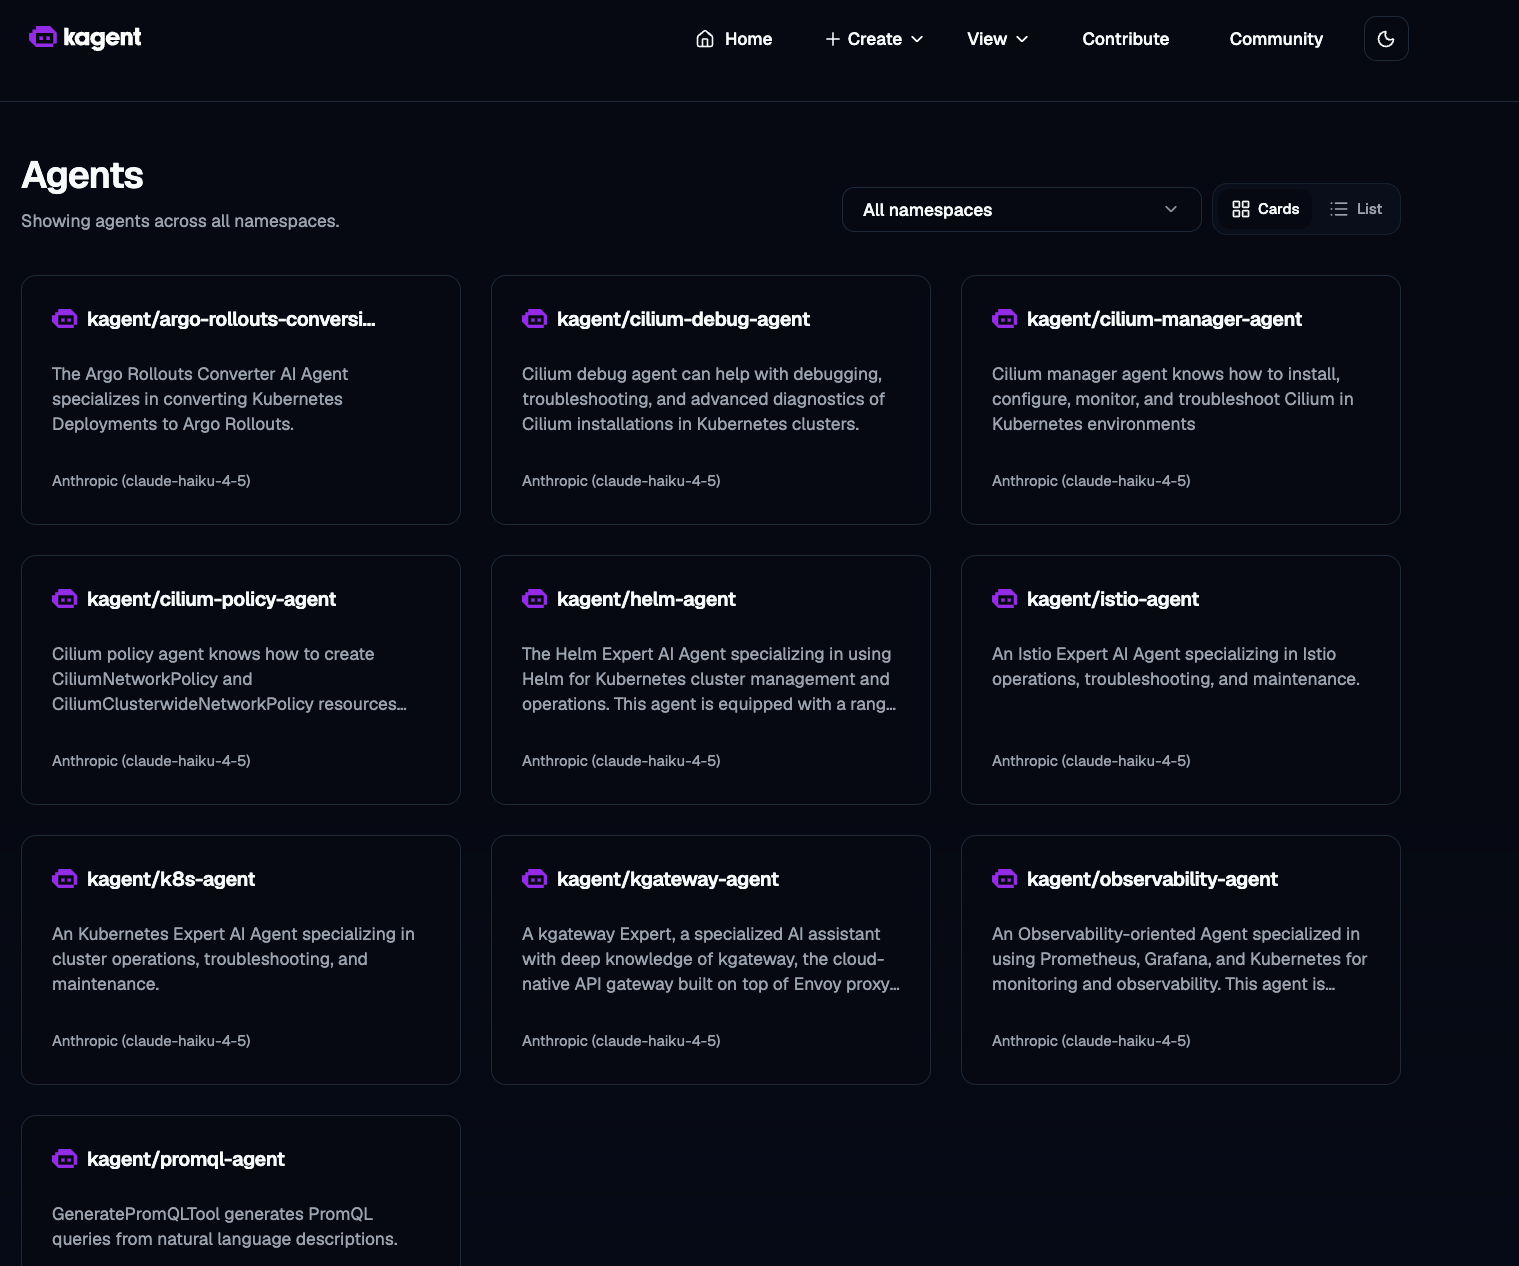
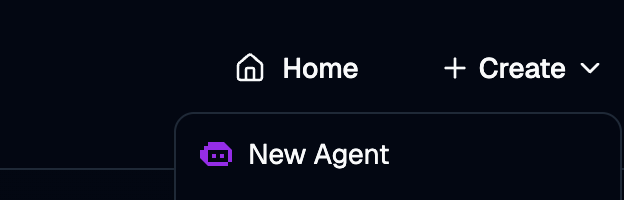
- In kagent, click the + Create button and choose New Agent.
- Give your Agent a name and a type. In this case, it can be declarative.
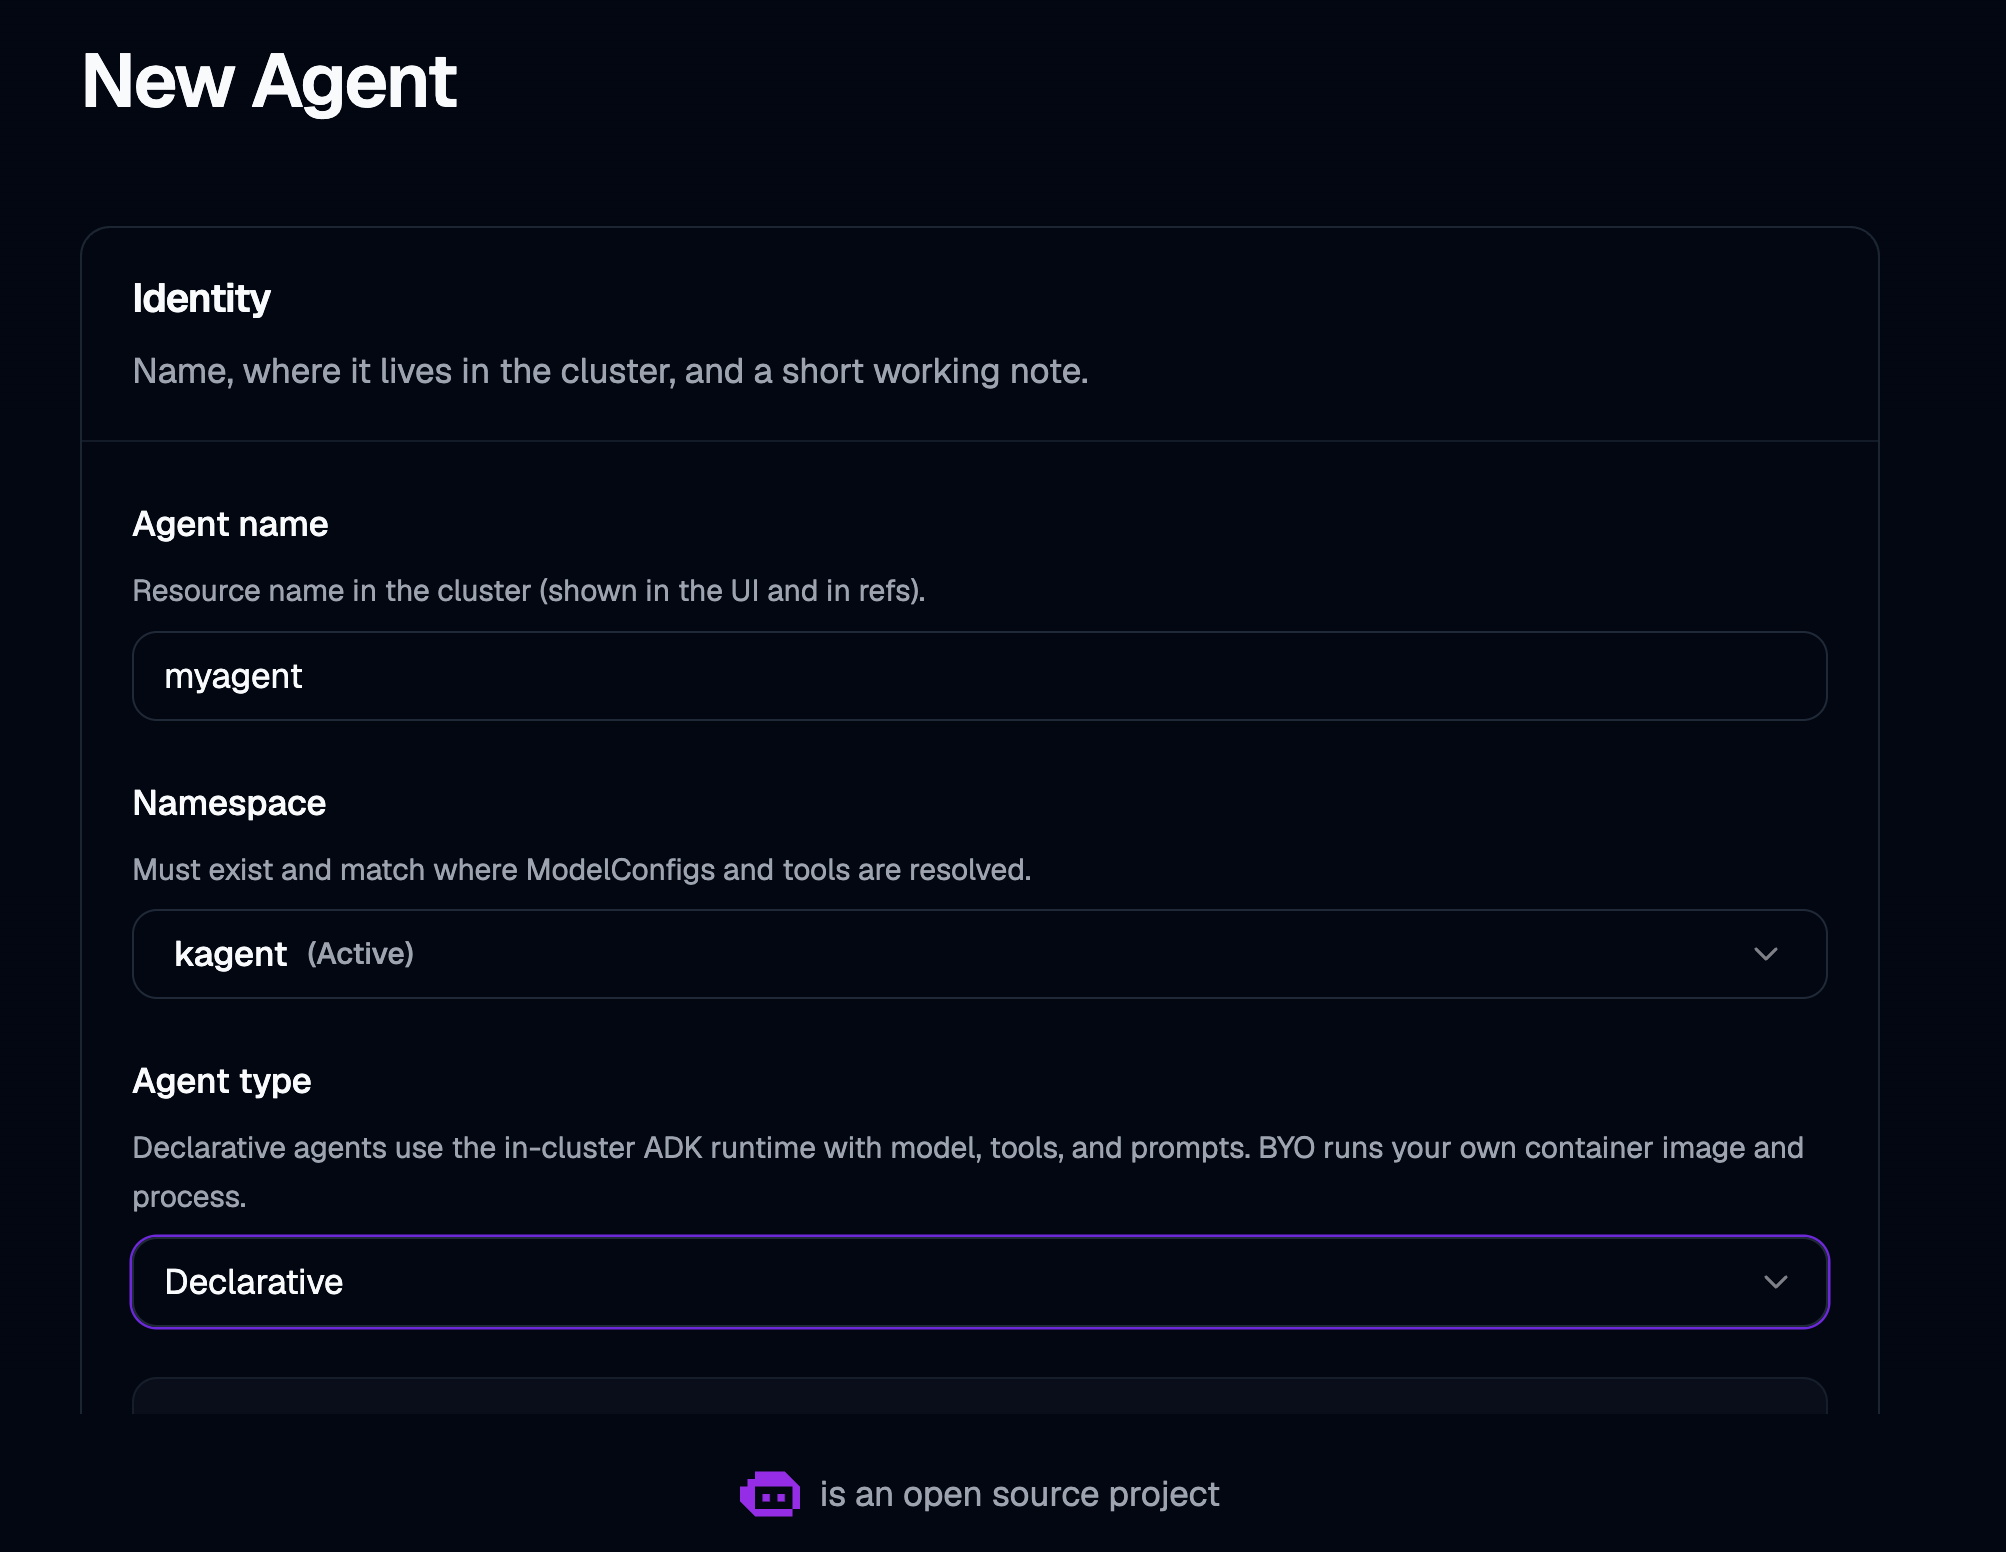
- Ensure to choose Agent Substrate under the Sandbox platform option.
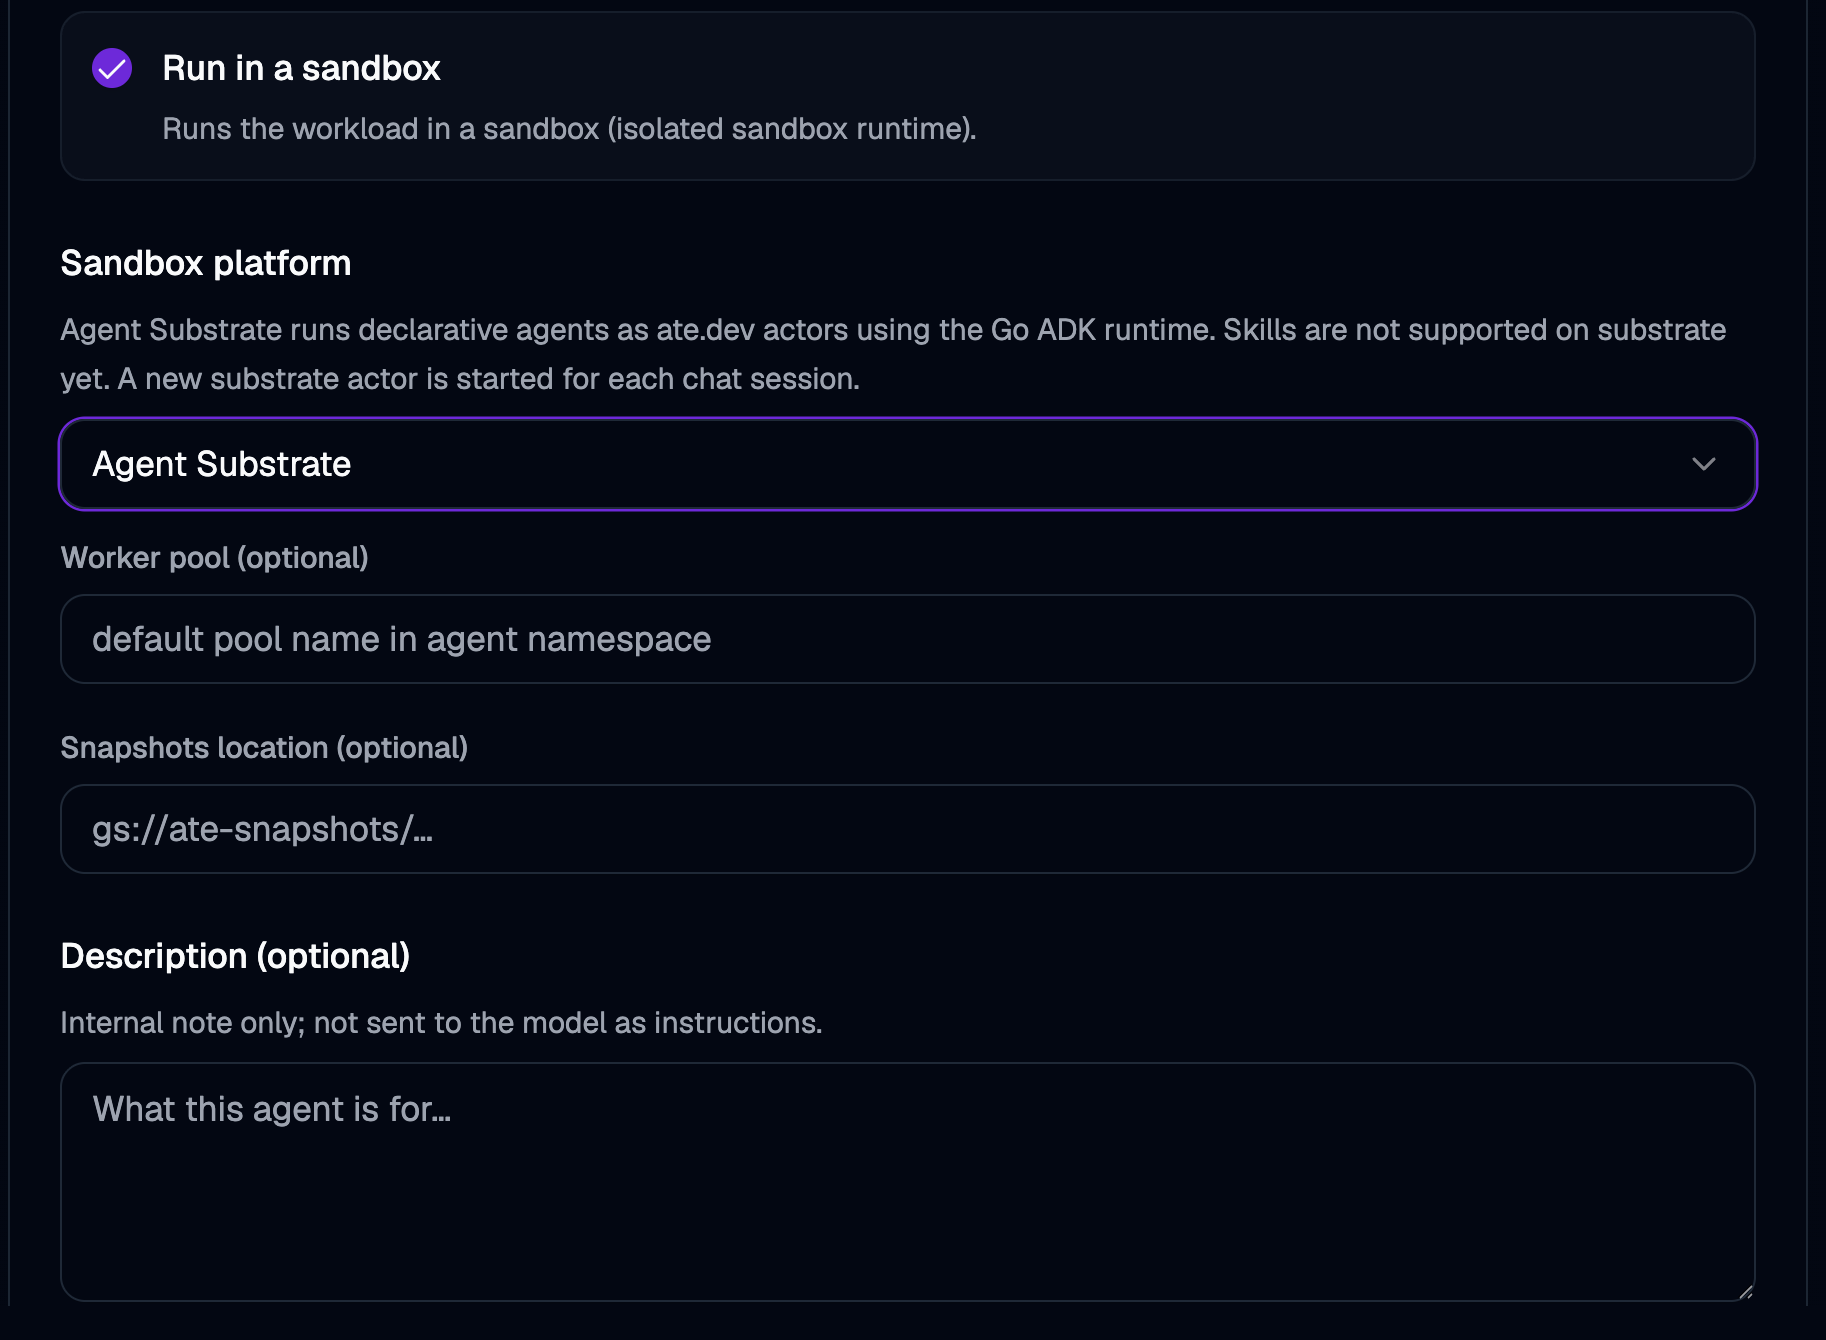
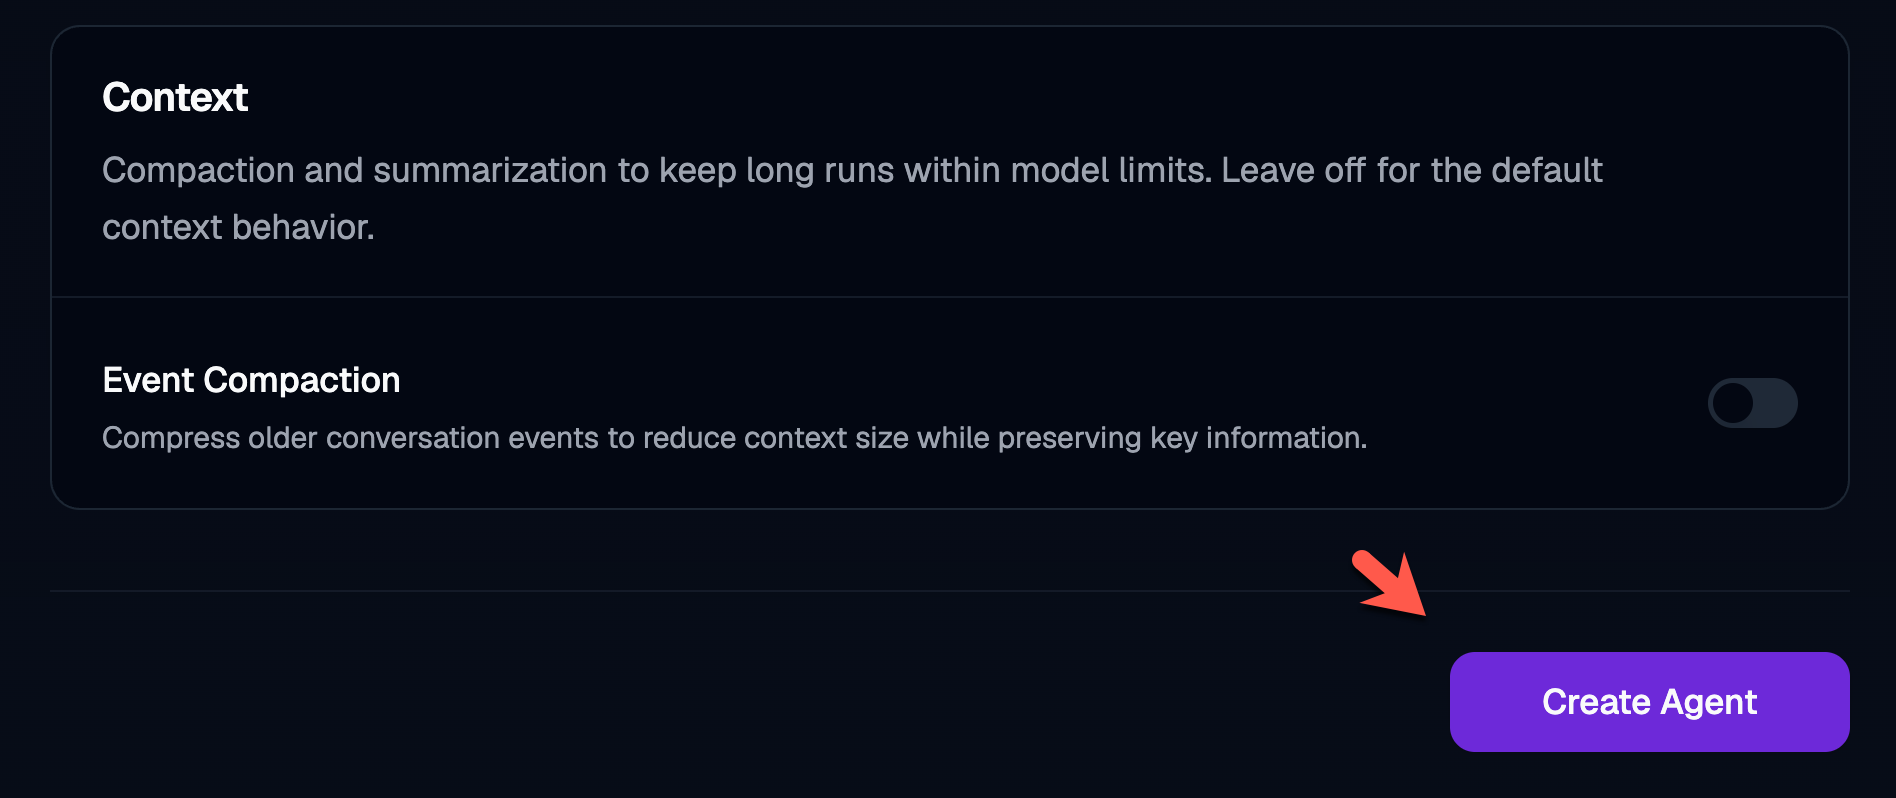
- There are several other options to choose from, like setting long term memory and context compaction, but you can skip that for the purposes of this blog post and click the purple Create Agent button.
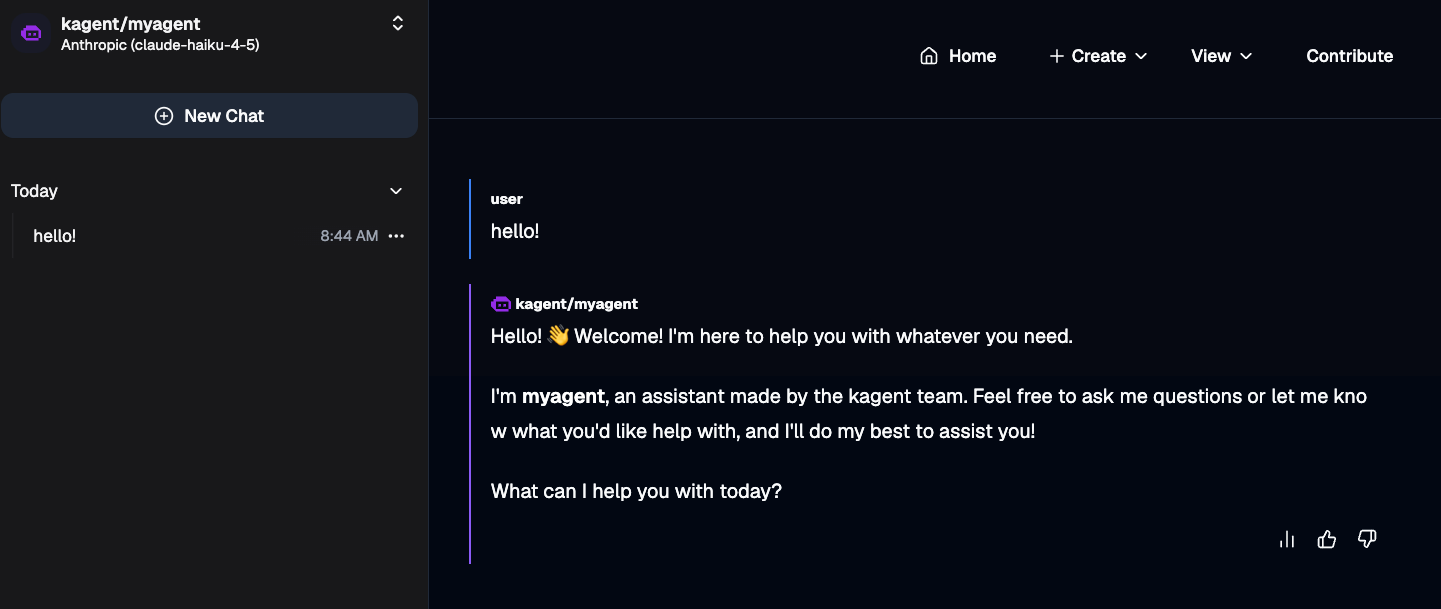
You should now be able to see your Agent running.
To do the same thing declaratively, you can use the following manifest:
  apiVersion: kagent.dev/v1alpha2
  kind: SandboxAgent
  metadata:
    name: myagent
    namespace: kagent
  spec:
    type: Declarative
    platform: substrate
    description: ff
    substrate: {}            # uses the controller's default WorkerPool (kagent-default)
    declarative:
      runtime: go
      modelConfig: default-model-config
      systemMessage: |-
        You're a helpful agent, made by the kagent team.

        # Instructions
            - If user question is unclear, ask for clarification before running any tools
            - Always be helpful and friendly
            - If you don't know how to answer the question DO NOT make things up, tell the user "Sorry, I don't know how to answer that" and ask them to clarify the question further
            - If you are unable to help, or something goes wrong, refer the user to https://kagent.dev for more information or support.

        # Response format:
            - ALWAYS format your response as Markdown
            - Your response will include a summary of actions you took and an explanation of the result
            - If you created any artifacts such as files or resources, you will include those in your response as well
You can see the Agent running via the sandboxagent object:
kubectl get sandboxagent -A
NAMESPACE   NAME      READY   ACCEPTED
kagent      myagent   True    True
One cool and important note is that the SandboxAgent is declarative, it's still using Agent Development Kit (ADK) underneath the hood like the Agent object, so you have a fully operational, vetted, and extendable framework.

Comments ()